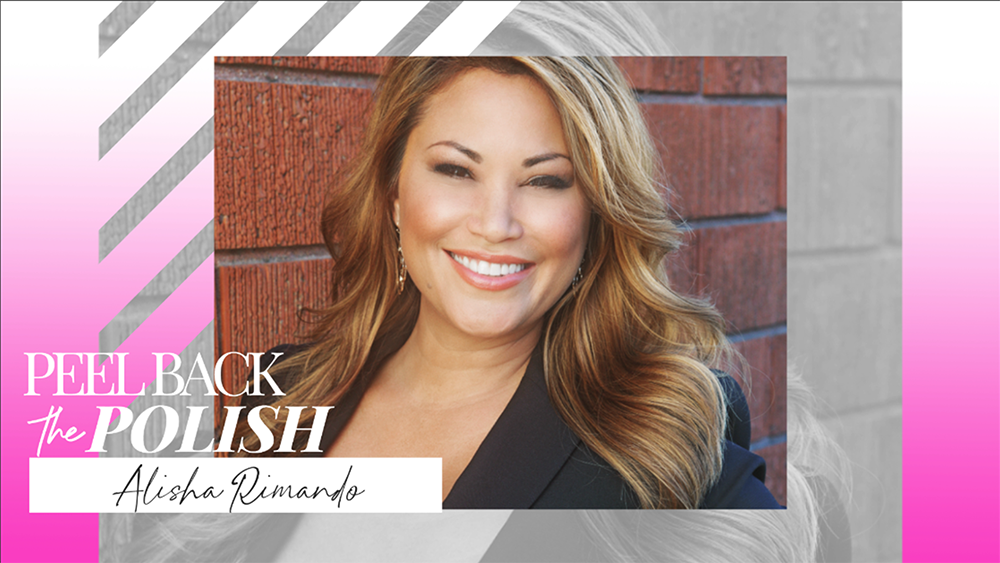
Alisha Rimando
![]()
ALISHA RIMANDO
In this interview, Alisha Rimando, CEO and Founder of GlossaryLive, shares her inspiring journey and passion for the nail industry—a career that spans over 30 years. Alisha began in a salon in 1995, but her talent quickly propelled her to the global stage as an educator, competitor, and hand model for the legendary Tom Holcomb. Mentored by a World Champion, she honed her craft and ultimately won her own World Championship title in sculptured nails.
Alisha’s career includes pivotal contributions to industry education. She’s authored multiple textbooks and worked as Training Director at Elizabeth Arden Red Door Spas, where she trained hundreds of technicians in natural nail care. Her work has graced the pages of trade publications worldwide, and she’s taught nail professionals across 25 countries.
Now, through GlossaryLive, Alisha channels her experience into a project that honors her mentor and celebrates nail artistry globally. This interview dives into Alisha’s vision for GlossaryLive—a platform created to educate, inspire, and connect nail artists everywhere. Whether you’re a nail professional or a fan of beauty and artistry, this conversation offers a rare look into Alisha’s legacy and her ongoing mission to elevate the nail industry.
UP NEXT ON PEEL BACK THE POLISH
RELATED VIDEOS
MORE TO EXPLORE
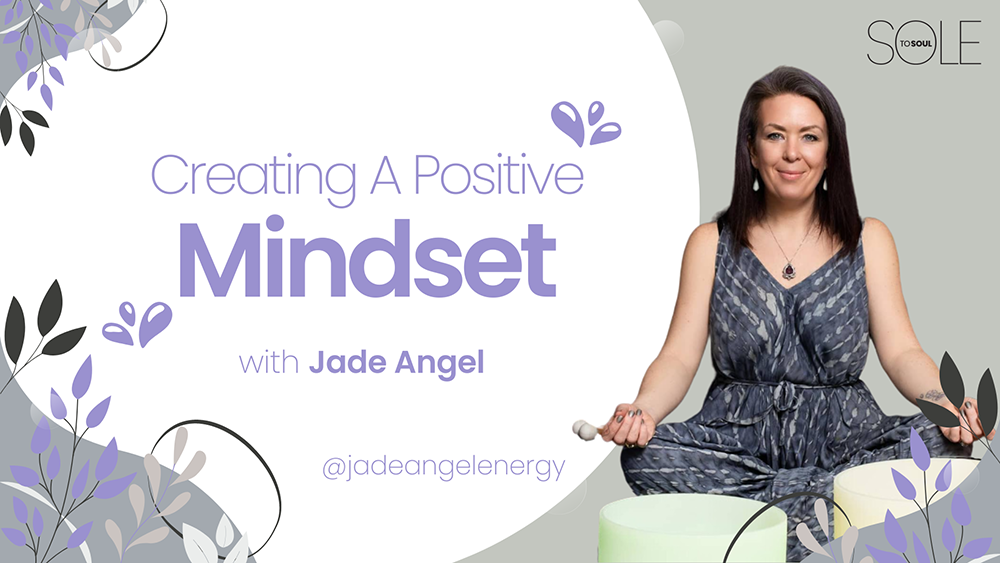
Creating A Positive Mindset
![]()
Creating A Positive Mindset
A qualified nail artist and educator of many years, Jade Evangelou closed her salon during covid and took a path deeper into healing, utliizing the skills honed as a beauty therapist. Working with crystals and sound, while tapping into different energetic vibrations for over 20 years, Jade is now immersed in energetic alchemy, which refers to the transmutation of energies from heaviness/negative to a light/positive for a more balanced state. This is done by using ancient shamanic practices from the Amazon in Peru as well as sound and crystal healing.
Jade uses this energetic alchemy to assist others in finding unique healing abilities inside themselves. Jade offers an overview of how best to clear your energtic field before, between and after clients during your working day.
SEE MORE SOUL TO SOUL
RELATED VIDEOS
MORE TO EXPLORE
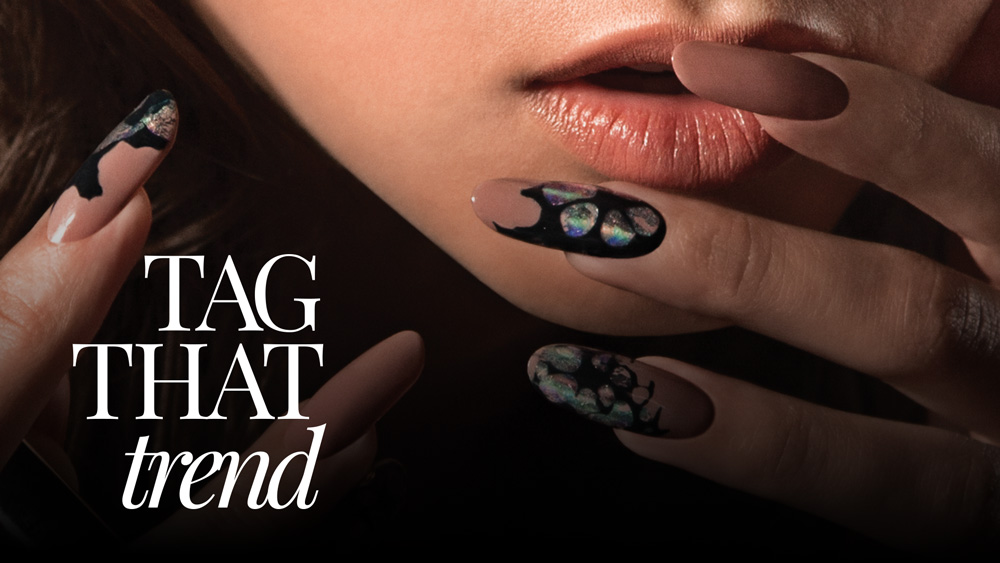
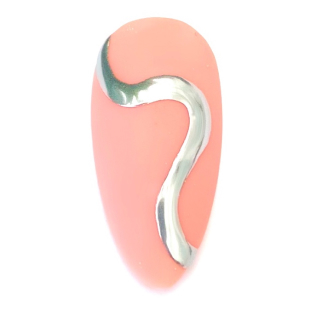
Metal Grunge
Metal Grunge
![]()
Alisha Rimando
It appears to be an advanced form of nail art, however not only can you have some fun creating this nail style, but it’s quick too. With just a few nail tools, nail foil, your choice of gel polish and some wax paper, you can recreate this rock ‘n roll style for your clients in no time at all.
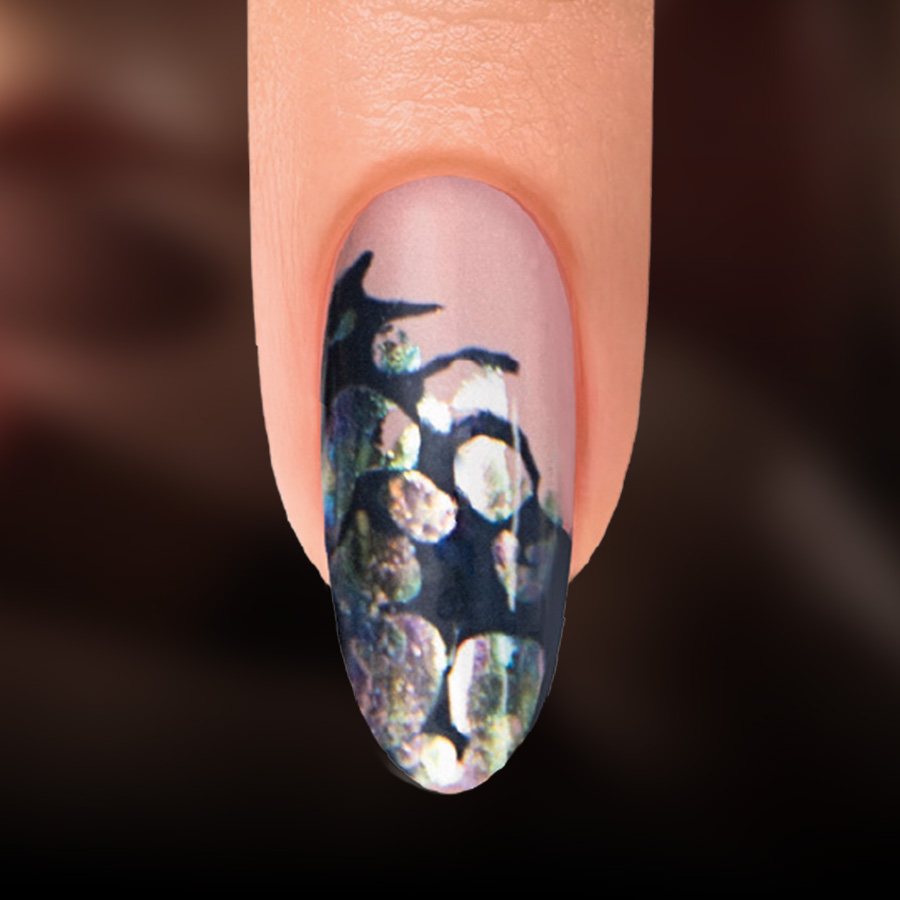
PRODUCTS USED
- UV/LED Artistic Gel Polish
- Rock Hard Extension
- Artistic Nail Surface Cleanser
- Acrylic Brush
- HRevive Cuticle oil
- Wax Paper
- Oil Slick Foil
STEPS
Follow application steps for Rock Hard Extension.
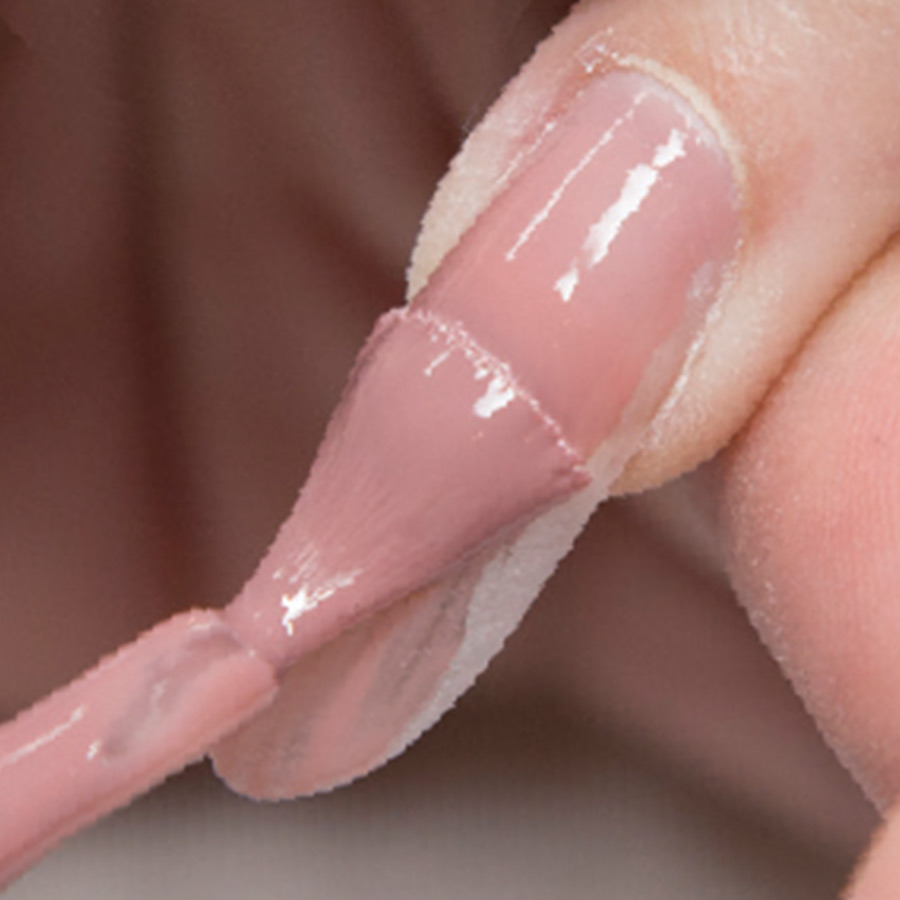
Apply a thin coat of Radiate My Love, making sure to cap the free edge. Cure for 30 seconds in LED light or 2-minutes in UV. Repeat.
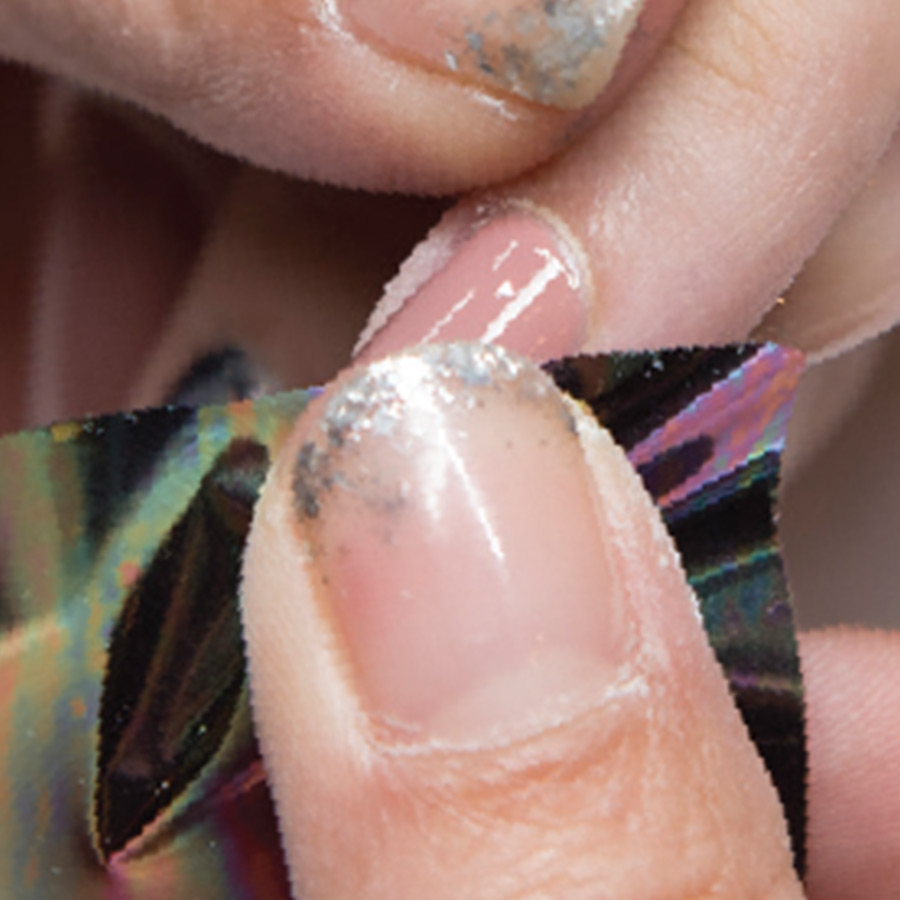
Transfer ‘Oil Slick’ foil diagonally across the tip of the nail. Be sure to firmly press foil onto the nail to ensure adhesion.
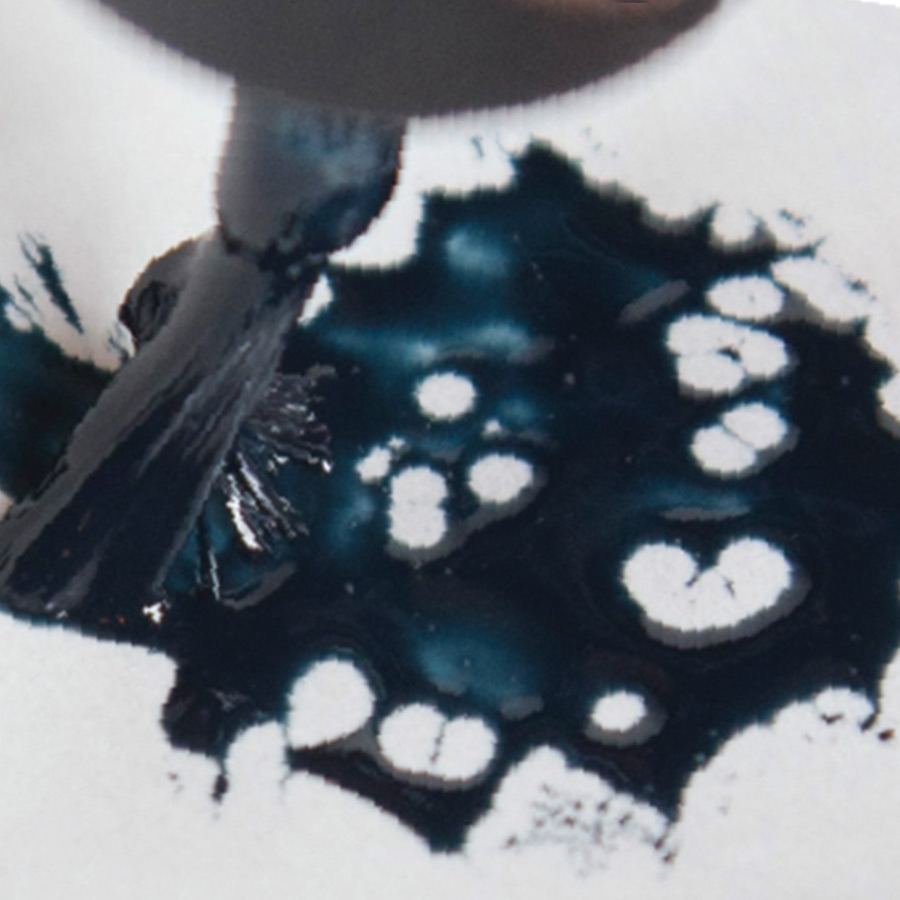
Create a dark oil spill effect decal by applying Colour Gloss in Torque It! on wax paper & creating voids or holes. Allow the product to sit for a moment while the holes become bigger as the gel settles. Assist the design by using a marbling tool to direct the gel to where you want it to go. Once desired design is achieved, cure for 30-seconds in an LED light or 2-minutes under UV.
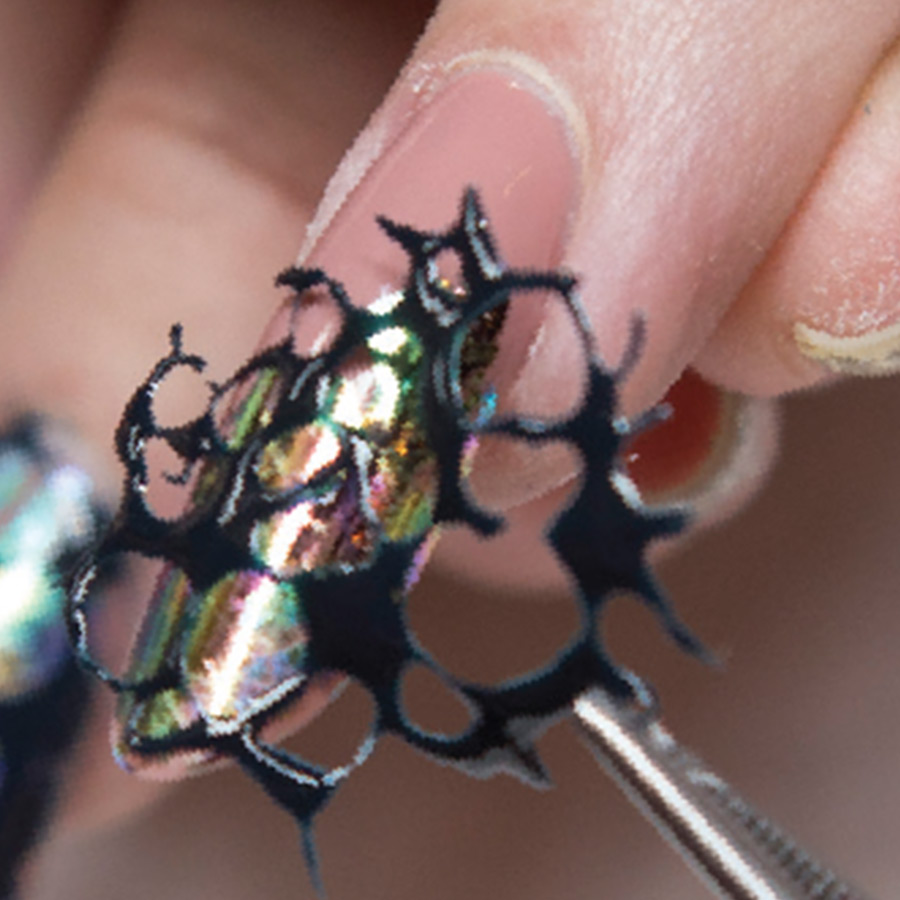
Use Sani Tongs to peel decal from wax paper & apply to the foiled area, trimming the edges to fit the nail.
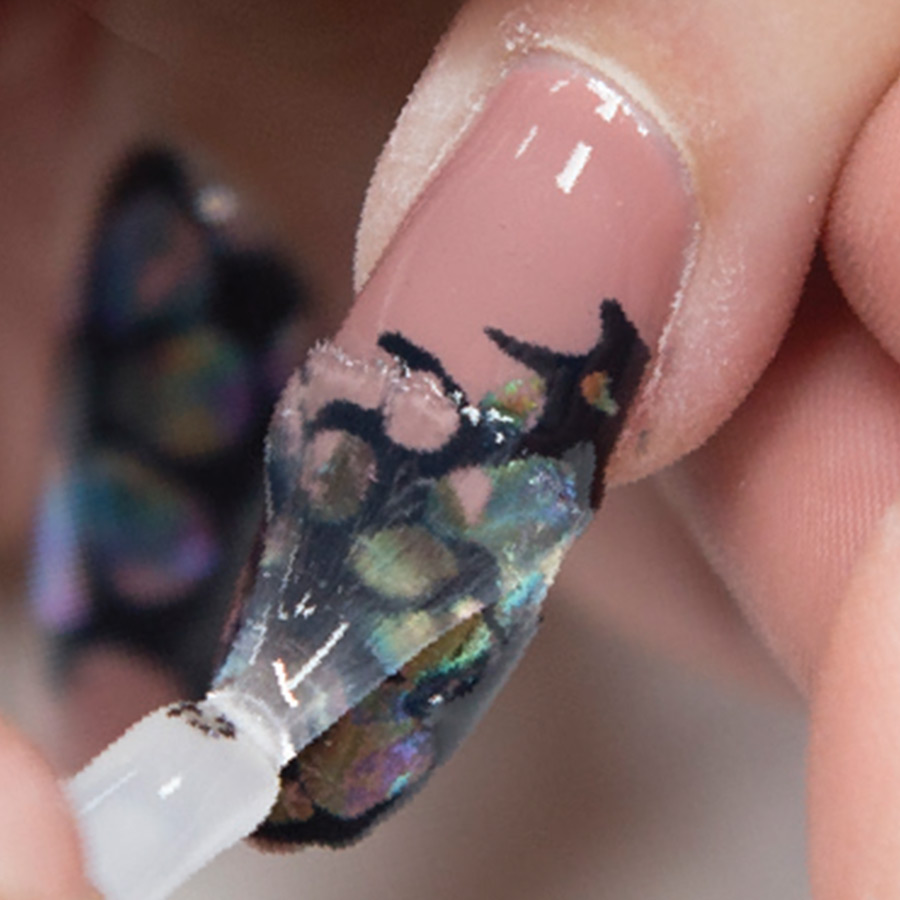
Apply Glossing Gel over the entire nail & cure for 30-seconds in an LED lamp or 2-minutes under UV. Apply a second coat of Glossing Gel & cure for 30-seconds in LED or 2-minutes under UV.
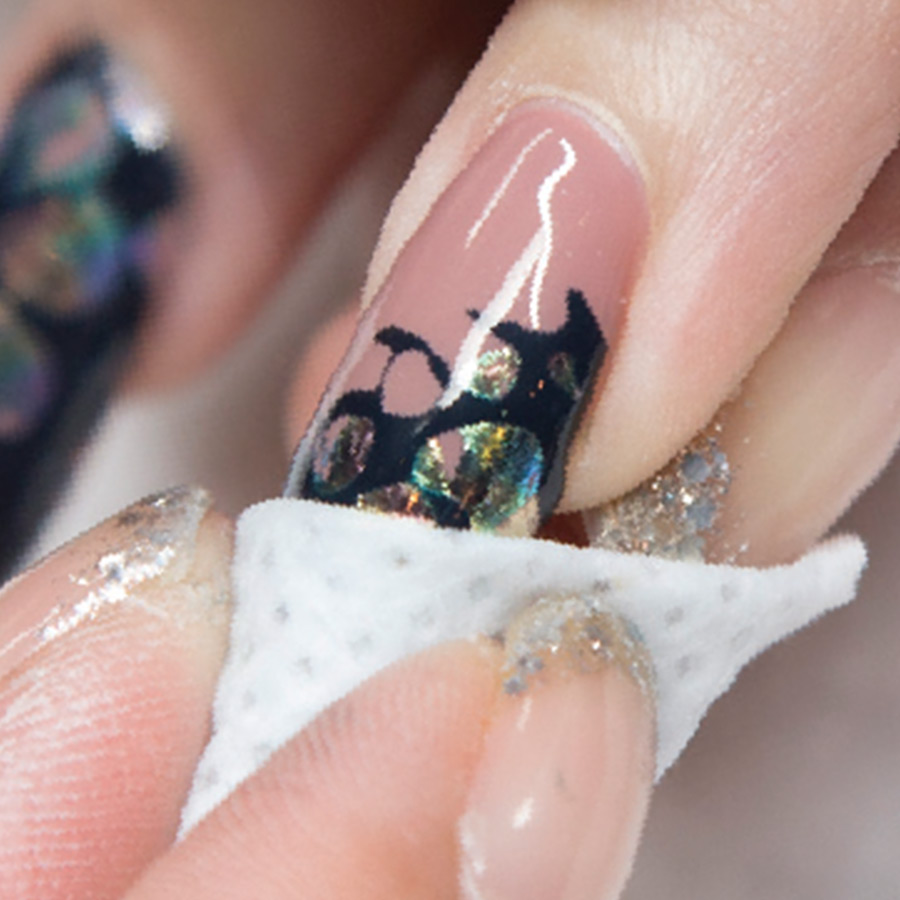
Use Nail Surface Cleanser & a lint-free wipe to cleanse the inhibition layer of the nail.
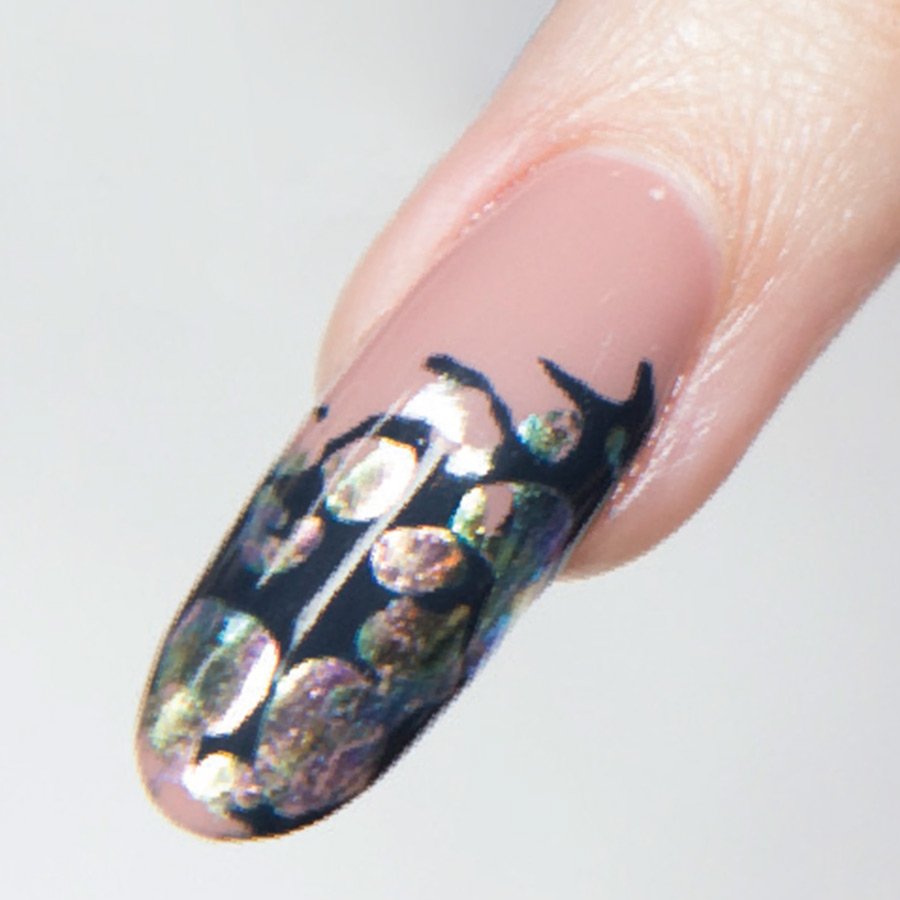
Massage one drop of Revive Cuticle Oil into the skin surrounding the nail plate, and enjoy the finished look.

MORE TAG THAT TREND
RELATED VIDEOS
MORE TO EXPLORE
Prep the natural nail using a 180-grit file, remove dust. Apply “Prep It!”, then two thin coats of Flex It! “Cover Peach”, curing each coat for 60-seconds.
Prep Apply a thin, even coat of HD Pro “Matt It!” Cure for 60-seconds.
Use the HD Pro Long liner brush and HD Pro Art Gel in “Graphite” to create a wavy line. Cure for 30-seconds, then rub line with a dusting brush.
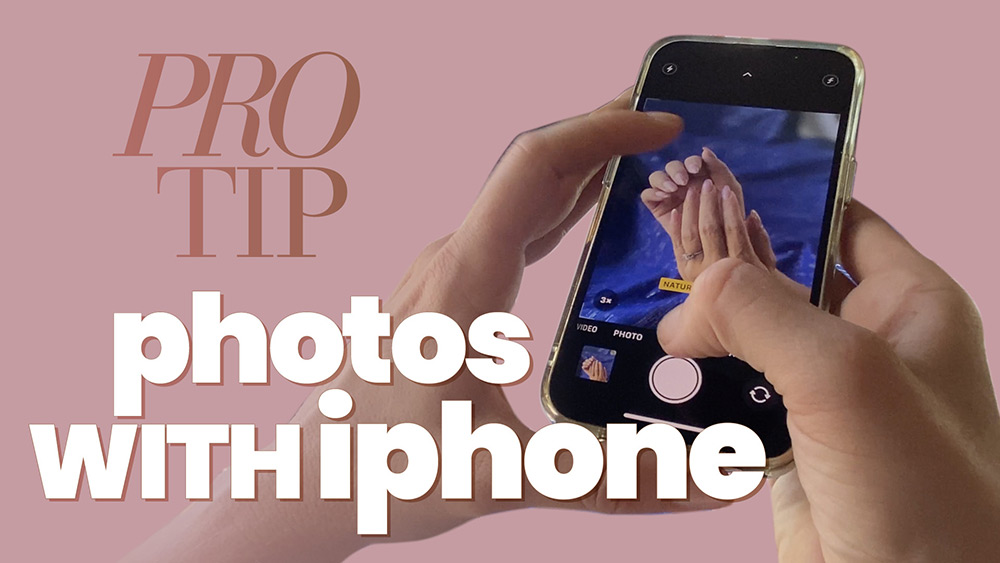
Photos with Iphone
![]()
Photos with iPhone
Want to make better photos with your iPhone for social media? Take LA-based professional photographer, Lindsey Karnopp’s advice on the differences between portrait and photo modes when styling close-ups of nails for your grid.
SEE MORE ON PRO TIPS
RELATED VIDEOS
MORE TO EXPLORE
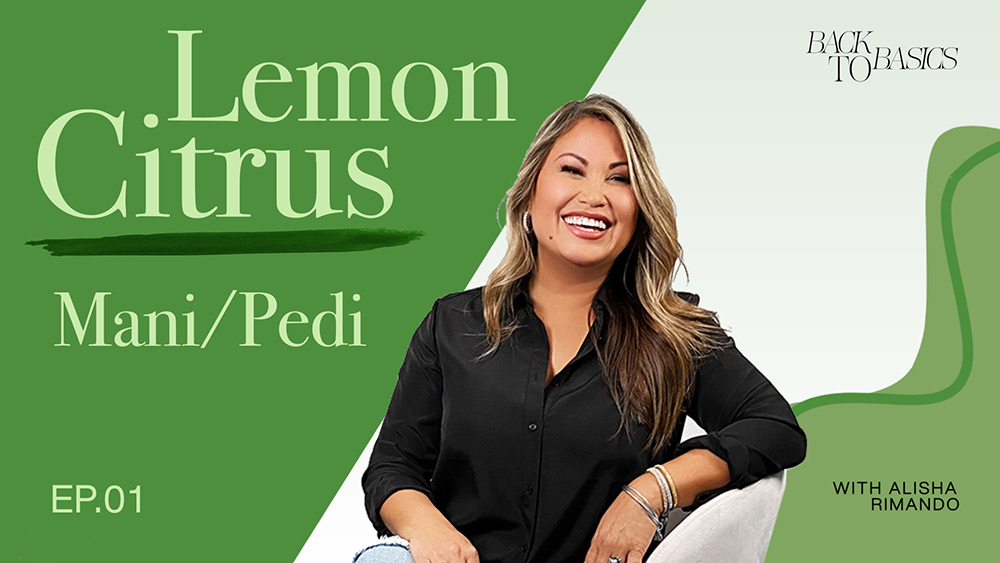
Spring Mani/Pedi Lemon Citrus
![]()
Spring Mani/Pedi Lemon Citrus
Spring is the perfect season for a manicure and pedicure promotion. As people emerge from winter to slip into the first sandals of the season, they will be in search of a unique pedicure service that will slough off the old and bring softness and beauty to tired soles. Learn how to up your salon game with a themed service paired with plenty decrations and marketing materials to promote your unique experience.
SEE MORE BACK TO BASICS
RELATED VIDEOS
MORE TO EXPLORE

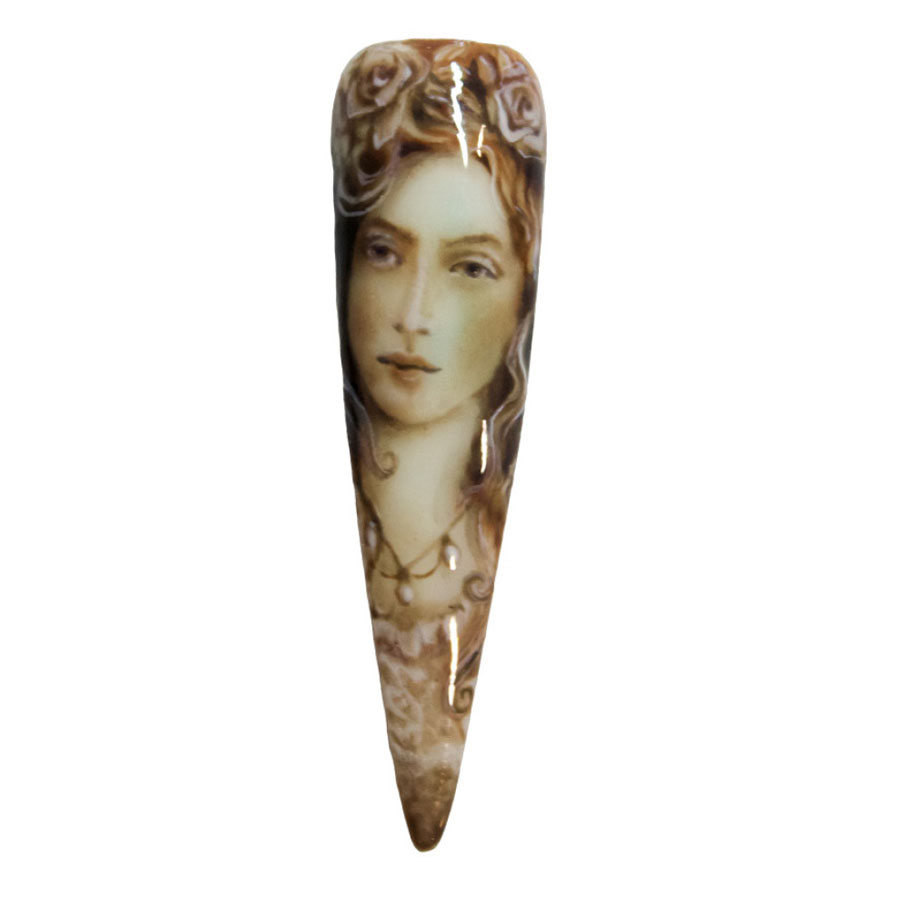
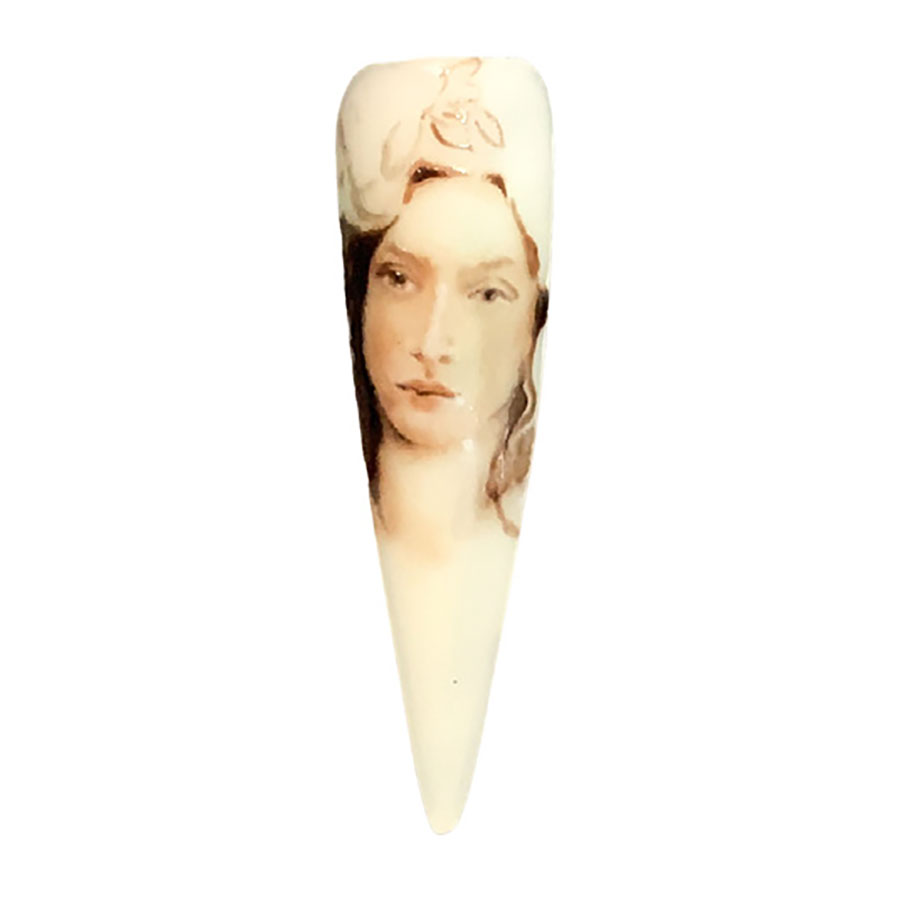
Portraiture in Flat Art
Portraiture in Flat Art
![]()
Jacqueline McClement
Jacqueline has been a certified nail technician since 2016 and the owner of private nail studio, Lux Nail Art Studio Inc in Estevan, Saskatchewan in Canada. She’s also a published children’s book illustrator.
“I’ve created many different types of art throughout my life, from large outdoor wall murals and backdrops, to children’s books and wall paintings. However, I never really found my niche until I discovered nail art,” cites Jacqueline. “This is where I really found my passion. I’ve attended over 30 nail training courses, and counting. I’ve learned so much from so many different educators, and I’m thankful to each one for sharing their knowledge with me.”
PRODUCTS USED
- Mosaic Gel Paints in Brown, Black and White
- Orangewood stick
- Nail Tips
- Matte Top Coat
- Small Fine Nail art Brush
- White Gel Polish
- Buffer
- Glossy Top Coat
STEPS
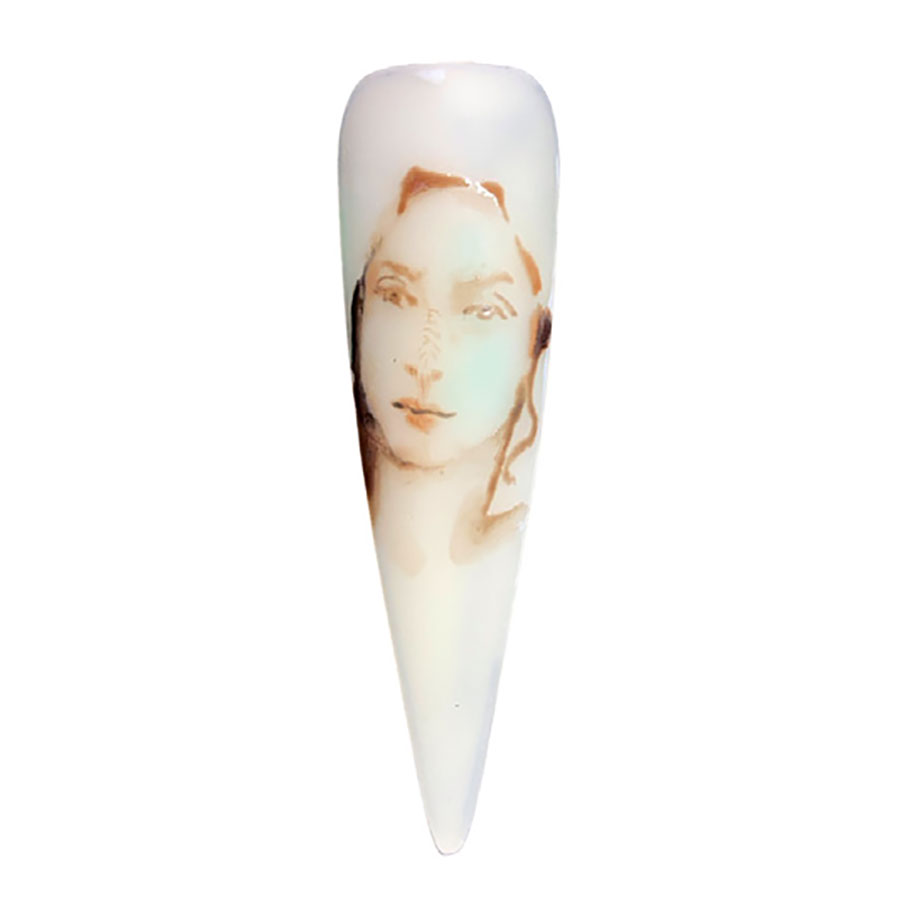
Prepare the nail tip with a coat of white gel polish & buff the surface of the nail to create a matte canvas for the design. Do not sketch the image or any lines onto the nail. Create the portrait using a blend of a little matte top coat mixed with brown gel paint. Start by adding the key features of the portrait & then start to fill in the shadows by using gentle strokes & less paint. This nail design is done in monochromatic colors; brown, white and black.
Continue to gradually add more shadows & details very lightly to build the portrait. Start by painting in the eyes & facial features in order to feel your character as you bring it to life.
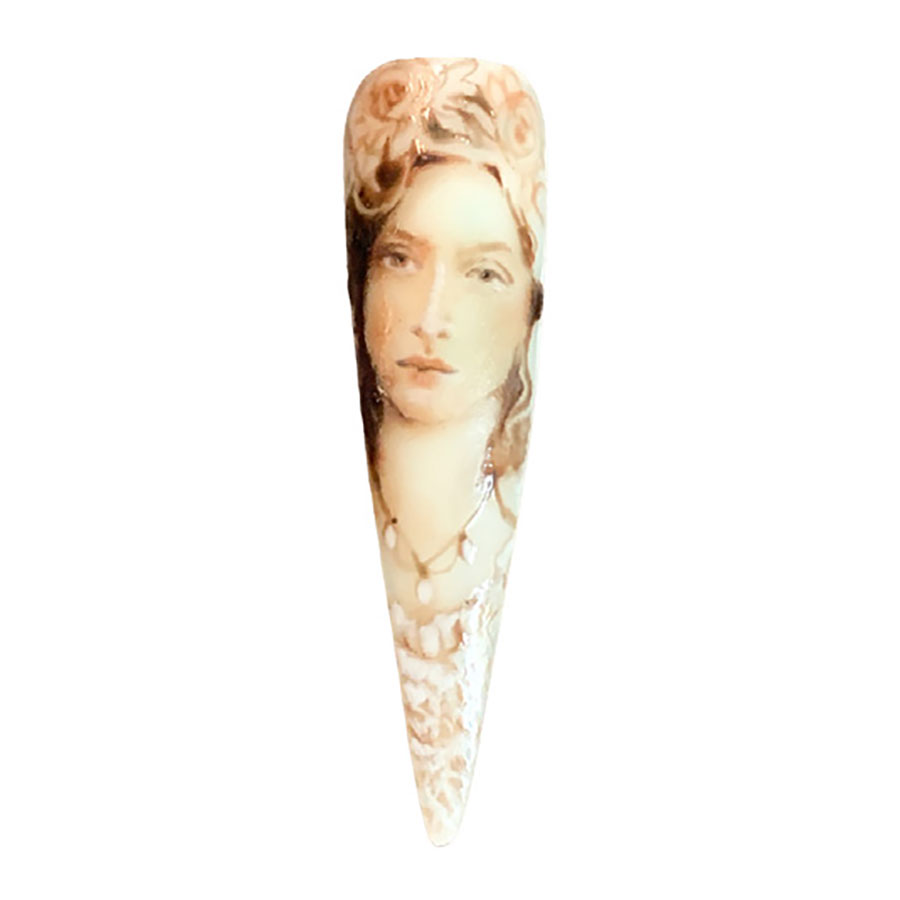
Continue to build up your portrait using the brown gel paint & matte top coat mixture. Deepen the darkest areas & keep light strokes across the lightest colors to make sure you create strong contrast.
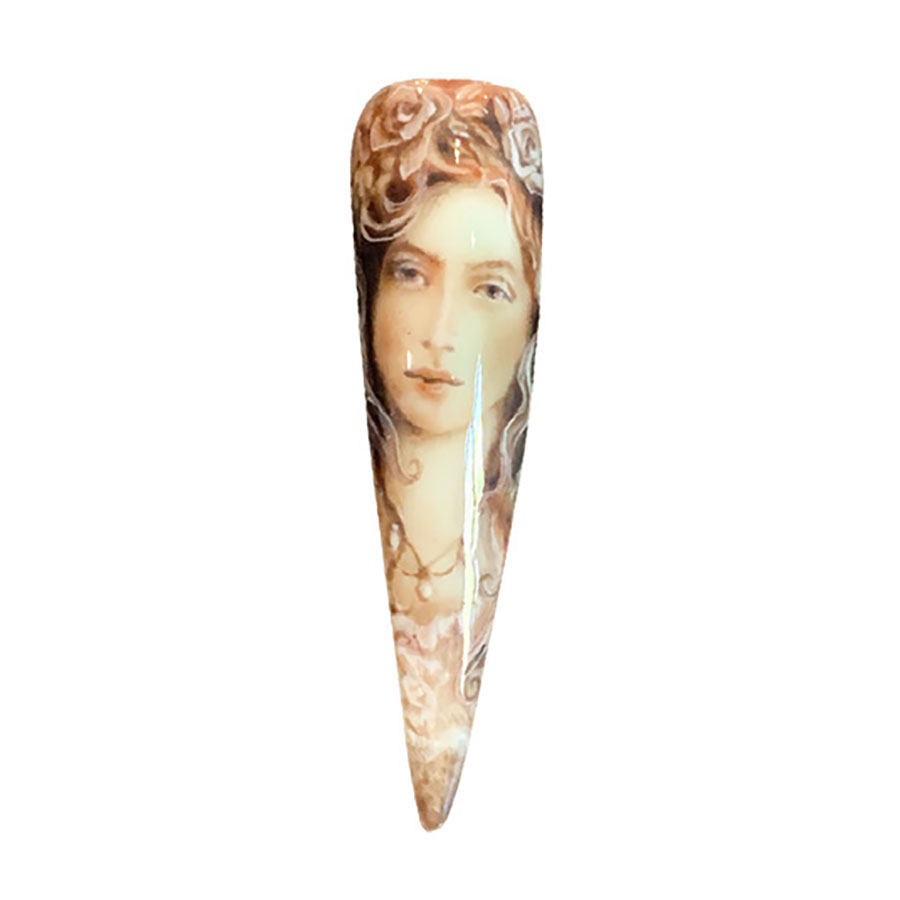
Once you have completed all elements from the facial features to the hair, head dress, necklace & bodice, finish with gloss top coat to bring out the lustre of the flat art.
MORE TAG THAT TREND
RELATED VIDEOS
MORE TO EXPLORE
Prep the natural nail using a 180-grit file, remove dust. Apply “Prep It!”, then two thin coats of Flex It! “Cover Peach”, curing each coat for 60-seconds.
Prep Apply a thin, even coat of HD Pro “Matt It!” Cure for 60-seconds.
Use the HD Pro Long liner brush and HD Pro Art Gel in “Graphite” to create a wavy line. Cure for 30-seconds, then rub line with a dusting brush.
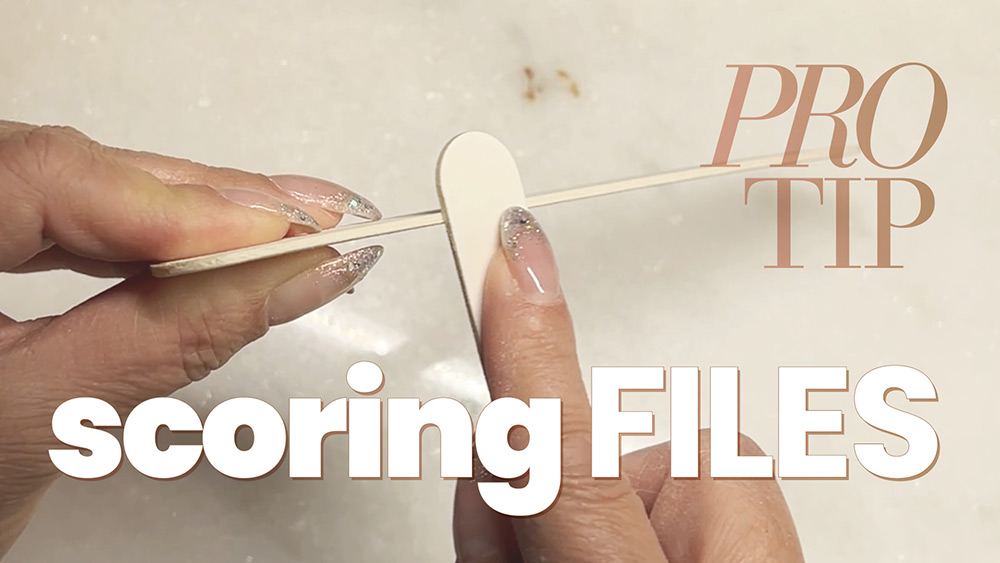
Scoring Files
![]()
Scoring Files
Have you ever cut a client while filing with a new hand file? Alisha Rimando shows you an easy remedy to dull edges before use that will soften the hard, sharp edges that are created when coming off the production line.
SEE MORE PRO TIPS
RELATED VIDEOS
MORE TO EXPLORE
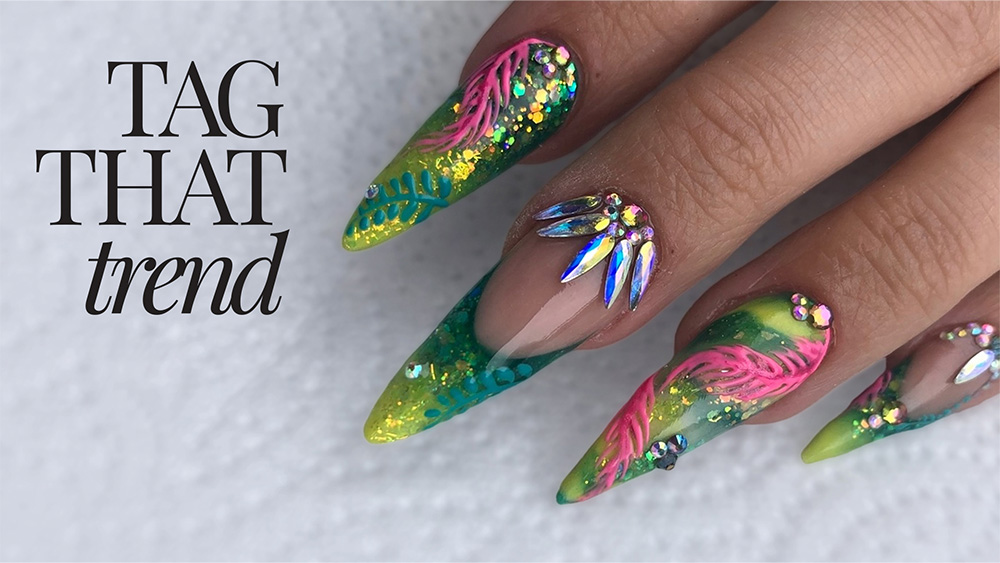
Tropical Summer
Tropical Summer
![]()
Kayley Cairns
Kayley Cairns has worked numerous fashion shows, met celebrity clients, worked at the 2012 London Olympics and exhibited at trade shows. In 2017 she joined the Hazel Dixon Nail Artist Academy where she trained as an independent educator. She’s competed in national and international nail competitions, winning multiple times at all levels, including Division 3 Nailympia. In 2021 she won the Scratch Stars Nail Stylist of the Year and Mixed Media Nail Artist of the Year. She’s also won the titles; Professional Beauty Nail Professional of the Year 2019, BABTAC Nail Technician of the Year 2019, Nailympia London 2019 – UK Top Tech and Art Winner of Winners 2019.
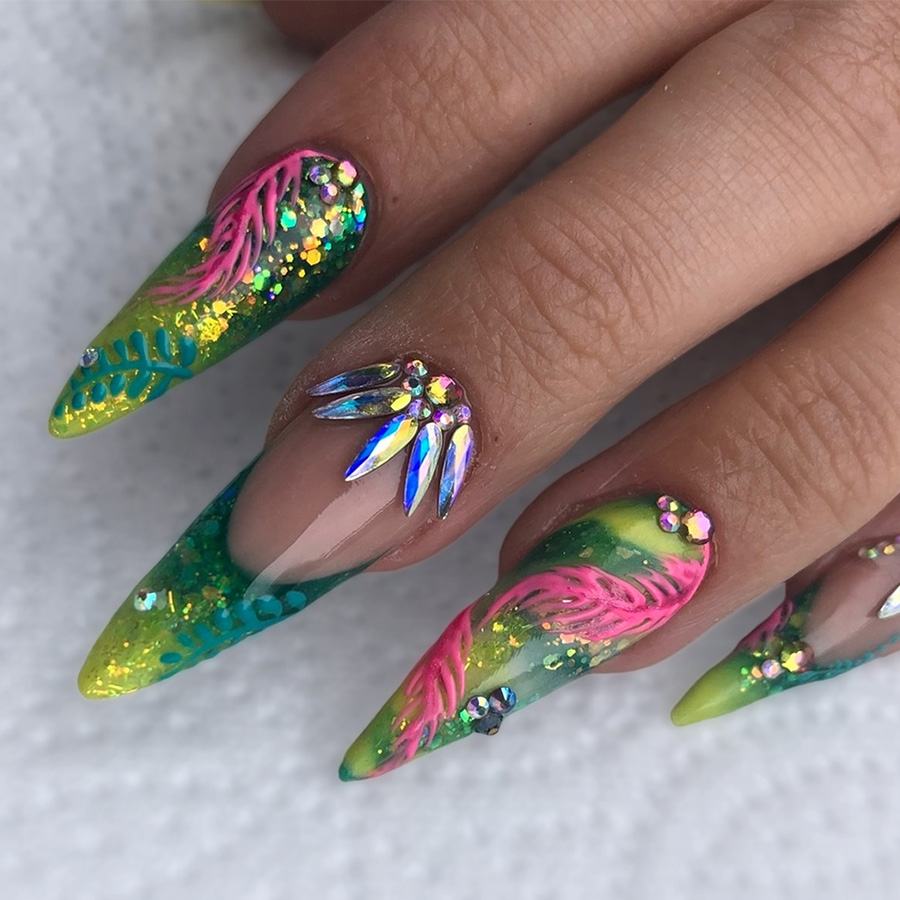
PRODUCTS USED
- HD Professional Nails L&P Acrylic System
- HD Professional Nails Gel Paints
- Acrylic Brush
- Gel Art Brush Nail File
- HD Pro Nails Top Coat
- Gel Adhesive
- Selection of Crystals
- Nail Oil
- LED Lamp
STEPS
Apply tips to all 10 nails & prep accordingly. Create a reverse French on selected nails, then add a clear/ nude thin base on the remaining nails.
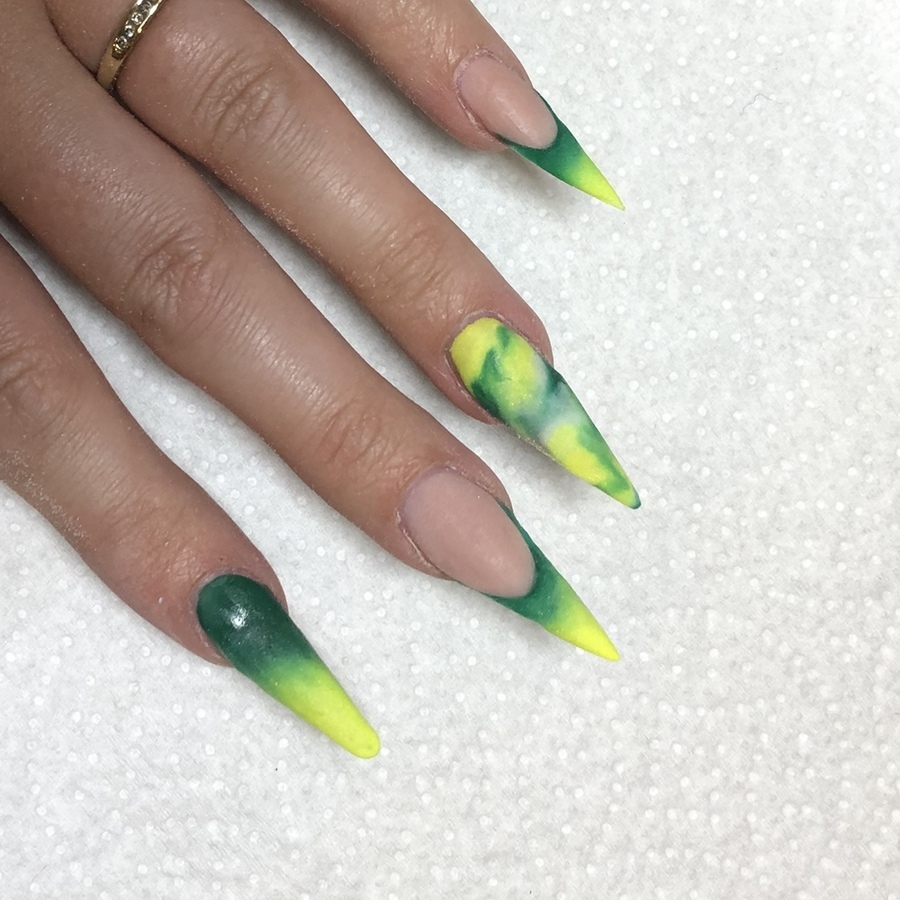
Take colored acrylic powders in neon yellow and green to create an ombré fade effect as a French on two nails, cover one entire nail tip & then marble the colors together on the ring finger.
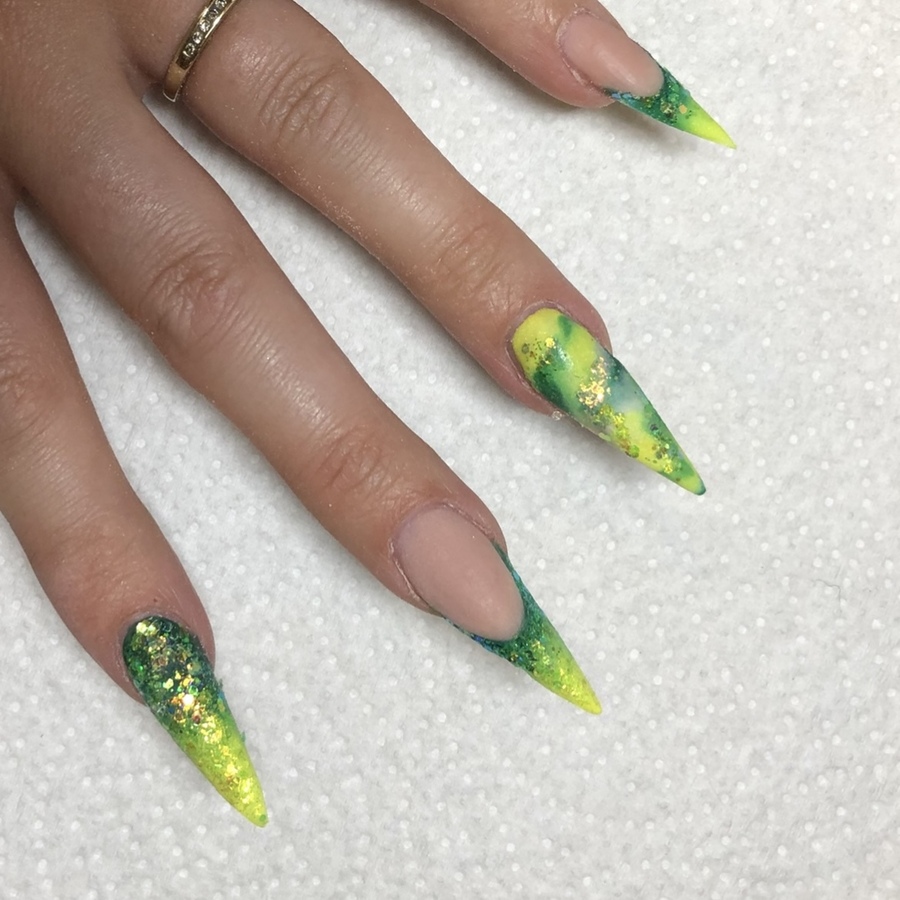
Apply iridescent glitter over the nail designs swirling in various areas to add details that pop.
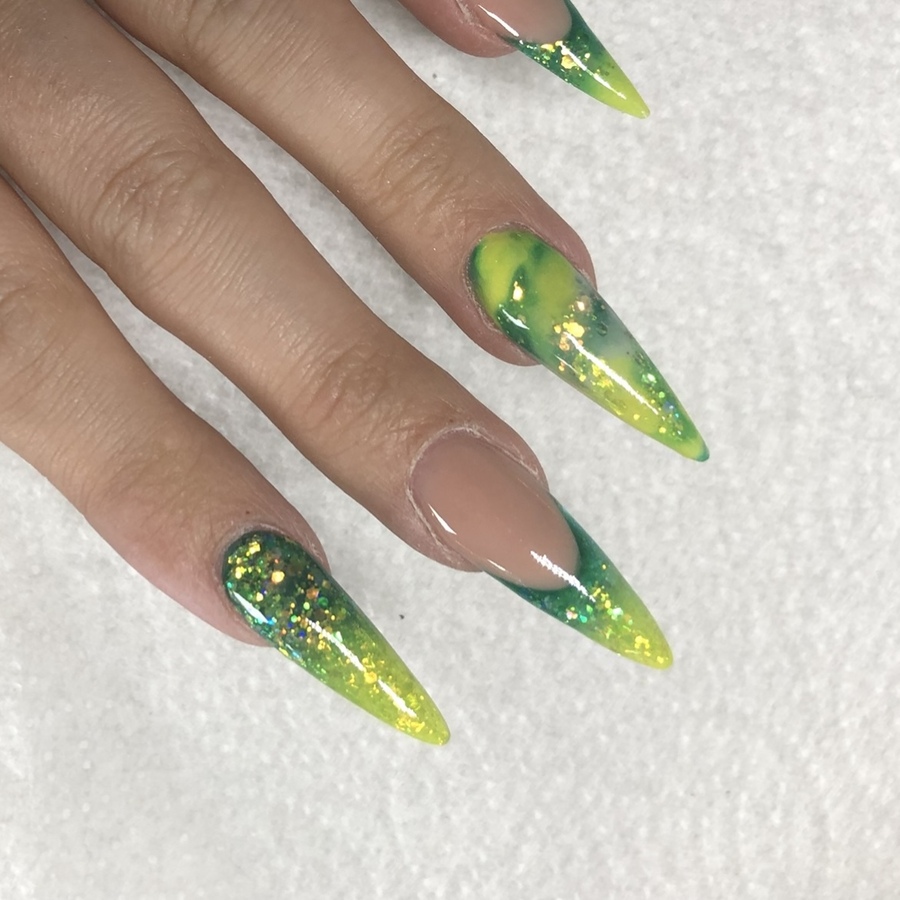
Cap all the nails in clear L&P acrylic. File & top coat.
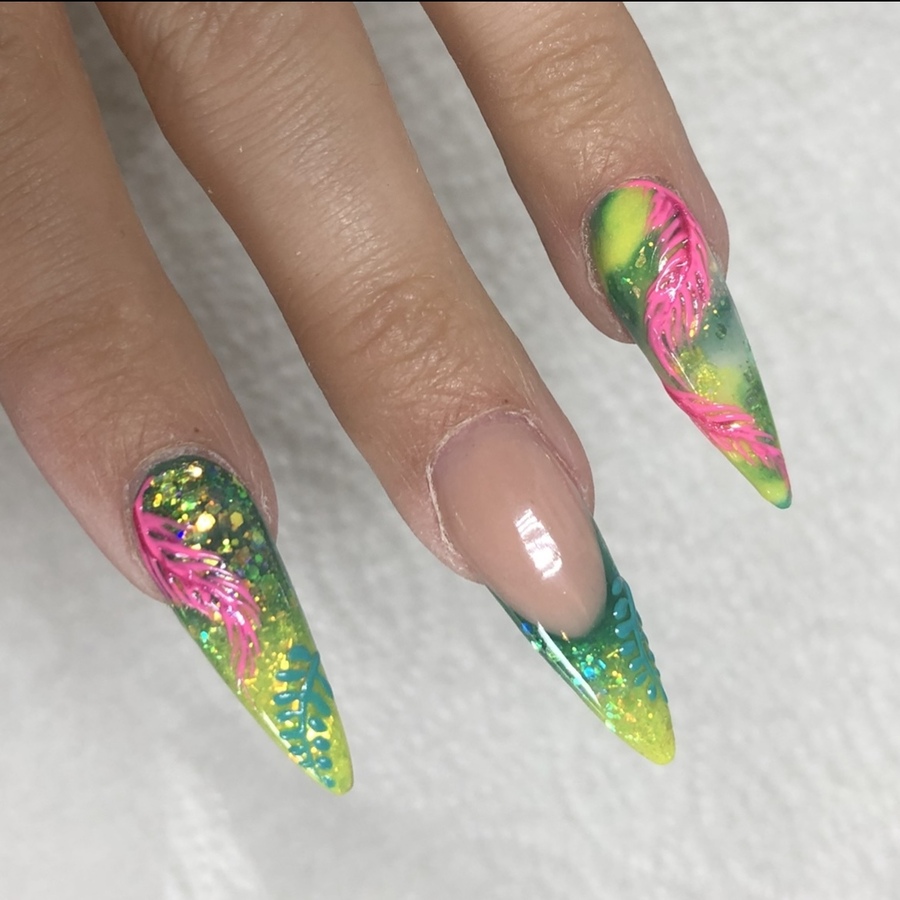
Use gel art paint in hot pink and green to paint a raised design over the nails & add any crystals using thick adhesive gel to secure them, cure & finish with oil.
MORE TAG THAT TREND
RELATED VIDEOS
MORE TO EXPLORE
Prep the natural nail using a 180-grit file, remove dust. Apply “Prep It!”, then two thin coats of Flex It! “Cover Peach”, curing each coat for 60-seconds.
Prep Apply a thin, even coat of HD Pro “Matt It!” Cure for 60-seconds.
Use the HD Pro Long liner brush and HD Pro Art Gel in “Graphite” to create a wavy line. Cure for 30-seconds, then rub line with a dusting brush.

Bubbles in Tips
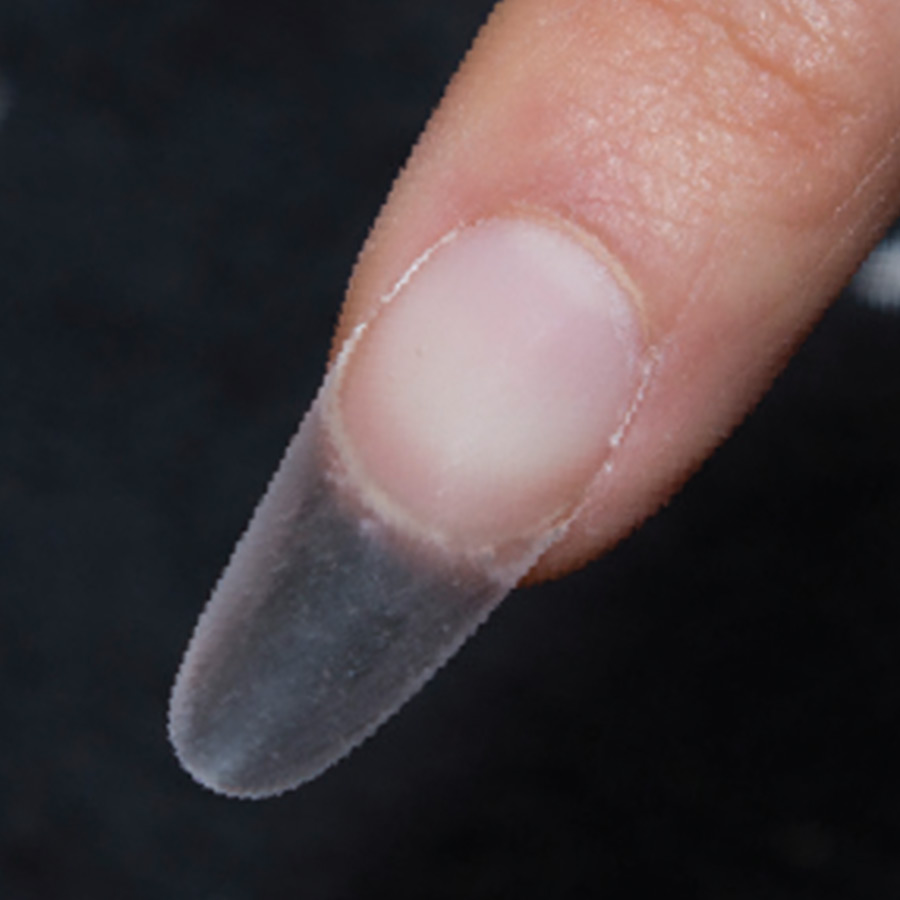
![]()
Bubbles in Tips
When applying full-cover soft tips, do you get bubbles in your gel? If so, Let Thao Do solve this in a flash, with a quick and simple application technique.
SEE MORE PRO TIPS
RELATED VIDEOS
MORE TO EXPLORE
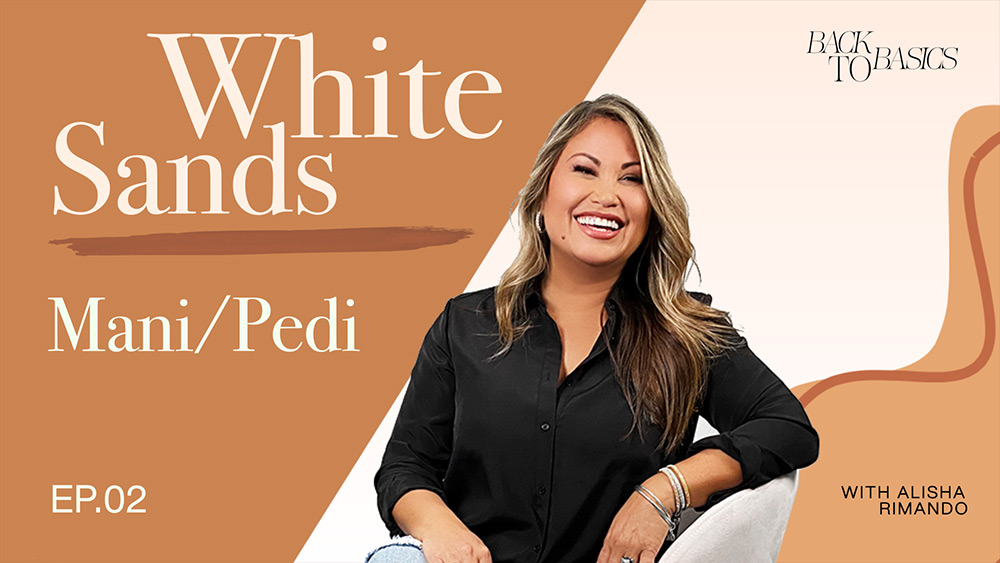
Summer Mani/Pedi White Sands
![]()
Summer Mani/Pedi White Sands
Let’s explore a summer service. This is a great time to get your clients vacation ready and a perfect time to introduce a treat or cocktail with your service in addition to retailing at home products. Learn how to theme your service, create homeade custom products and create a luxury experience for your clients. This is the season for fun, so get out the blow up unicorn floaties and get your clients in the summer spirit.