GlossaryLive Freestyle Nail Art Raindrops of Sunshine Eric Vega

Raindrops in Sunshine

Raindrops in Sunshine

For a jaw-droppingly simple way to create magnificent designs, artist Eric Vega has utilized the airbrush gun to spray a color-fade across his nail canvas. Once ready, choosing a vivid, contrasting color to create an abstract design really makes this scene pop. By adding drops of clear gel and curing, this nail gives the impression that raindrops have been frozen in time. So simple, yet so exquisite.

UP NEXT ON FREE STYLE NAIL ART

RELATED VIDEOS

MORE TO EXPLORE

GlossaryLive Pro Tips Need Nail Friends?

Need Nail Friends?

Need Nail Friends?

The nail industry can be quite isolating for many who work from home, mobile, or as a stand-a-lone tech in a busy beauty or hair salon. Everyone needs motivating from time to time, everyone needs to grow in their work and be inspired by others. Networking in nails is essential for both your business growth and your mental wellbeing. Alex Fox stresses the power of meeting like-minded people and other nail artists in the powerful, energized space of the nail competition arena.

UP NEXT ON PRO TIPS

RELATED VIDEOS

MORE TO EXPLORE

GlossaryLive Salon Stopover Michaela Salon

Michaela Salon

Michaela Salon

Residing in Marseille, Michaela Malinová has been running Michaela Salon for the past seven years. The salon serves as a tribute to her passion for nails, showcasing her competition works, trophies, medals and diplomas. With 15 years of experience in the nail industry, Michaela is not only a COD nail brand trainer and distributor for Krista Paulitti in France, but also an accomplished international competitor. Among her victories are 1st place wins at Aquarelle, Golden Hands of Bohemia 2013, Bling Nails, Czech Nail Cup 2017 and 3rd place Invent A Nail Shape, Nailympia 2023. She excels in sculpting extreme nail shapes and hand painting flat art, and for the past three years she has been a judge for the International Czech Nail Cup competition.

Want to see your salon featured in an episode of Salon Stopover? We are looking for fabulous salons & unique services to showcase from around the globe. Contact us for details.

UP NEXT ON SALON STOPOVER

RELATED VIDEOS

MORE TO EXPLORE

GlossaryLive Freestyle Nail Art Dominique Sharpe Touch of Tweed

Touch of Tweed

Touch of Tweed

In celebration of the winter season, UK-based nail artist Dominique Sharp showcases her interpretation of the fabric tweed in a nail design style. Quick and easy nail art is created using various gel polishes with the dry brush and foil transfer techniques. This is a great design to add to your menu this season.

UP NEXT ON FREESTYLE NAIL ART

RELATED VIDEOS

MORE TO EXPLORE

Metallic Sweater

tag that trend

Alisha Rimando

Global educator, champion nail artist and session stylist, Alisha Rimando shares a quick, yet stylish design that takes just minutes to create for maximum effect when creating party-themed, seasonal nails.

UPGRADE TO PREMIUM TO VIEW TAG THAT TREND
HOW TO STEPS AND WORKBOOKS

Upgrade your account to access this Premium
How To and so much more educational content.

Want to see your nail art featured on Tag That Trend? Our team is excited to see your work and get you published. Contact us for details.

RELATED VIDEOS

MORE TO EXPLORE

Magnetic Glitz & Glam

UPGRADE TO PREMIUM TO WATCH THIS VIDEO

Upgrade your account to access this Premium
video and so much more educational content.

Magnetic Glitz & Glam

There's a wealth of fun a nail artist can have when using magnetic chrome polish with a magnetic wand, as you watch the design move across the nail. By curing between layers, the design builds up to create a holographic design, literally in seconds. In this design, Eric Vega rubs chome powder onto the nail to create added sparkle, rhinestones are placed for a real sense of glitz and glam, before chrome powder is used on raised gel to elevate the nail ready for the red carpet.

UP NEXT ON FREESTYLE NAIL ART

RELATED VIDEOS

MORE TO EXPLORE

GlossaryLive Master Class Angela Wilden Q&A

Q&A with Angela Wilden

master class

Angela Wilden

This Master Class covers the stages necessary when creating and completing an extreme nail design. Award-winning nail artist and international master educator, Angela Wilden of Luxembourg, reveals her pathway from the design and application of the nail design to the filing, shaping and refining right up to, and including, the decoration of the nails in readiness for a photoshoot or fashion show.

Q&A with Angela Wilden

Alex Fox and Angela Wilden discuss the application ideas and techniqes that Angela has found useful in her journey to becoming an award-winnng extreme nail designing artist and expert in this nail art genre.

Do you have questions for the artist? GlossaryLive will present a LIVE interview with this artist. Email your questions to be featured during the Q&A session.

RELATED VIDEOS

MORE TO EXPLORE

GlossaryLive Tag That Trend Milena Mingozzi The Witch

The Witch

tag that trend

Milena Mingozzi

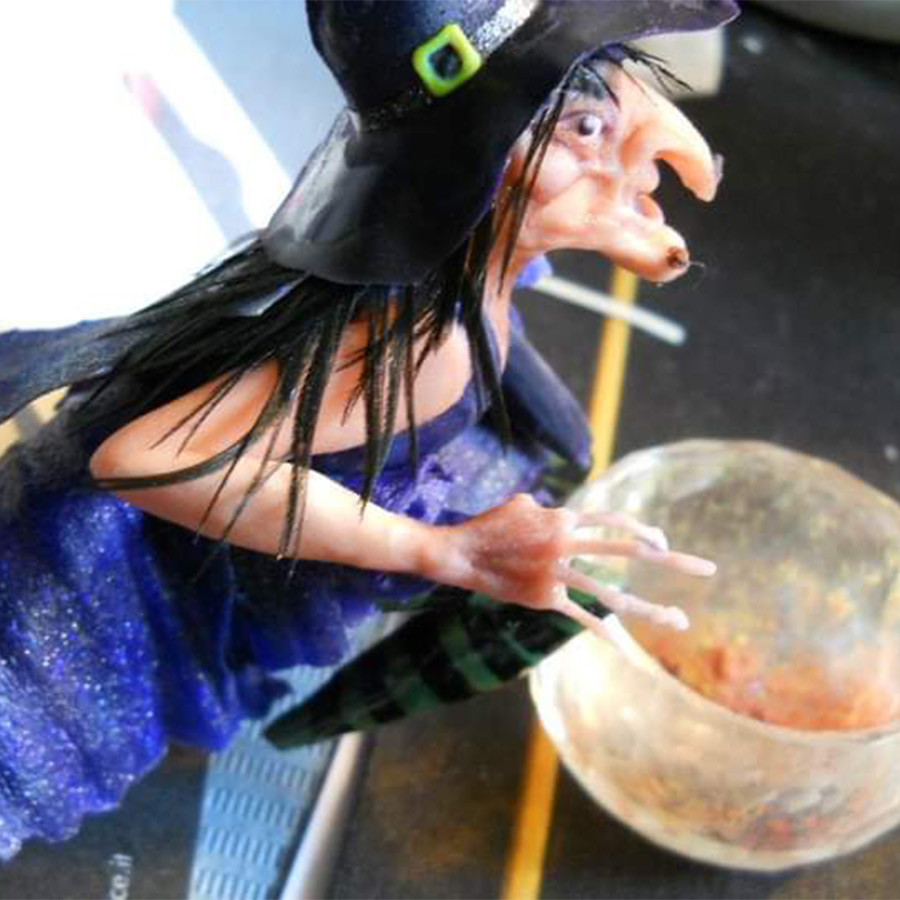
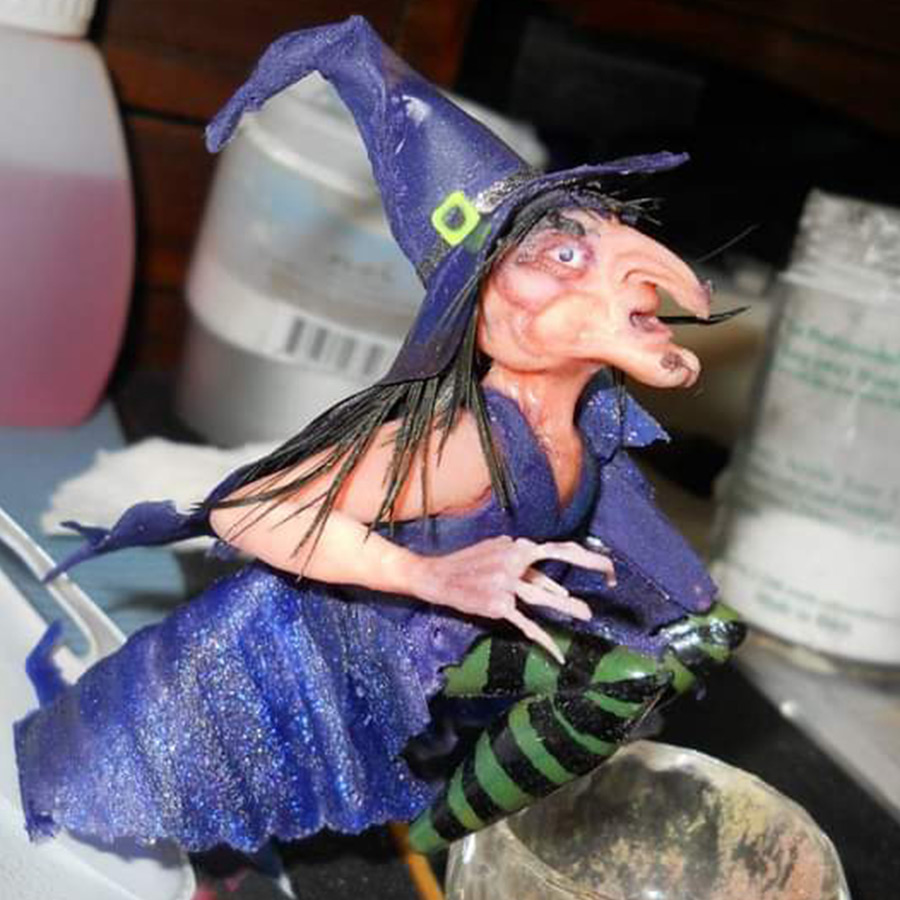
Learn how to approach a piece of 3D mixed media / fantasy artwork using the L&P acrylic liquid & powder system. Here, Milena showcases how to start imagining your piece, drawing it out, creating its architecture, form & structure and then how you move into the crafting of the character as well as the detailing of all elements that bring it to life.


GlossaryLive Tag That Trend Milena Mingozzi The Witch

PRODUCTS USED

    • Hobbyist Clay
    • Orangewood Stick
    • Nail Art Tools
    • Acrylic Brushes in Various Sizes
    • A Series of Colored Powders
    • Liquid Monomer
    • Dappen Dish
    • Forms/wax Paper
    • Small Hand Roller
    • Bird’s Feather
    • Small Pin to Add Very Tiny Detailing
    • Brush Fibers
UPGRADE TO PREMIUM TO DOWNLOAD THIS WORKBOOK

Upgrade your account to access this Premium
workbook and so much more educational content.

STEPS

GlossaryLive Tag That Trend Milena Mingozzi The Witch Step 1

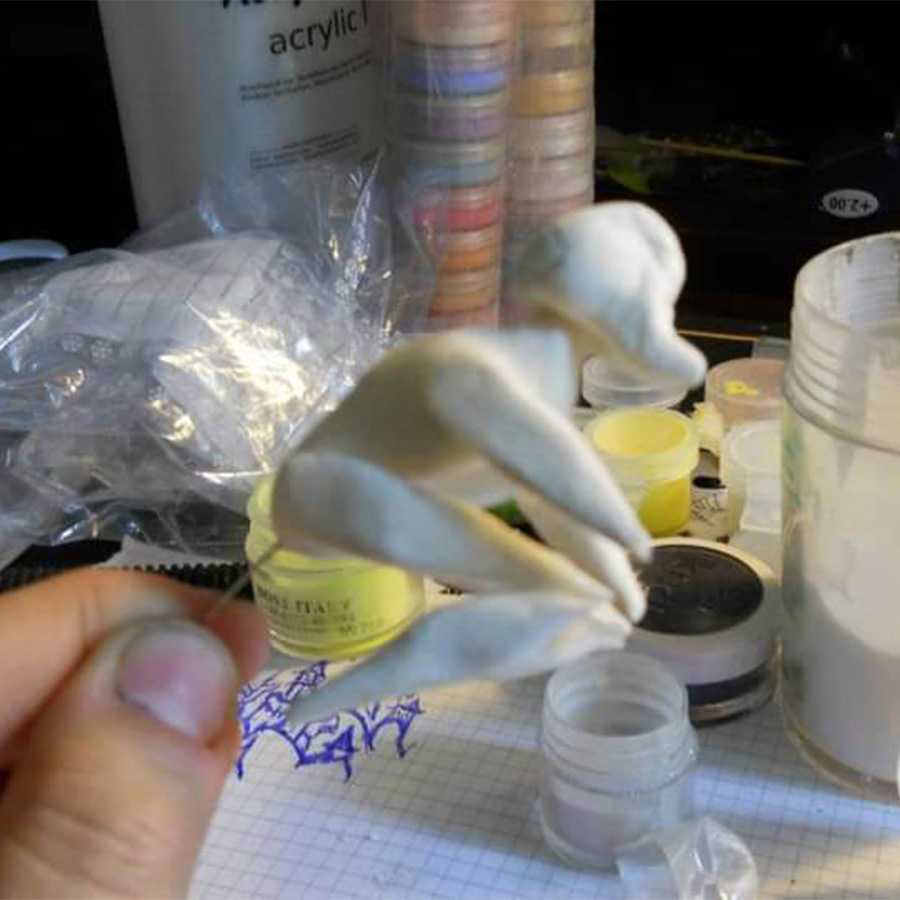
Choose a picture from which to gain inspiration & ideas for shape, structure & detailing.
GlossaryLive Tag That Trend Milena Mingozzi The Witch Step 2

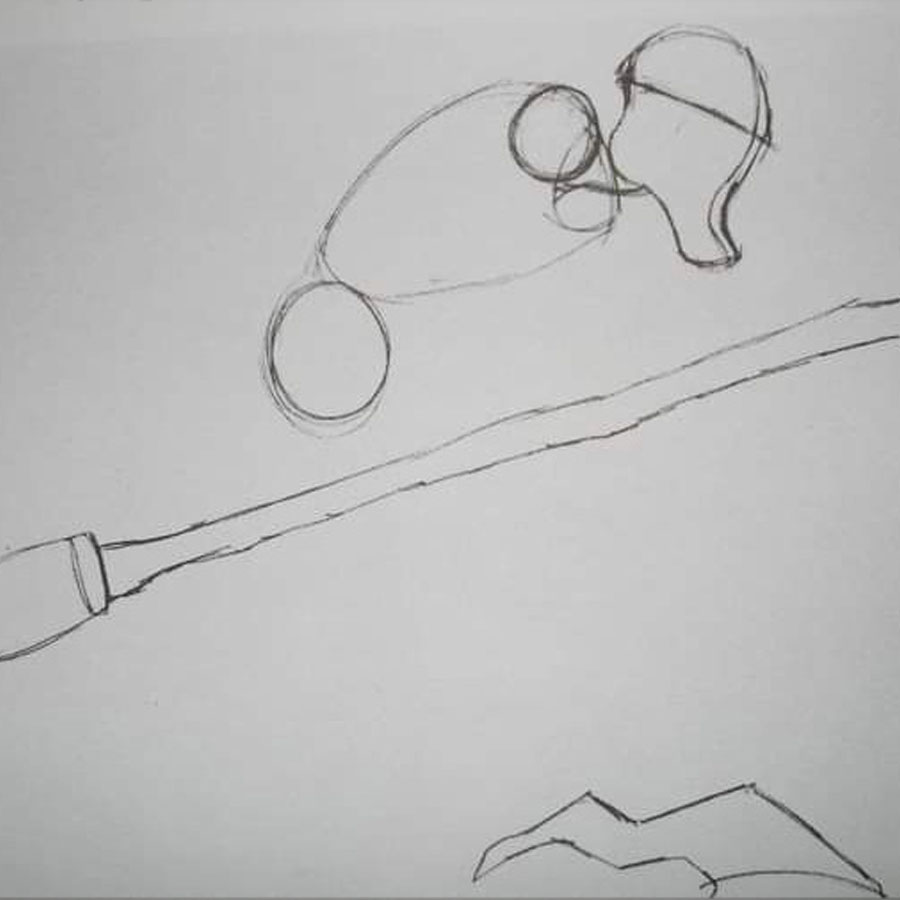
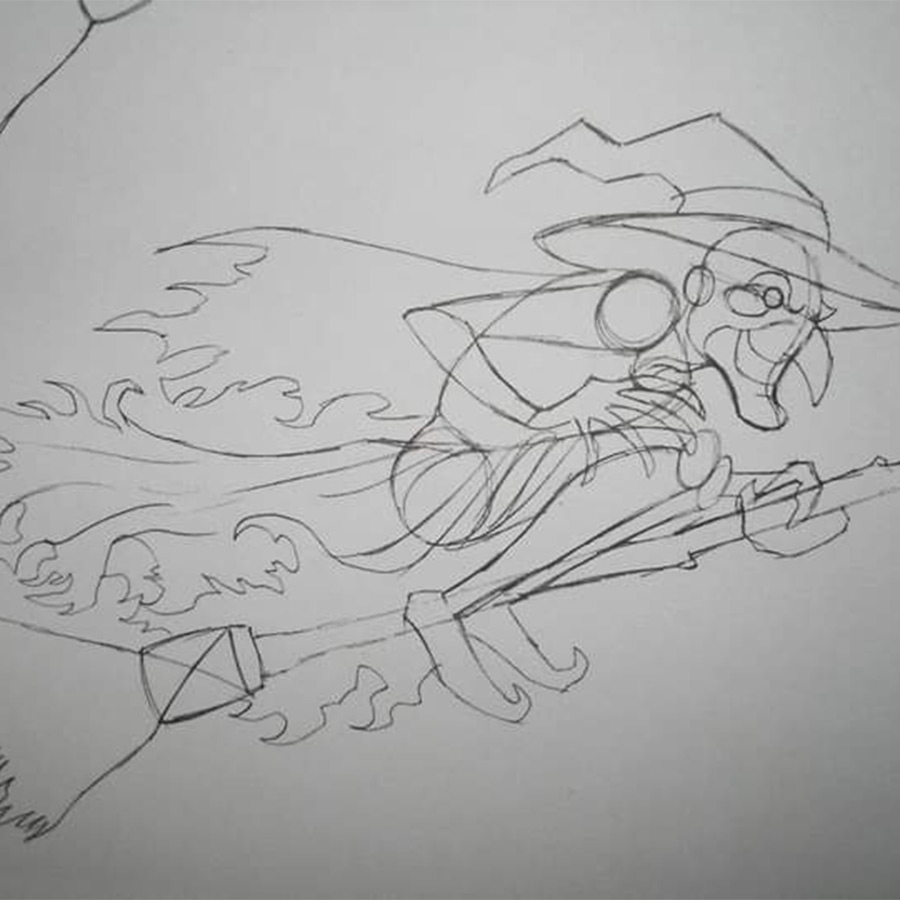
 Draw an outline sketch of the witch as you want her to look.
GlossaryLive Tag That Trend Milena Mingozzi The Witch Step 3
GlossaryLive Tag That Trend Milena Mingozzi The Witch Step 4

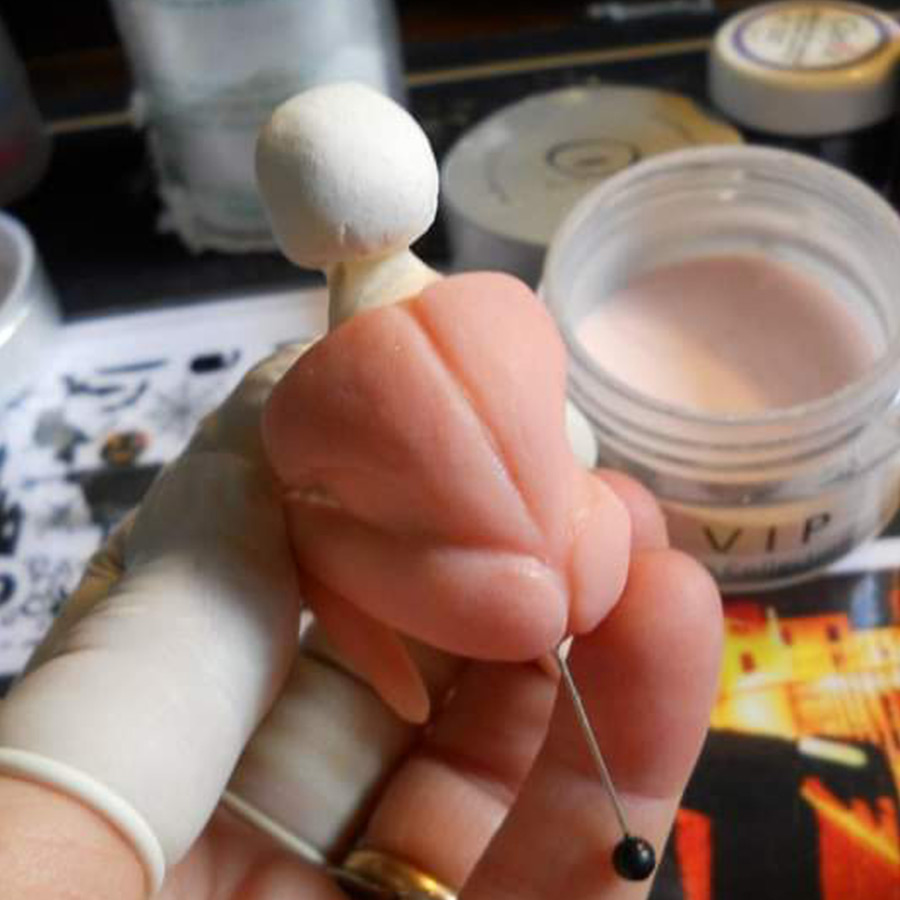
Build the shape of your witch using white hobby clay. Manipulate & sculpt it into shape, then leave it to harden. Place a pin inside the body for stability.
GlossaryLive Tag That Trend Milena Mingozzi The Witch Step 5

Take a series of pink beads of acrylic & cover the entire clay form. Use a thin implement to start adding features to the body to sculpt her form. Start at her buttocks & down her spine.
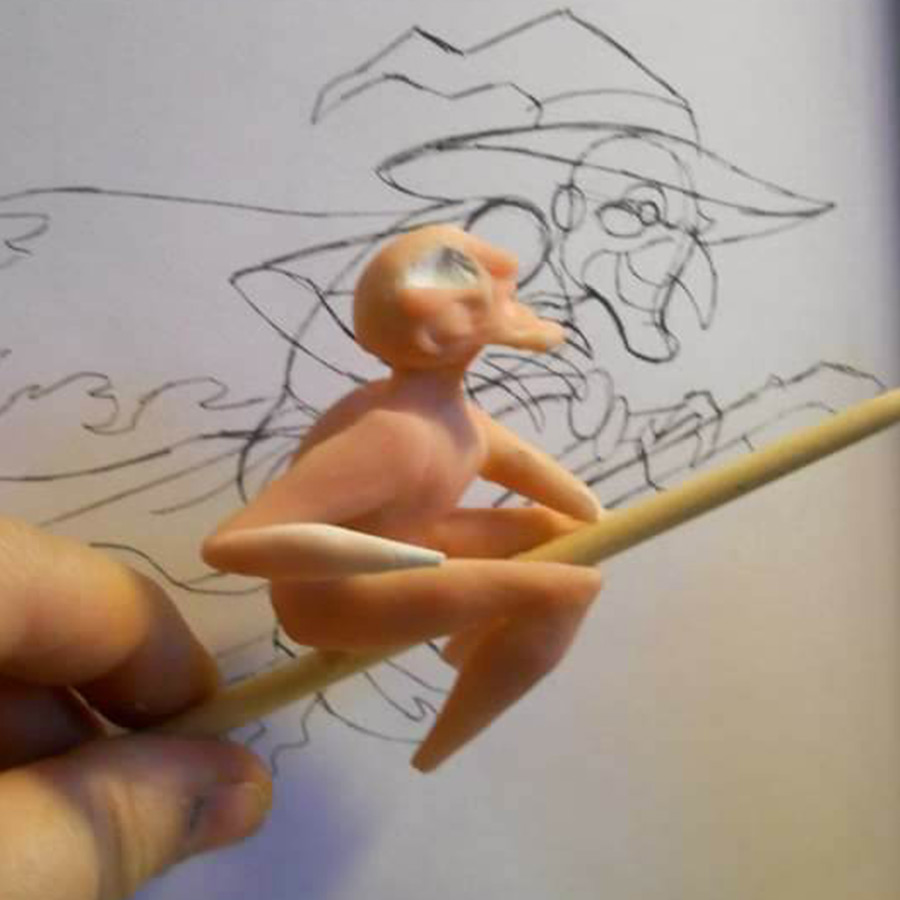
GlossaryLive Tag That Trend Milena Mingozzi The Witch Step 6

Now sculpt her nose & form her facial features, creating hollows for eyes & humps for cheekbones to give her a wizened look.
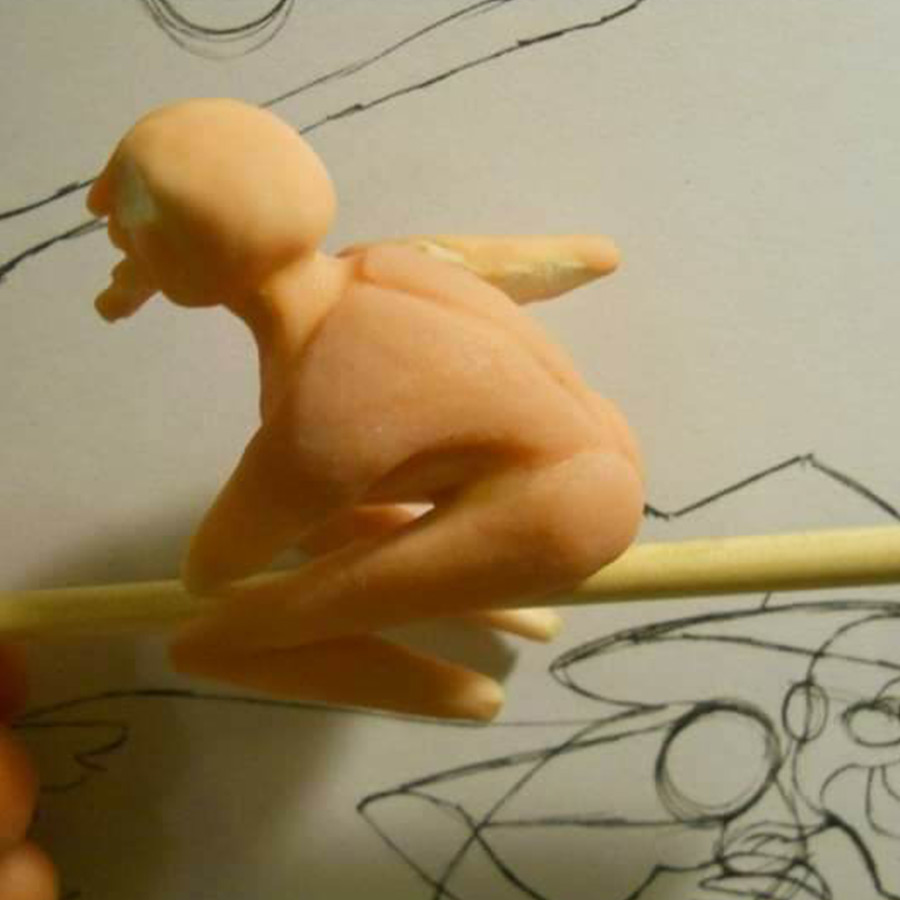
GlossaryLive Tag That Trend Milena Mingozzi The Witch Step 7

Using a series of colored acrylic powders, monomer & brushes in a suitable size for each part of the body, give life & color to this witch.
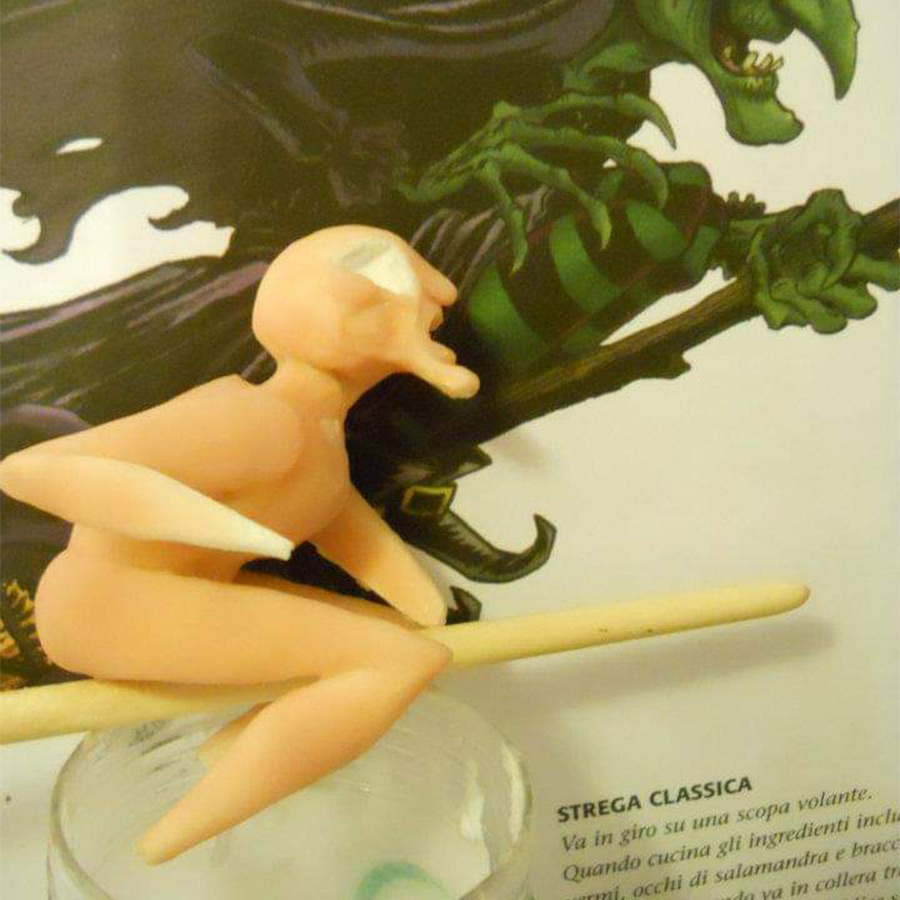
GlossaryLive Tag That Trend Milena Mingozzi The Witch Step 8

Use small beads of acrylic to build out her boney chin.
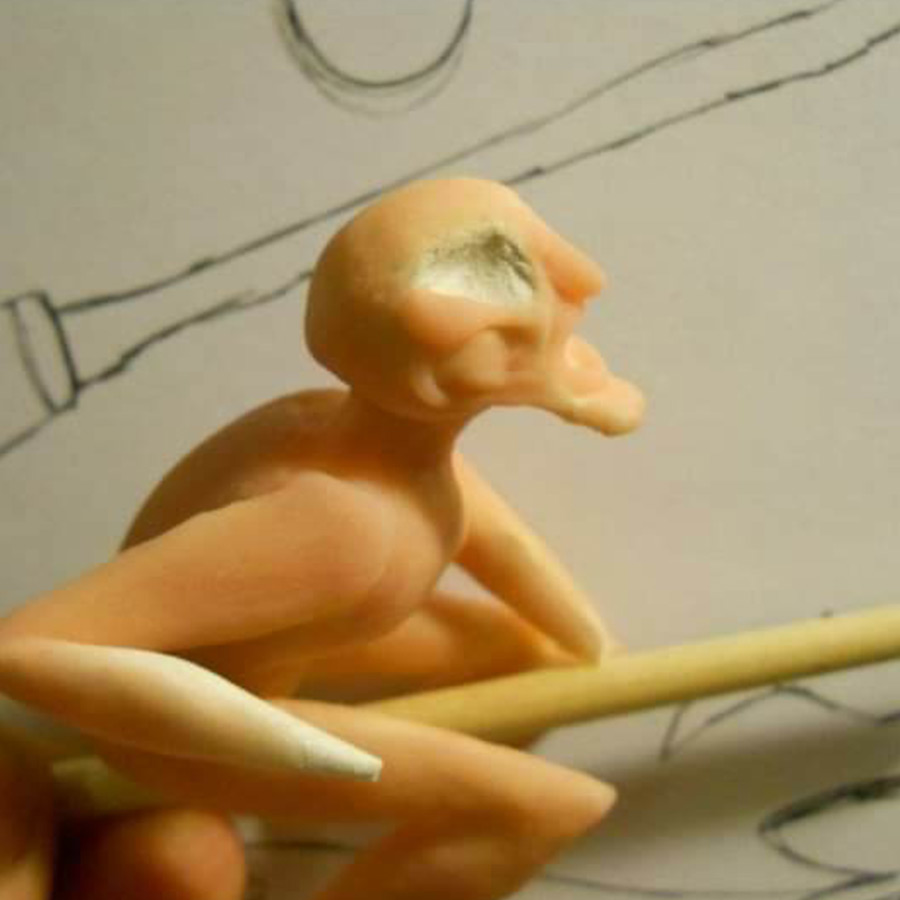
GlossaryLive Tag That Trend Milena Mingozzi The Witch Step 9

Use a small nail art tool to gently sculpt her facial expression.
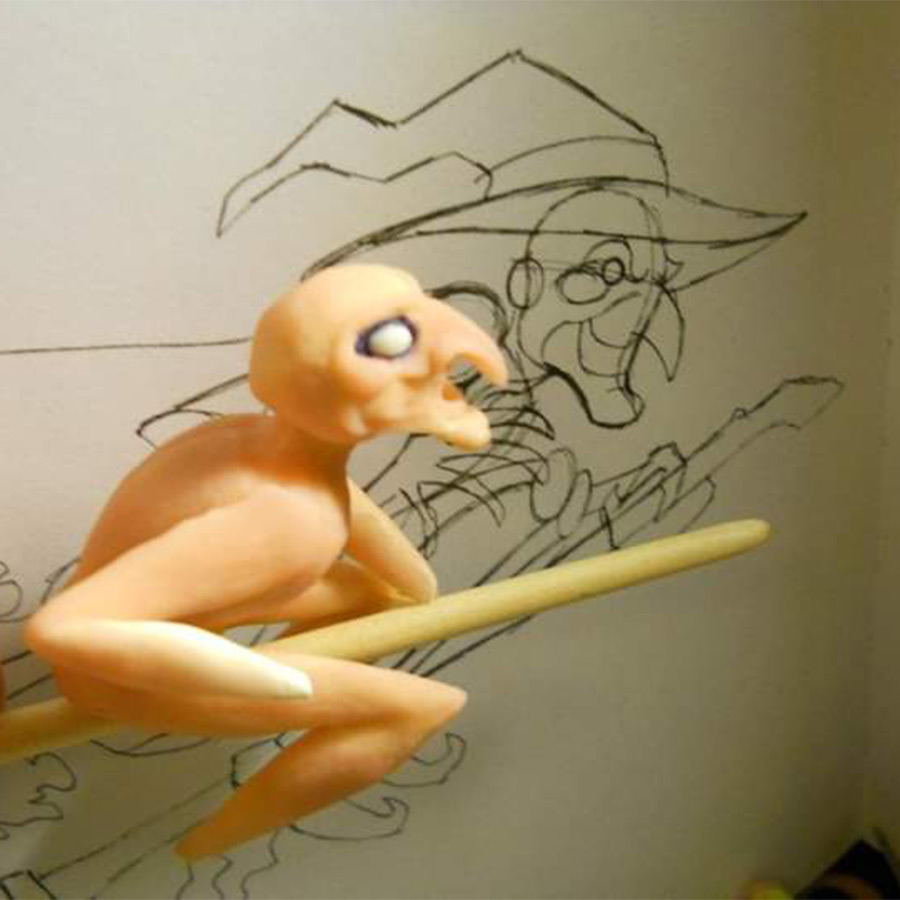
GlossaryLive Tag That Trend Milena Mingozzi The Witch Step 10

Use black ink in a pen to outline the eyes with black liner.
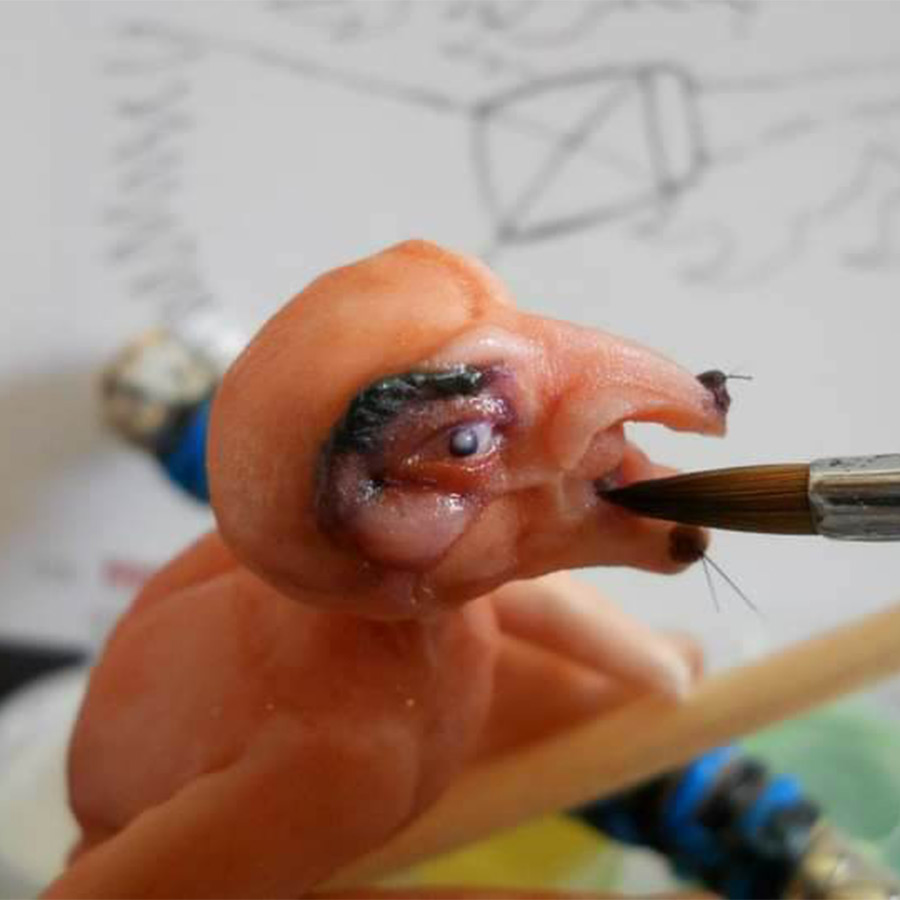
GlossaryLive Tag That Trend Milena Mingozzi The Witch Step 11

Take small dark colored acrylic beads & add warts to her face, & a big bushy eyebrow. Use a small nail art tool to give the eyebrow texture. Stick small hairs from an old art brush into the warts to make her look truly ghastly before they cure. A small white bead in the center of a darker bead to create her eyeball, will give the idea of a cataract, giving her a sense of moodiness.
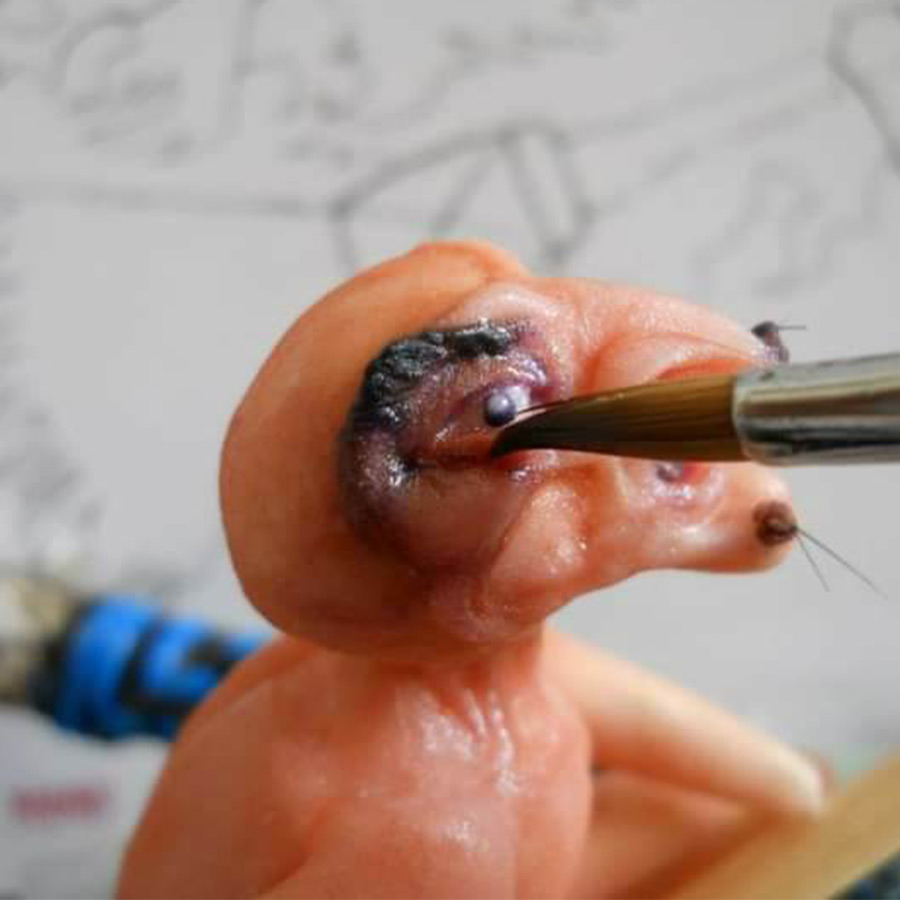
GlossaryLive Tag That Trend Milena Mingozzi The Witch Step 12

Build up the character in her face with small beads of relevant shades around the eyes. Bring her character to life with careful placing of tiny beads.
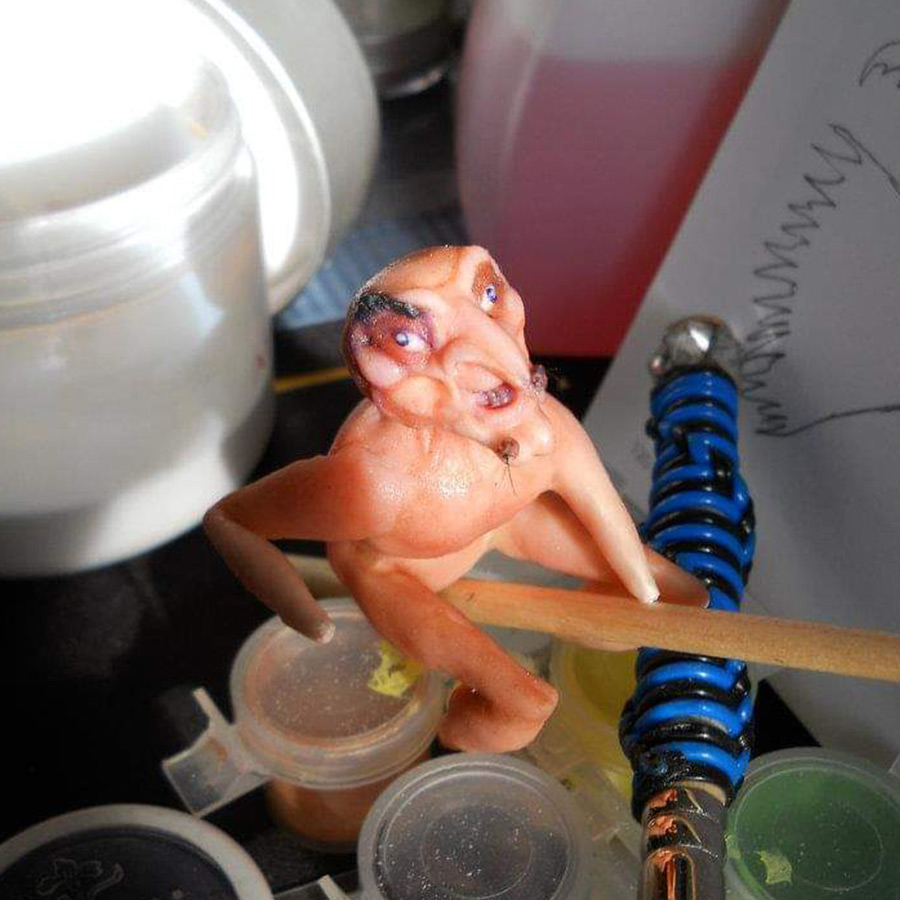
GlossaryLive Tag That Trend Milena Mingozzi The Witch Step 13

Use varying shades of pink skin tone shades to highlight & shade the details on her face.
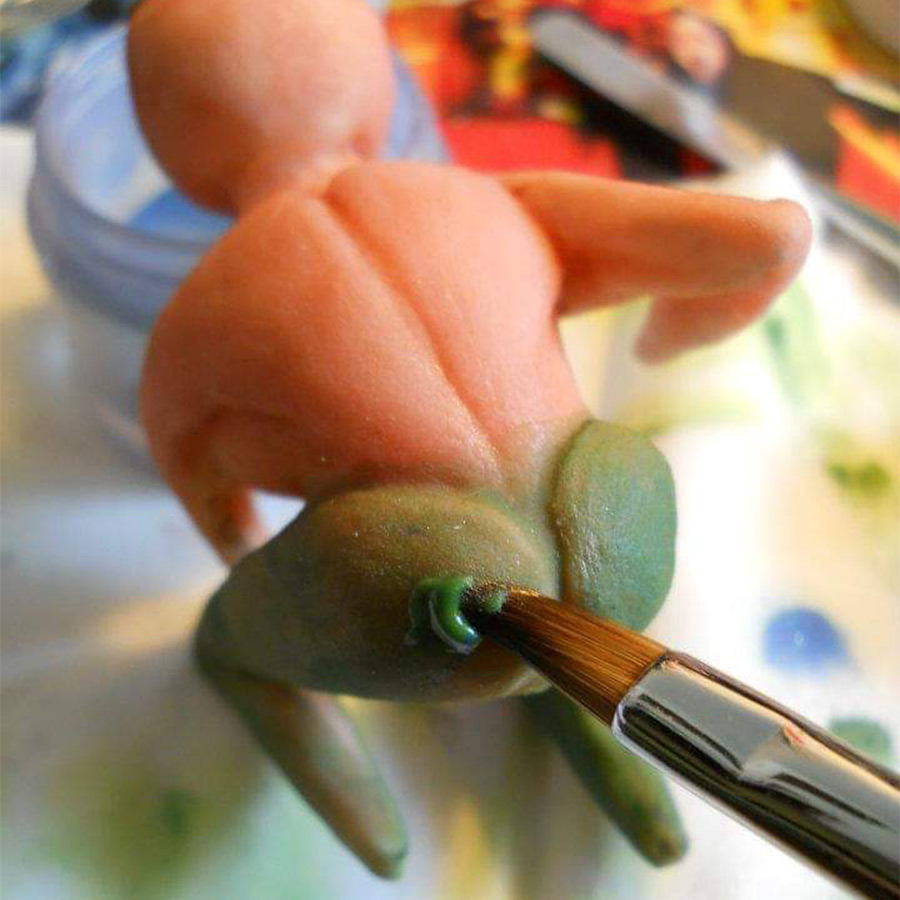
GlossaryLive Tag That Trend Milena Mingozzi The Witch Step 14

Move to her buttocks & legs, cover with a very thin, wetter bead of your chosen shade for her stockings.
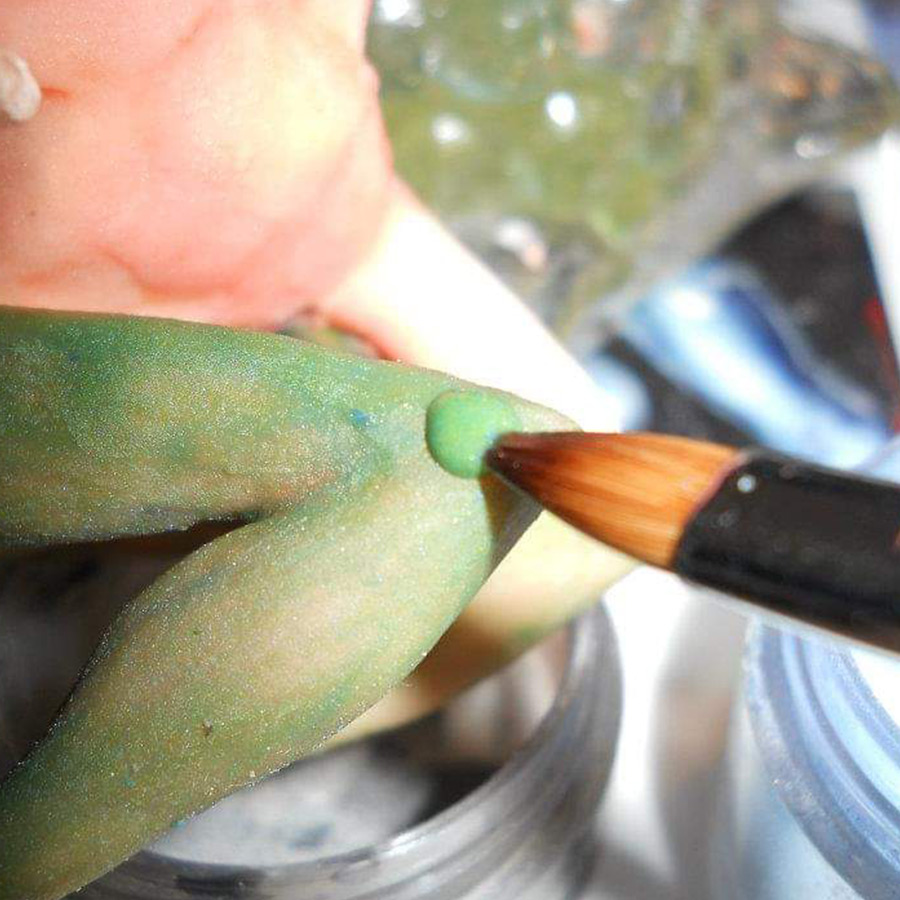
GlossaryLive Tag That Trend Milena Mingozzi The Witch Step 15

Continue with the colored beads as you completely cover her legs.
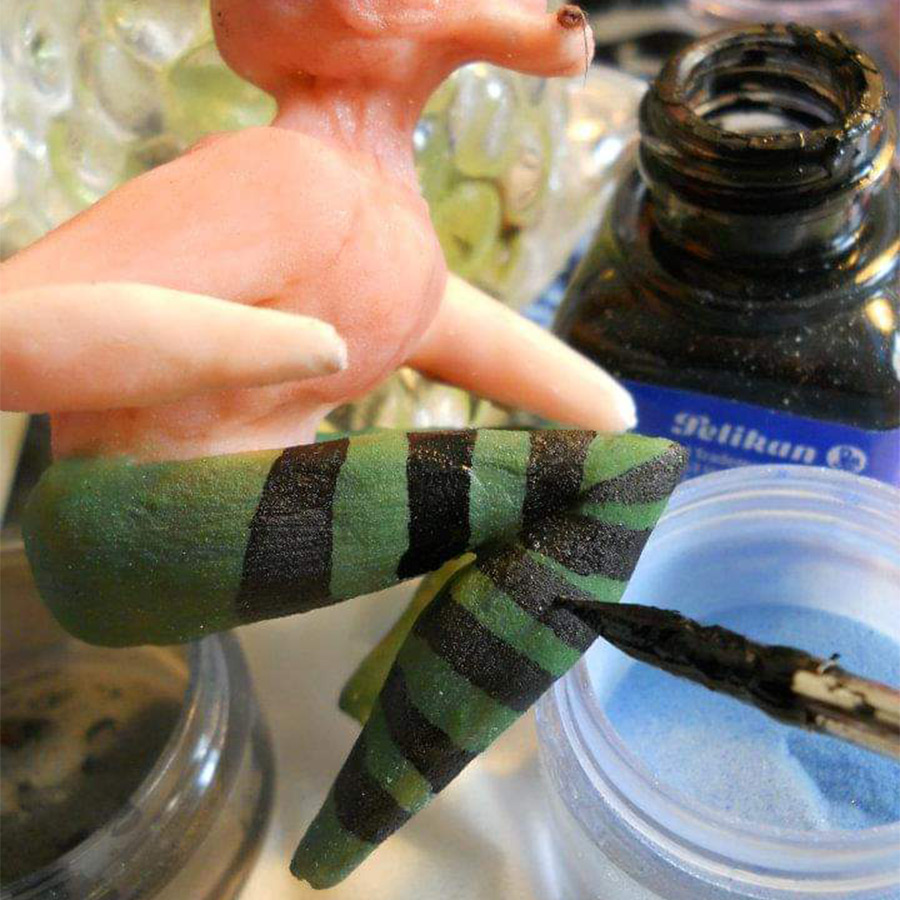
GlossaryLive Tag That Trend Milena Mingozzi The Witch Step 16

Create the black stripes of the stockings using black ink, a pen & brush.
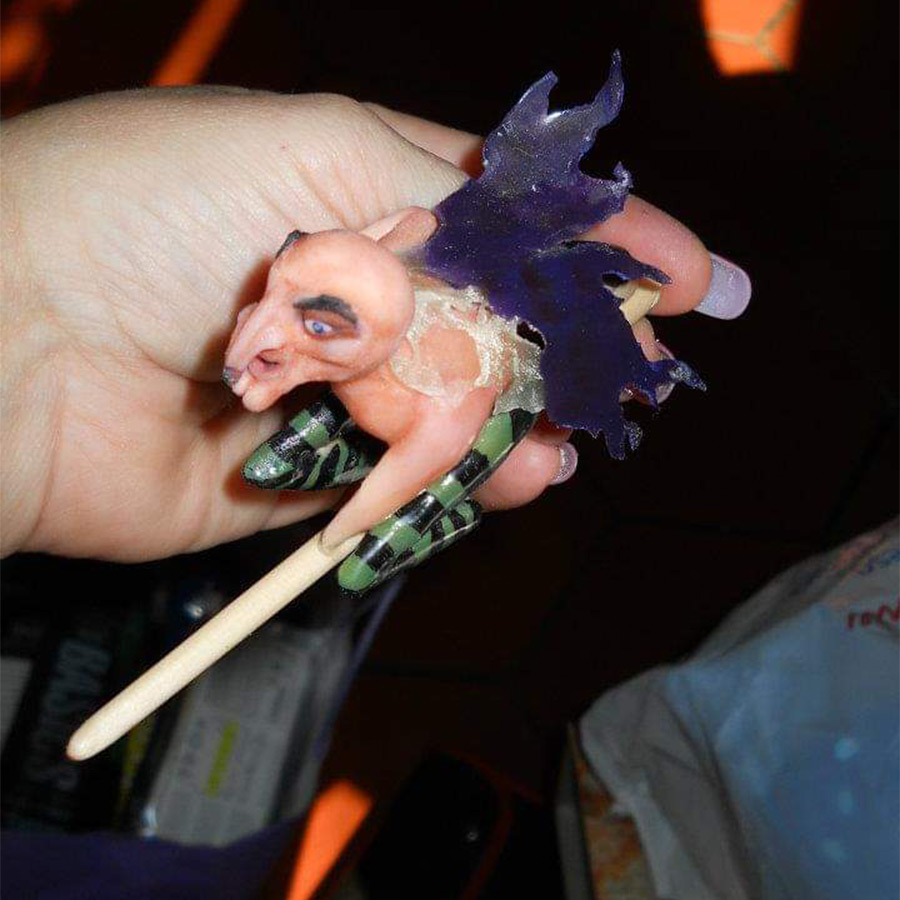
GlossaryLive Tag That Trend Milena Mingozzi The Witch Step 17

For the tailcoat to her cloak, take a wet bead of your chosen color & place it between two sheets of wax paper of the disused part of a nail form. Then use a roller to flatten & thin out the bead. Let it cure & then attach using an acrylic bead to the figurine.
GlossaryLive Tag That Trend Milena Mingozzi The Witch Step 18

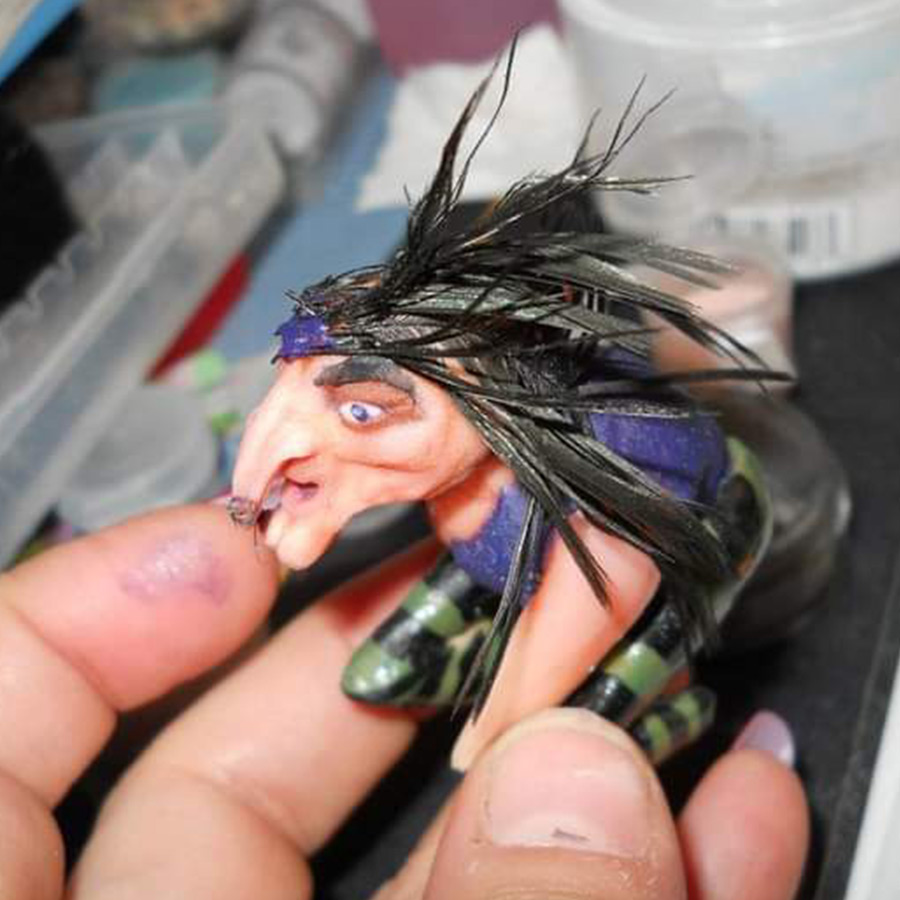
Add the hair using the filaments from a black raven bird’s feather. This was collected from Milena’s garden. “Nature gives us everything for our work & our imagination,” Milena cites.
GlossaryLive Tag That Trend Milena Mingozzi The Witch Step 19

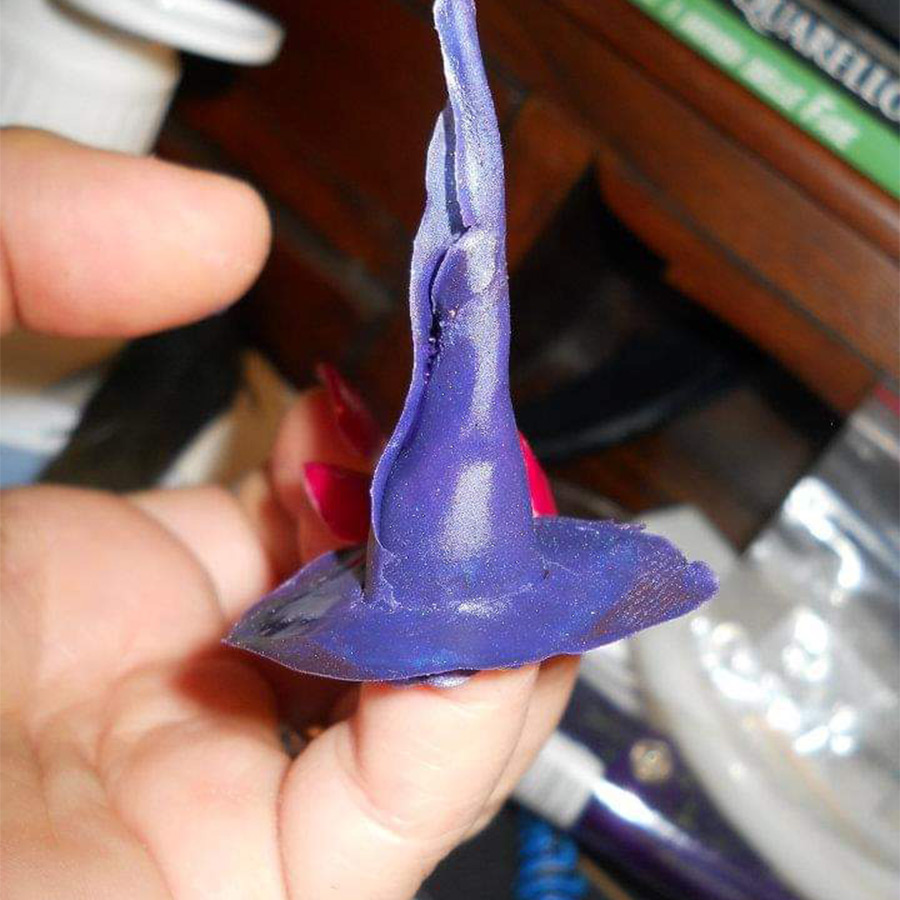
Use the same method as you used for the cloak to create a flat, thin piece of colored acrylic for her hat. Place this on your finger, use hot air if you need to make it softer, then fold it around your finger to create the shape of a hat.
GlossaryLive Tag That Trend Milena Mingozzi The Witch Step 20

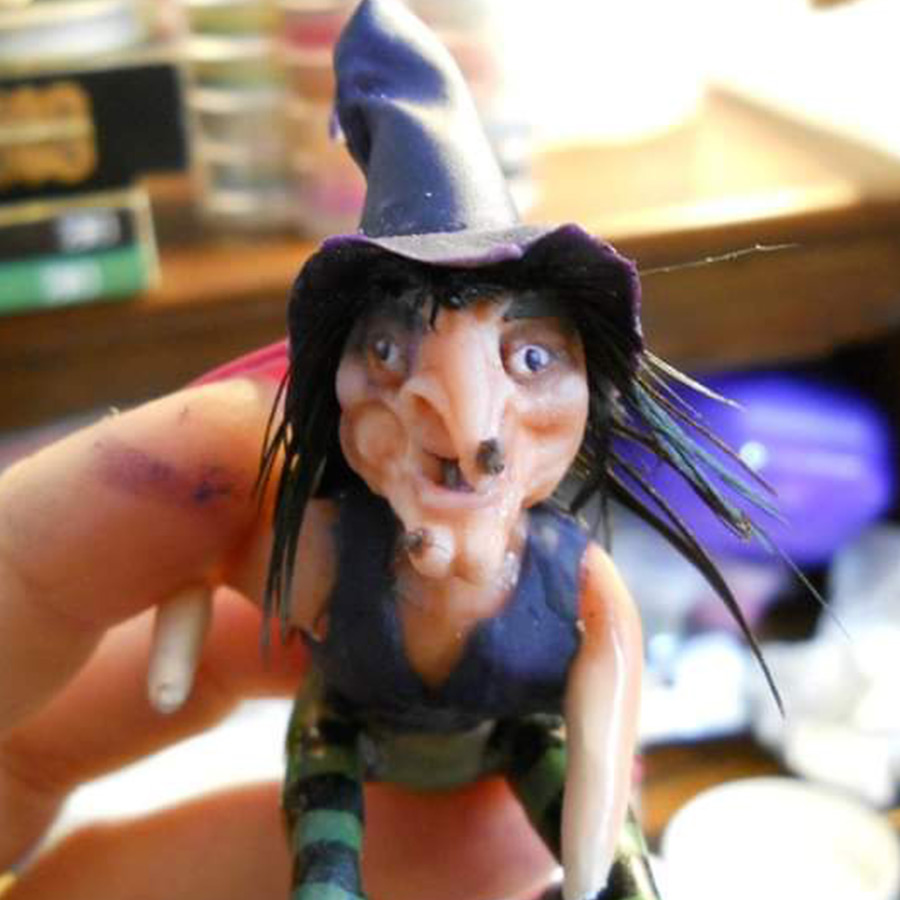
Using a small bead of acrylic pop the hat on her head to stabilize it.
GlossaryLive Tag That Trend Milena Mingozzi The Witch Step 21

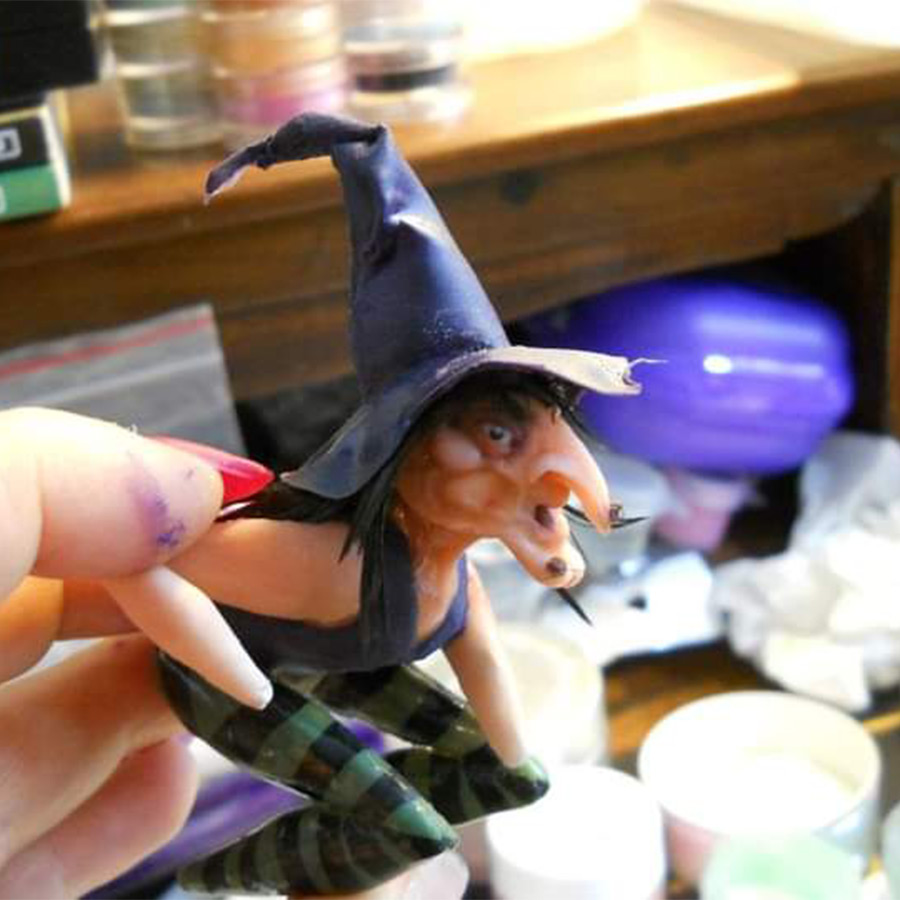
Before the hat cures, bend & shape it to make it look well worn.
GlossaryLive Tag That Trend Milena Mingozzi The Witch Step 22

To shape the fingers create tiny beads of skin-toned acrylic & create each single finger to look lumpy & boney, remembering to create bumps where her knuckles will sit. Sculpt each one with a tiny tool & micro beads of acrylic. Next sculpt her hands onto the end of the arms & attach each individual finger using a very small 3D brush.
GlossaryLive Tag That Trend Milena Mingozzi The Witch Step 23

Complete your witch by adding more of her cloak, her collar & then check her all over to add in any further details, color shading, shapes, shadows & highlights. You now have a witch, you just need to sculpt her broom!

Want to see your nail art featured on Tag That Trend? Our team is excited to see your work and get you published. Contact us for details.

MORE TAG THAT TREND

RELATED VIDEOS

MORE TO EXPLORE

GlossaryLive Tag That Trend Pinstriped Alisha Rimando

Pinstriped

tag that trend

Alisha Rimando

The light handling of a striper brush can create a very stylish nail design. Choose your palette of colors, using a very light pink as the base, then a few quick slicks of the striper brush brings this design to life quickly. Add an accent with the addition of some carefully placed crystals to complete the design.
UPGRADE TO PREMIUM TO VIEW TAG THAT TREND
HOW TO STEPS AND WORKBOOKS

Upgrade your account to access this Premium
How To and so much more educational content.

STEPS

GlossaryLive Tag That Trend Pinstriped Step 1

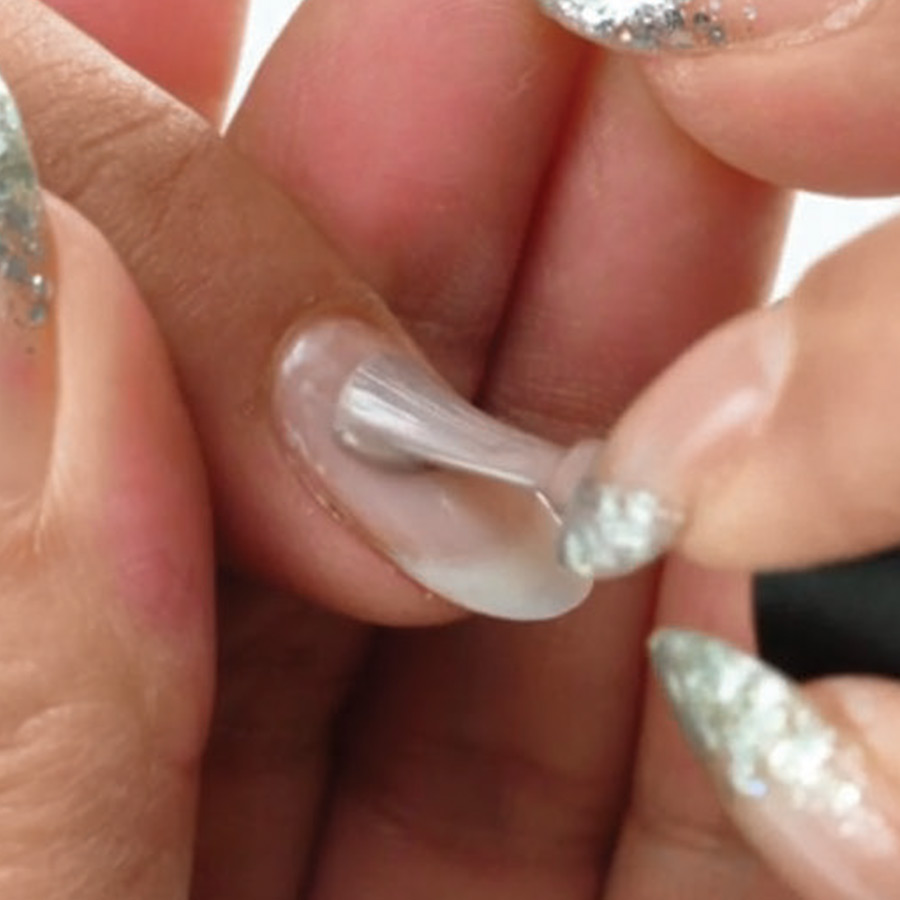
After proper nail prep, apply a thin coat of Bonding Gel, cure for 5-seconds in LED light, Cure for 30-seconds in LED Light or 2-minutes in UV. Apply a thin coat of Oh Crepe, making sure to cap the free edge. Cure for 30-seconds, then repeat.
GlossaryLive Tag That Trend Pinstriped Step 2

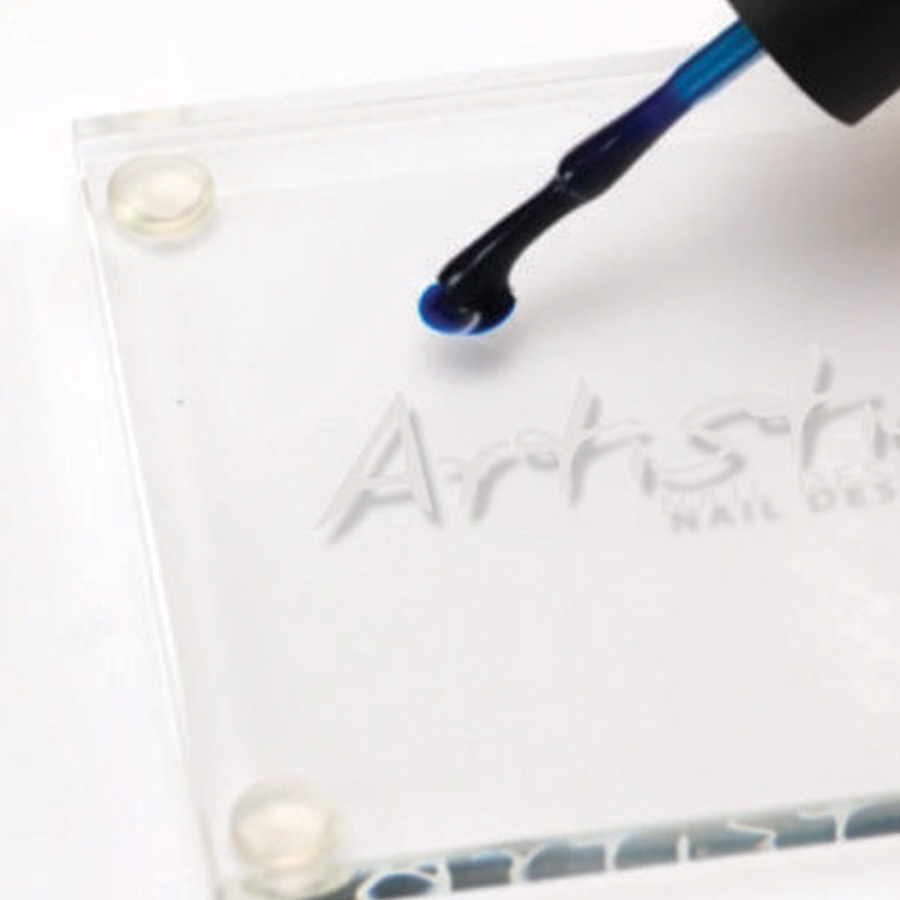
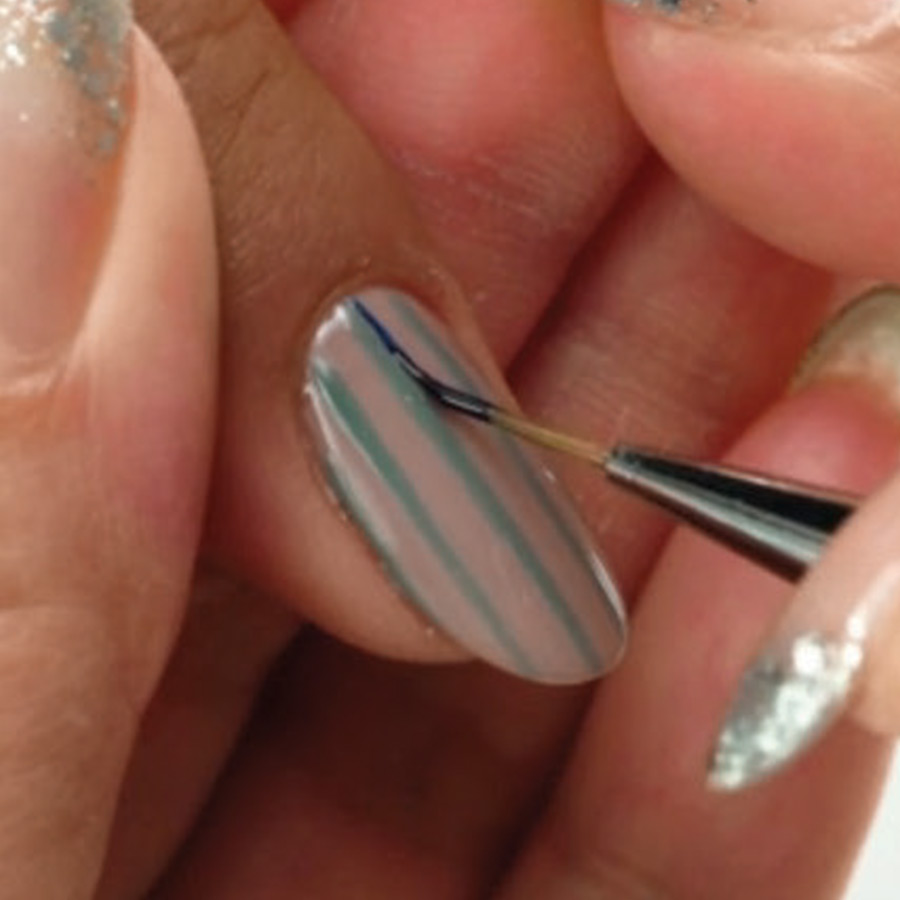
Apply two drops of Serving Up Sass & Wok & Roll On Baby on the Artistic glass palette.
GlossaryLive Tag That Trend Pinstriped Step 3

Using Artistic Striper Brush, apply Serving Up Sass & create four straight lines to the right of the Wok & Roll Baby lines.
GlossaryLive Tag That Trend Pinstriped Step 4

Cure for 30-seconds in LED Light or 2-minutes in UV.
GlossaryLive Tag That Trend Pinstriped Step 5

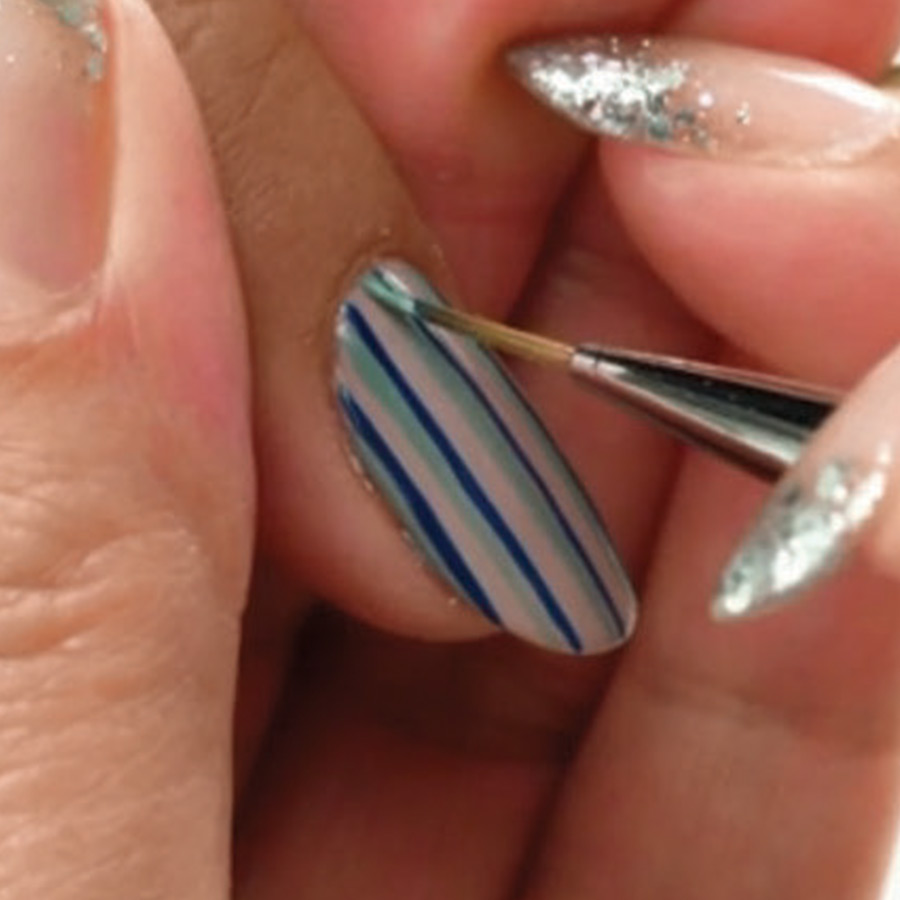
Repeat steps to perfect your lines & repeat twice on top of the lines. Cure for 30-seconds.
GlossaryLive Tag That Trend Pinstriped Step 6

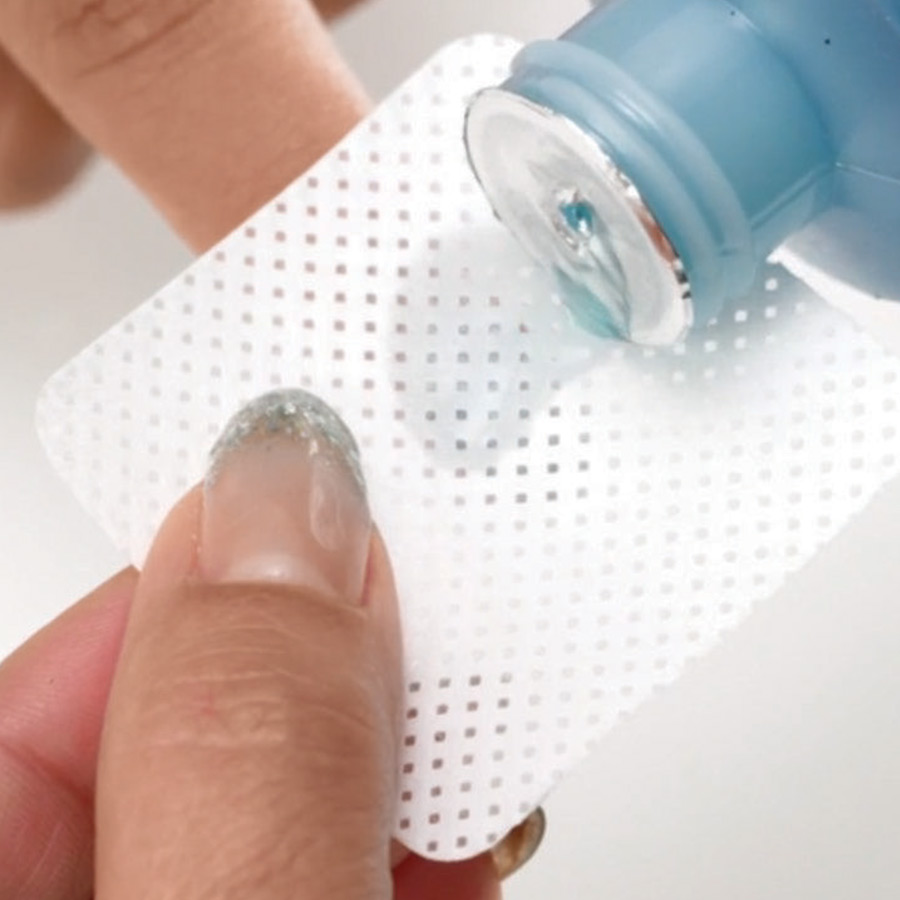
Use Nail Surface Cleanser & a lint-free wipe to cleanse the inhibition layer of the nail.
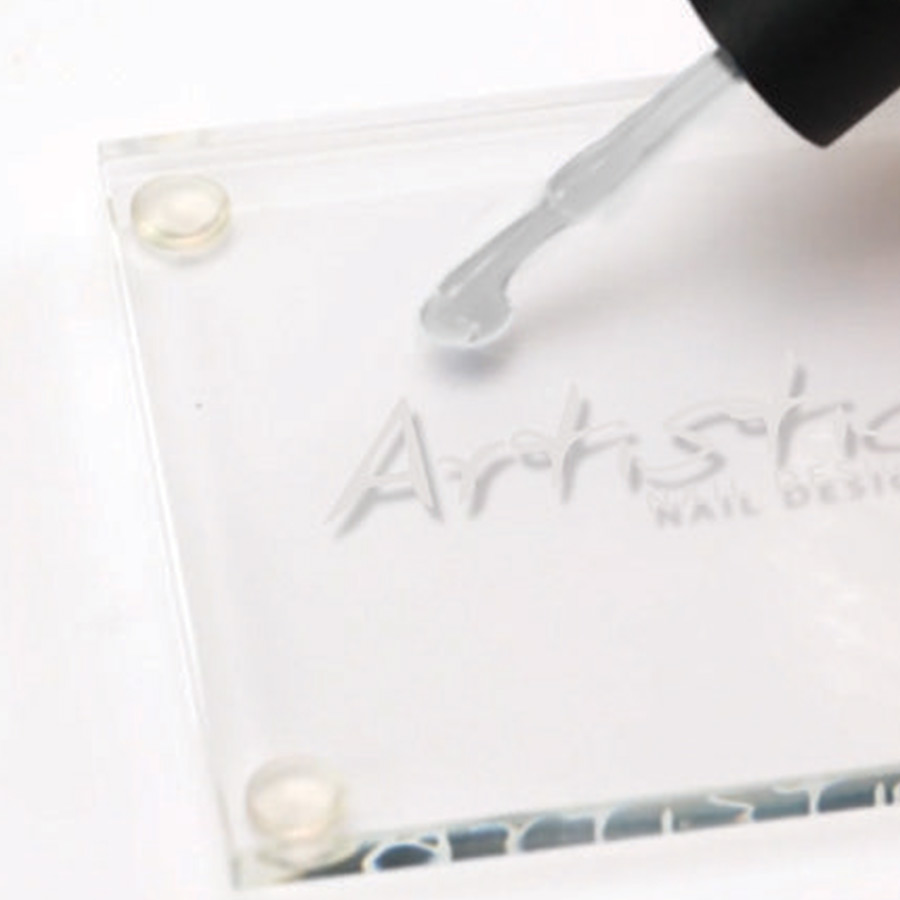
GlossaryLive Tag That Trend Pinstriped Step 7

Apply a drop of Bonding Gel to the Artistic glass palette.
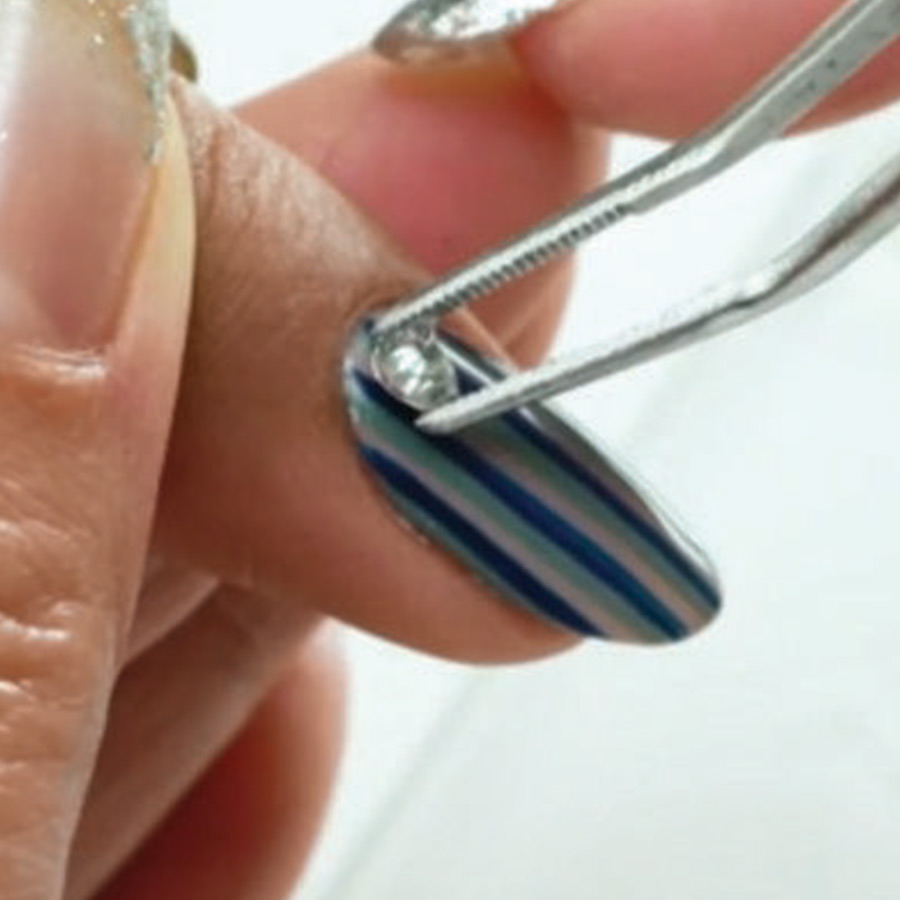
GlossaryLive Tag That Trend Pinstriped Step 8

Using Sani Tongs, apply large stones/diamonds to the base of the nail while using Bonding Gel as the adhesive. Cure for 30-seconds.
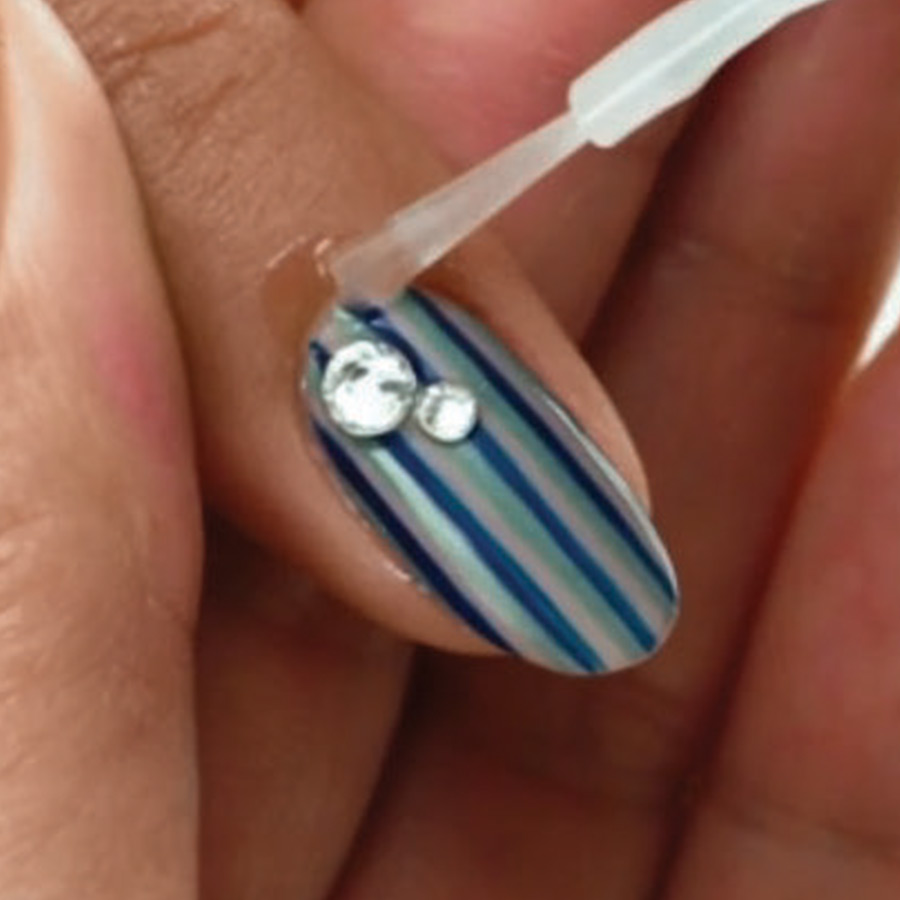
GlossaryLive Tag That Trend Pinstriped Step 9

Apply Revive Cuticle Oil & massage into the nail & surrounding skin to finish.

Want to see your nail art featured on Tag That Trend? Our team is excited to see your work and get you published. Contact us for details.

MORE TAG THAT TREND

RELATED VIDEOS

MORE TO EXPLORE

GlossaryLive Freestyle Nail Art Juicy Melon Anastasiia Morozova

Juicy Melon

Juicy Melon

Multi-champion nail artist from Ukraine, Anastasiia Morozova, shares her refreshing and bright melon design that features a gel effect giving the illusion of the melon's juice sliding off the nail.

UP NEXT ON FREE STYLE NAIL ART

RELATED VIDEOS

MORE TO EXPLORE