Cosmoprof North America
![]()
Cosmoprof North America
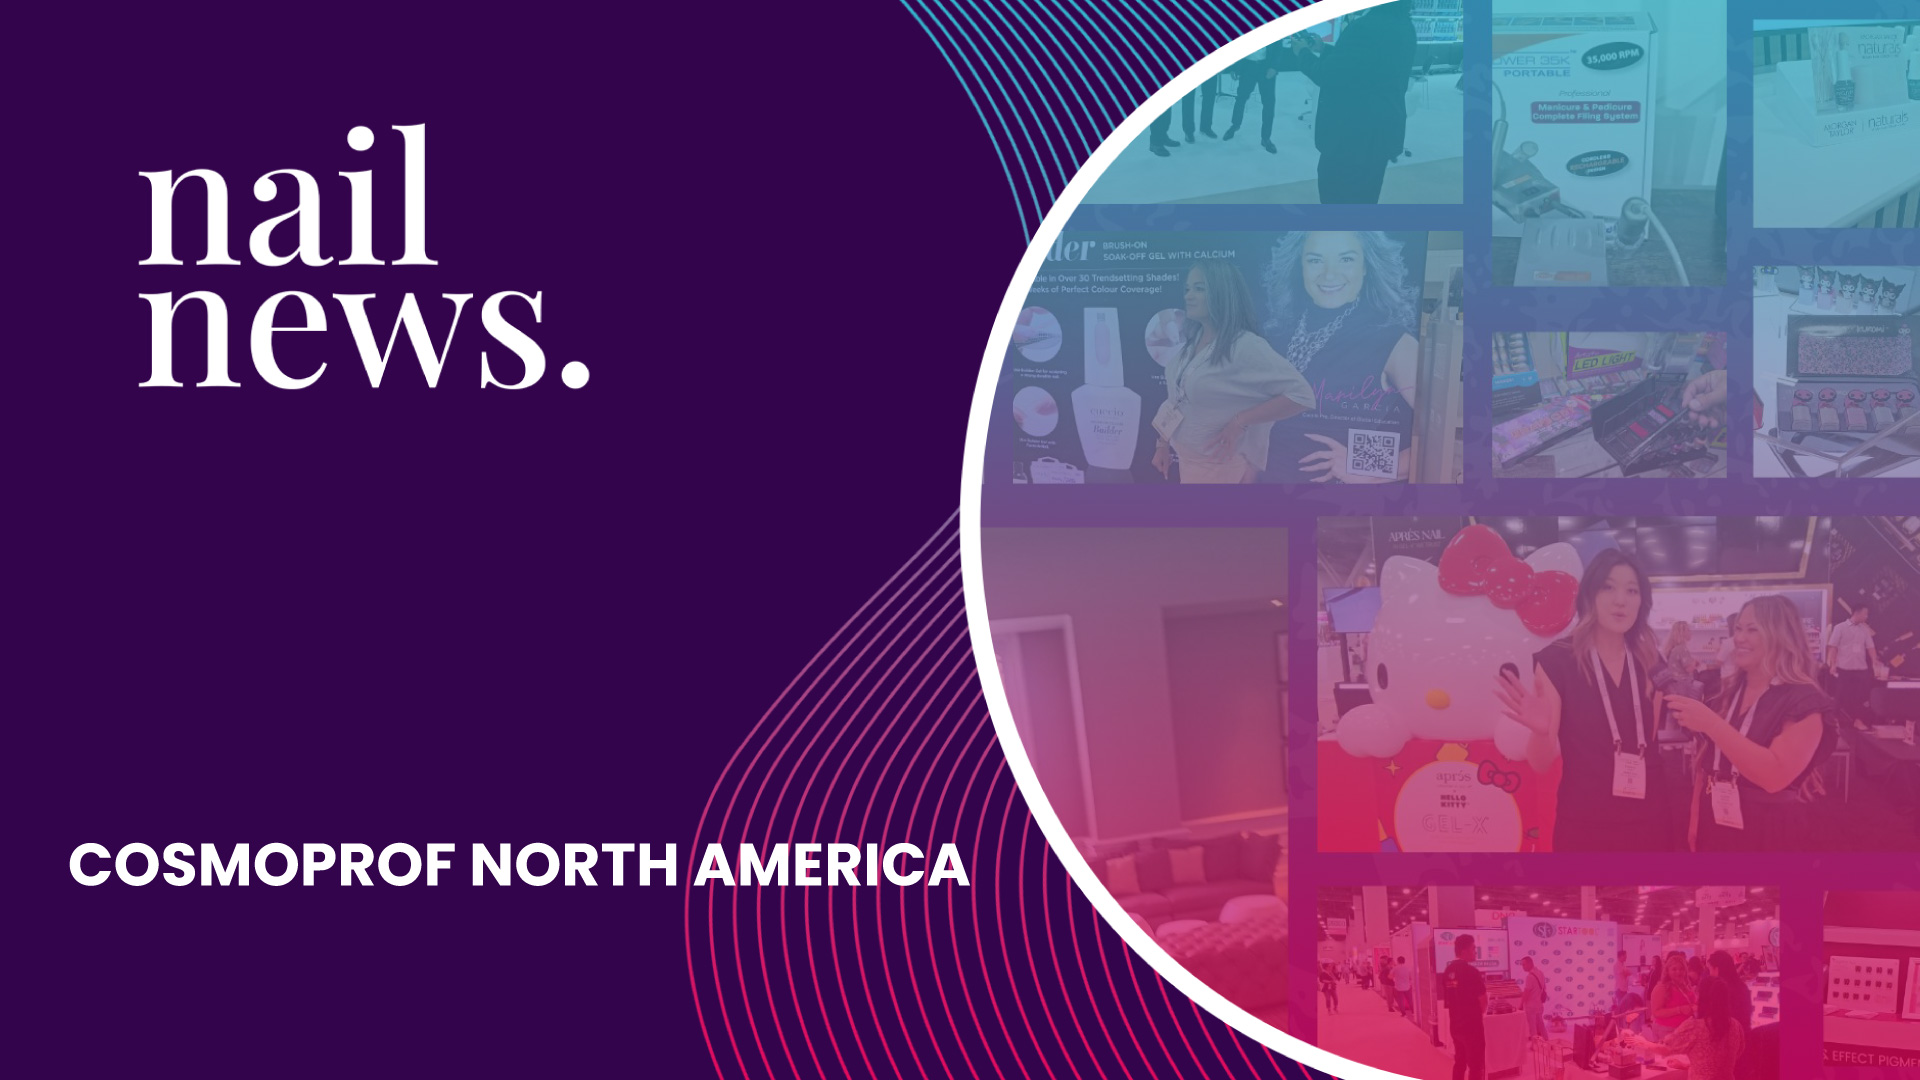
Stay ahead of the curve with Nail News from Cosmoprof North America and get a sneak peak the newest nail products launching in 2024! This exclusive video features insightful interviews with top industry brands like Gelish, Cuccio Professional, and KUPA Inc. Learn about the latest innovations and state-of-the-art tools and materials, that will soon be available in salons worldwide. You’ll get an insider’s look at what’s trending and what’s set to revolutionize the nail industry.
We also highlight the special moment when Richard Hurter of KUPA Inc. was presented with a gold-plated MANIPro Passport e-file, celebrating KUPA’s 40th anniversary. This video is a treasure trove of information for nail artists, salon owners, and beauty enthusiasts eager to stay updated on the industry’s cutting-edge developments. Don’t miss this opportunity to be in the know and ahead of your competition. Watch now and get inspired for the year ahead!
SEE MORE NAIL NEWS
RELATED VIDEOS
MORE TO EXPLORE
Spring Nail Art Blooms Upward
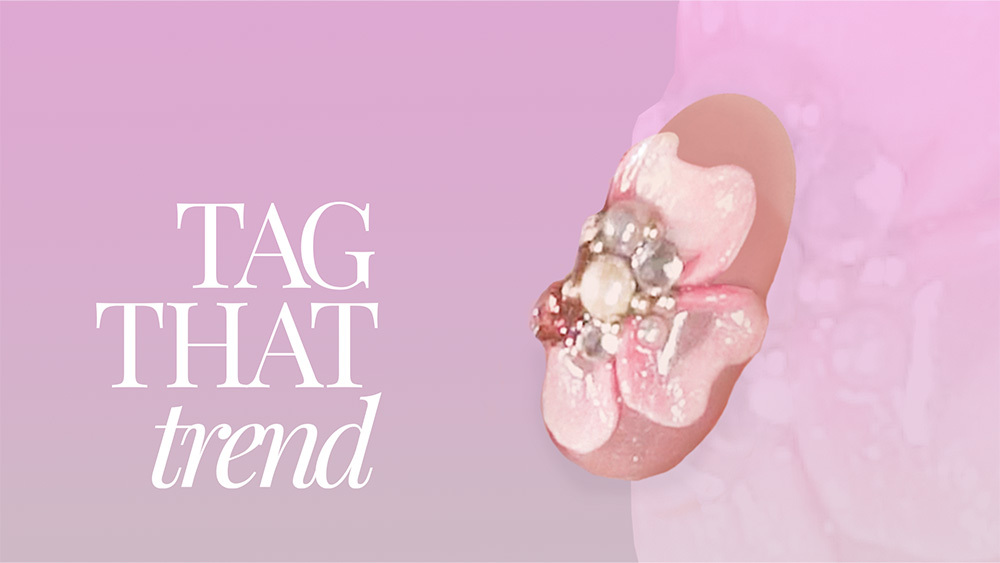
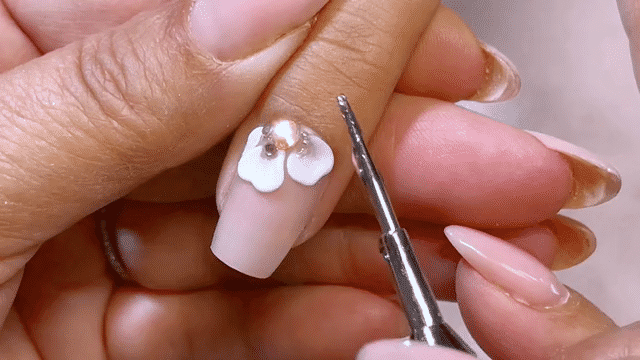
TAG THAT TREND
Nail art tutorial proves 3D looks can be quick and lucrative.
Article by Alisha Rimando | Published in 2024
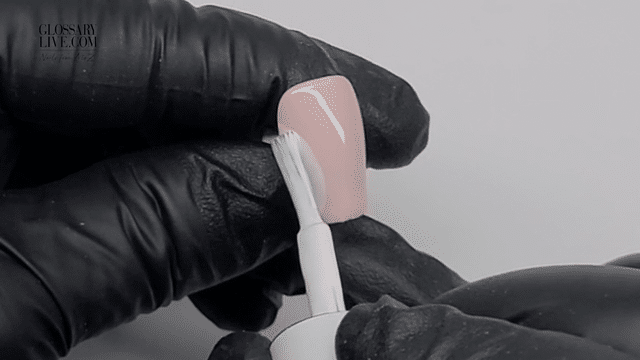
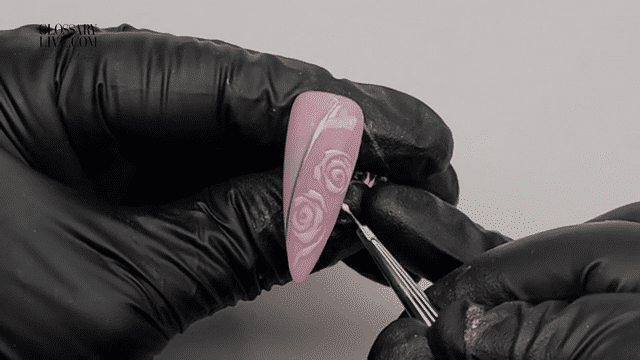
Spring has finally arrived making way for floral nail designs and soft color palettes. For nail artists seeking something different to offer, journey into the vibrant world of mixed media nail art with the enticing allure of a simple yet captivating 3D flower design. If you’ve never tried mixed media nail art using acrylic or acrygel systems, you’re in for a delightful surprise at how swiftly you can master this innovative technique. The key lies in the expert guidance of none other than world champion nail artist, Alisha Rimando. Known for her skill and creativity in acrylic medium, Alisha has crafted a step-by-step tutorial that demystifies the process, making 3D designs accessible even to those new to mixed media nail art.
Alisha Rimando’s tutorial not only promises a visually stunning result but also ensures a smooth and uncomplicated learning curve. By breaking down the 3D flower design into tangible stages, she eliminates the intimidation often associated with venturing into the world of three-dimensional nail art. Each step is carefully explained, allowing enthusiasts to follow along effortlessly, regardless of their prior experience. Alisha’s thoughtful approach transforms the intricate into the achievable, making this tutorial a must-try for anyone ready to elevate their nail art skills and all newcomers eager to delve into the world of mixed media nail art. With a little bit of practice this 3D design can be accomplished in minutes. So, feel free to upgrade your spring nail services with this impressive 3D look.
Learn the Step-by-Step & Download Workbook
Foundation of Nail Structure
UP NEXT
![]()
![]()
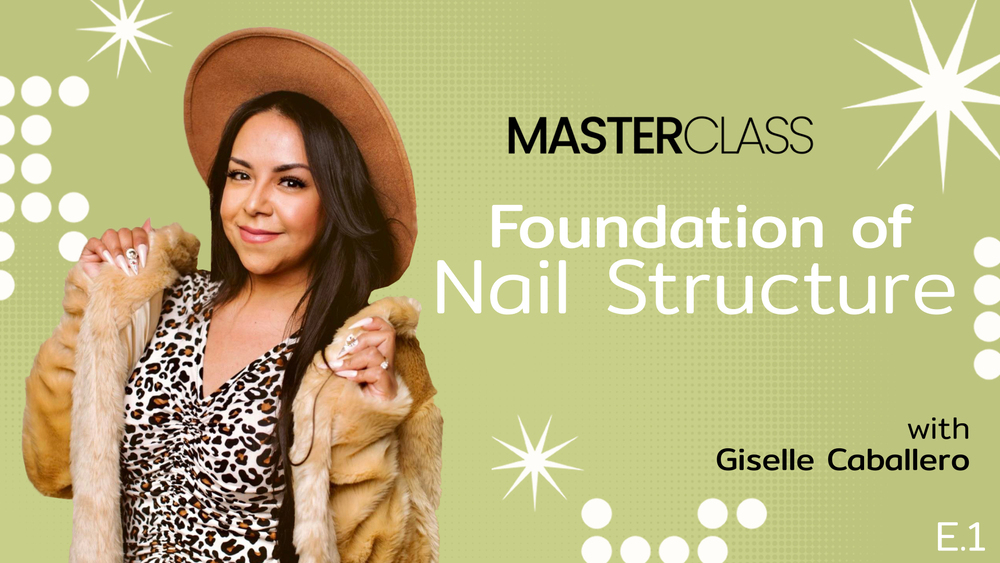
Foundation of Nail Structure
Correct nail form fitting is essential when sculpting any shaped nail using hard gel, acrygel, or liquid and powder. In this episode learn how to carefully assess the nail form to fit both width and length too, in order to create a perfectly straight nail extension. Nail forms not placed correctly can result in product seepage under the nail, if you aren’t following the curvature of the natural nail. Let Giselle Cabellero explain perfectly how to measure and cut forms for the perfect nail form fit every time.

SEE MORE MASTER CLASS
RELATED VIDEOS
MORE TO EXPLORE
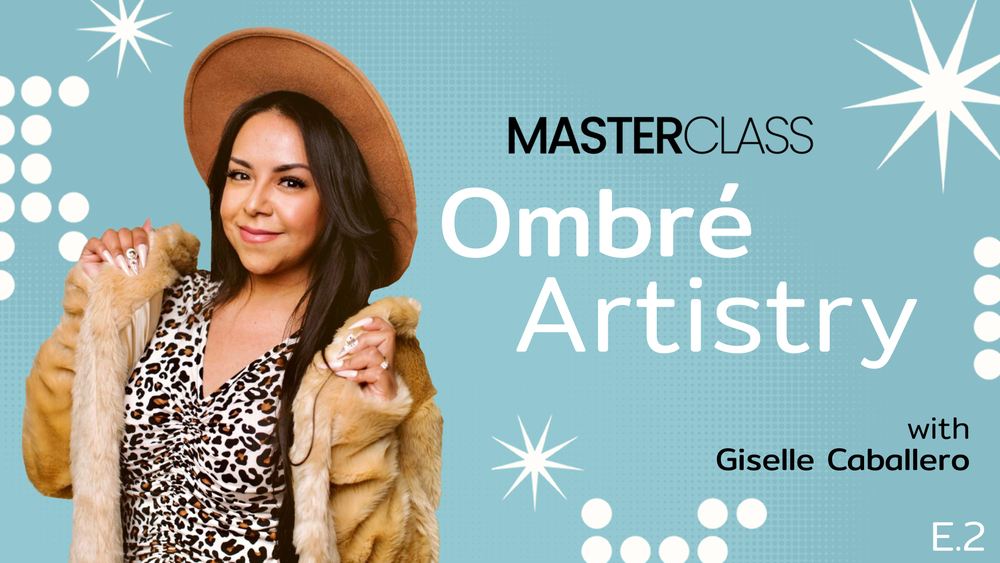
Ombré Artistry
UP NEXT
![]()
![]()
Ombré Artistry
The ombré French, also known as the baby boomber nail or French fade, is a stylish nail design where the white tip blends into the back of the nail and merges into the pink. Creating this design is quite straightforward when working with liquid & powder beads, however it can be tricky when using the UV gel system. Fortunately there are two ways to solve this situation. In this Master Class, Giselle shares both her sponging and airbrushing techniques for the creation of a bouncing baby boomer nail.
SEE MORE MASTER CLASS
RELATED VIDEOS
MORE TO EXPLORE

Next Level Nail Art
UP NEXT
![]()
![]()
Next Level Nail Art
Maximizing your time during a nail appointment while creating exciting designs can be challenging if you’re not prepared. Giselle Caballero recommends planning ahead to help guide your nail art structure and pricing plan in order to produce unique and dynamic sets of nails, with some incorporating mixed media to increase revenue and boost your business. If thinking of new art and exciting nail art designs can be stressful at times, let Giselle Caballero showcase her effective and stunning art ideas for your salon clientele.
SEE MORE MASTER CLASS
RELATED VIDEOS
MORE TO EXPLORE
Q&A with Giselle Caballero
UP NEXT
![]()
![]()
Q&A with Giselle Caballero
Join Alex Fox & Giselle Caballero for a Live Q&A on the GlossaryLive Facebook page at 10am (PST) & 6pm (UK) on Monday 12 June 2023. If you want to join the conversation and connect with Giselle in person, then join using this Zoom link ID: 836 1832 4641 Passcode: 746990
SEE MORE MASTER CLASS
RELATED VIDEOS
MORE TO EXPLORE
test tool tip
What it is: A term used to a identify any nail file or buffer. Its abrasiveness is determined by its grit.
How to use it: Use nail abrasives to shorten, shape or smooth natural nails and nail enhancements.
How to store it: In a covered or sealed container.
How to disinfect: Abrasives made from paper or sand cannot be disinfected and therefore can only be used on one client. Abrasives made of plastic or metal can be disinfected by a spray sanitizer or immersed in antiseptic. Check the manufacturer’s directions for proper sanitation techniques
Beauterra - The Ultimate Beauty Companion
NEWSWORTHY
Unlocking & Exploring the Beauty Universe Inside The Beauterra App
ARTICLE BY ALEX FOX| PUBLISHED IN 2024
Are you a beauty professional looking to streamline your booking process and expand your client base? Or perhaps you’re a client seeking a hassle-free way to book appointments with top-notch beauty experts? Look no further than Beauterra – the revolutionary new app designed to simplify communication and booking between beauty artists/aestheticians and clients.
Launched on September 4, 2023, Beauterra is a free-to-use platform that caters to a wide range of beauty services, including nail, hair, barbering, brows, lashes, make-up, massage, and aesthetics. Whether you’re a seasoned pro or a newcomer in the industry, Beauterra offers a seamless experience for both parties.
For beauty professionals, listing services and appointment times is a breeze. Simply download the app, register with your expertise, provide your business address, or specify mobile services and covered areas. Once registered, you can easily manage your availability through the integrated calendar, importable from your smartphone’s calendar app. Additionally, you can showcase your work through photos, allowing clients to explore your styles and offerings before booking.
“The listings and bookings calendar reduces the need for multiple apps and simplifies the experience for both artists and clients,” says Natalie Lomakina, the visionary behind Beauterra. Natalie’s personal struggle to find a reliable nail artist inspired her to create a platform that connects clients with independent beauty professionals seamlessly.
Development for Beauterra began in May 2023, with Natalie, joined by co-founder Andreea Simona Ignat, an award-winning nail artist, and Valery Ponomarenko, a seasoned mobile app developer. Together, they envisioned a platform that caters to the diverse needs of both beauty professionals and clients.
Beauterra not only simplifies the booking process but also prioritizes user experience. Clients can easily browse through a list of beauty professionals, check their availability, and make bookings with just a few taps. The app also includes a client rating system, allowing users to leave feedback for fellow professionals.
“With Beauterra, we aim to create a beauty universe where every enthusiast – pro or client – can fulfil their beauty and wellbeing goals via a single app,” cites Natalie.
But Beauterra doesn’t stop there. The team behind the app is constantly innovating, with plans to introduce new features such as auto-booking, salon bookings, subscription services, and the ability to buy and sell courses all coming soon to the platform. Beauterra is not just an app; it’s a comprehensive solution that revolutionizes the beauty industry.
So whether you’re a beauty professional looking to expand your clientele or a client seeking top-tier beauty services, download Beauterra today and experience the future of beauty booking. Say goodbye to tedious booking processes and hello to a world of beauty at your fingertips.
From Red Carpet to Fingertips
STYLE FILES
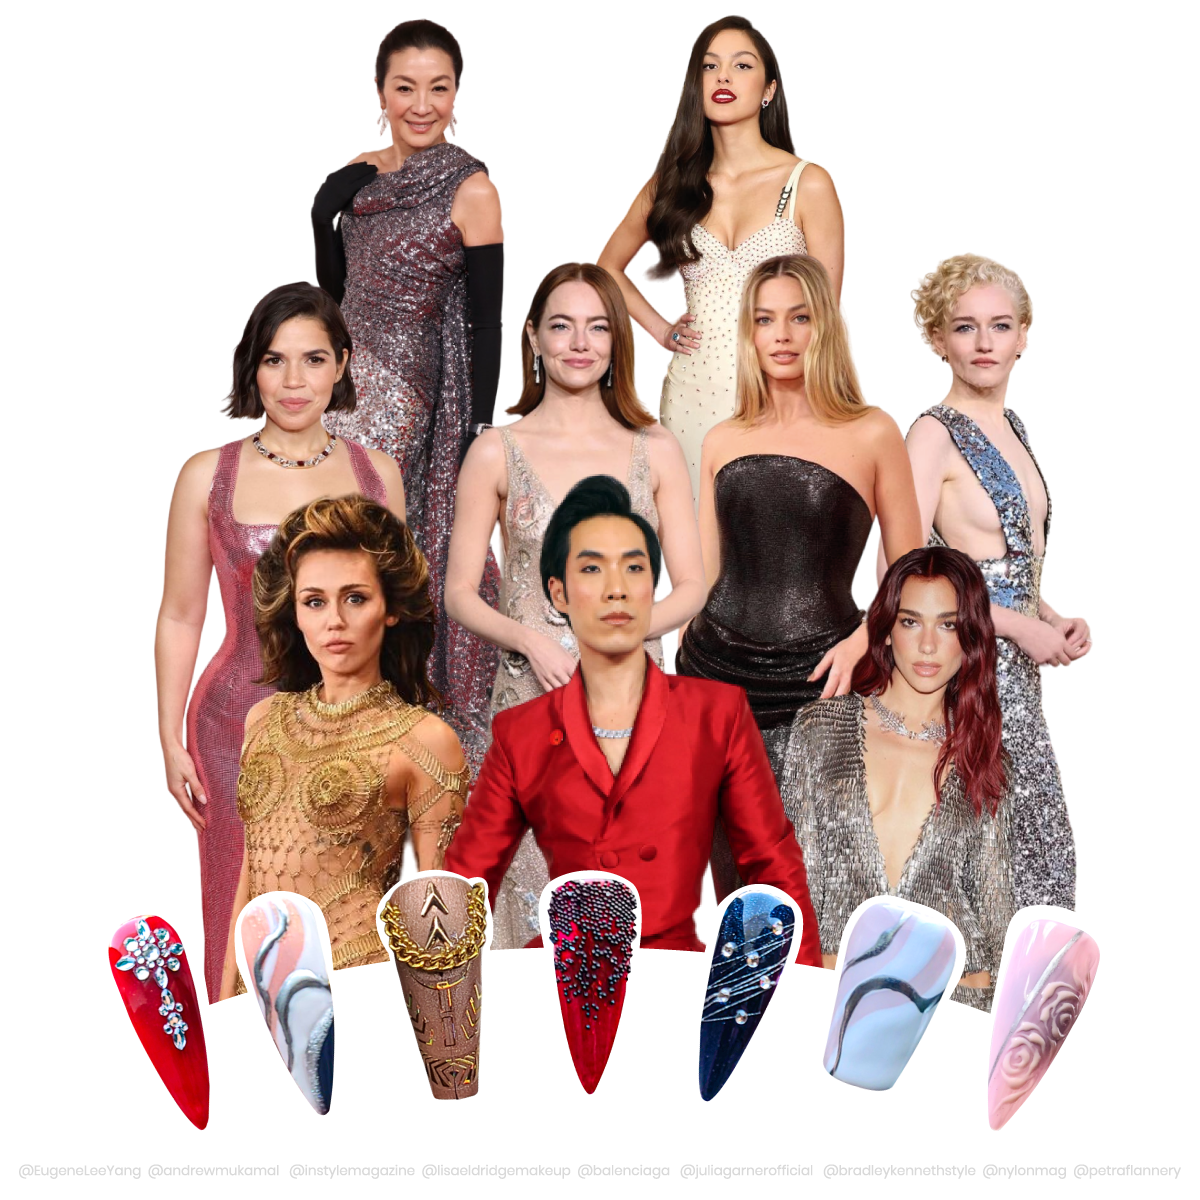
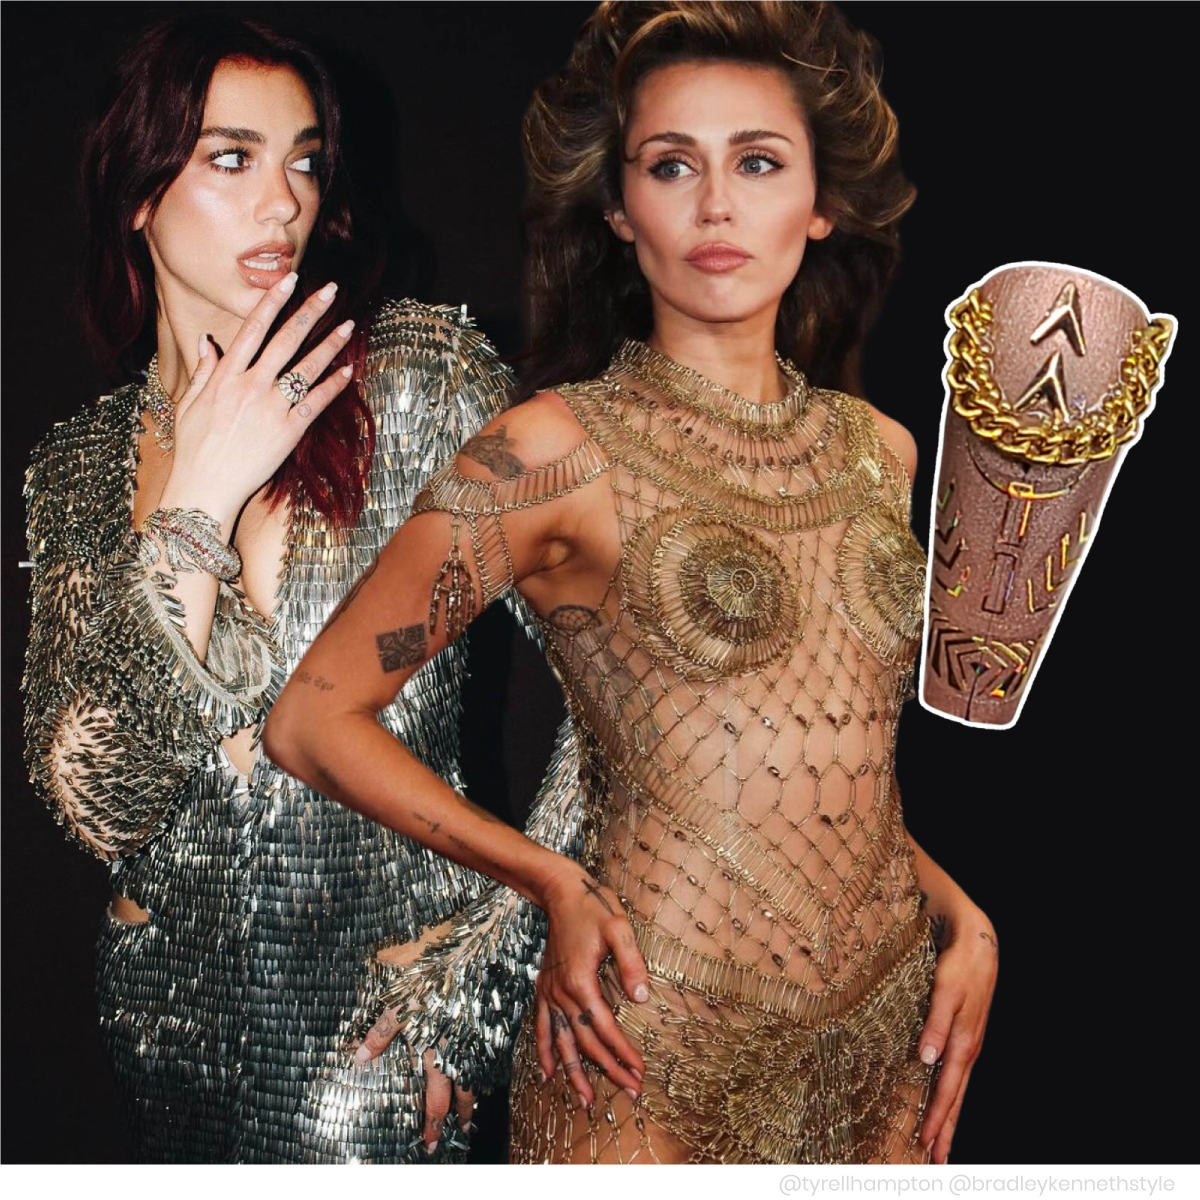
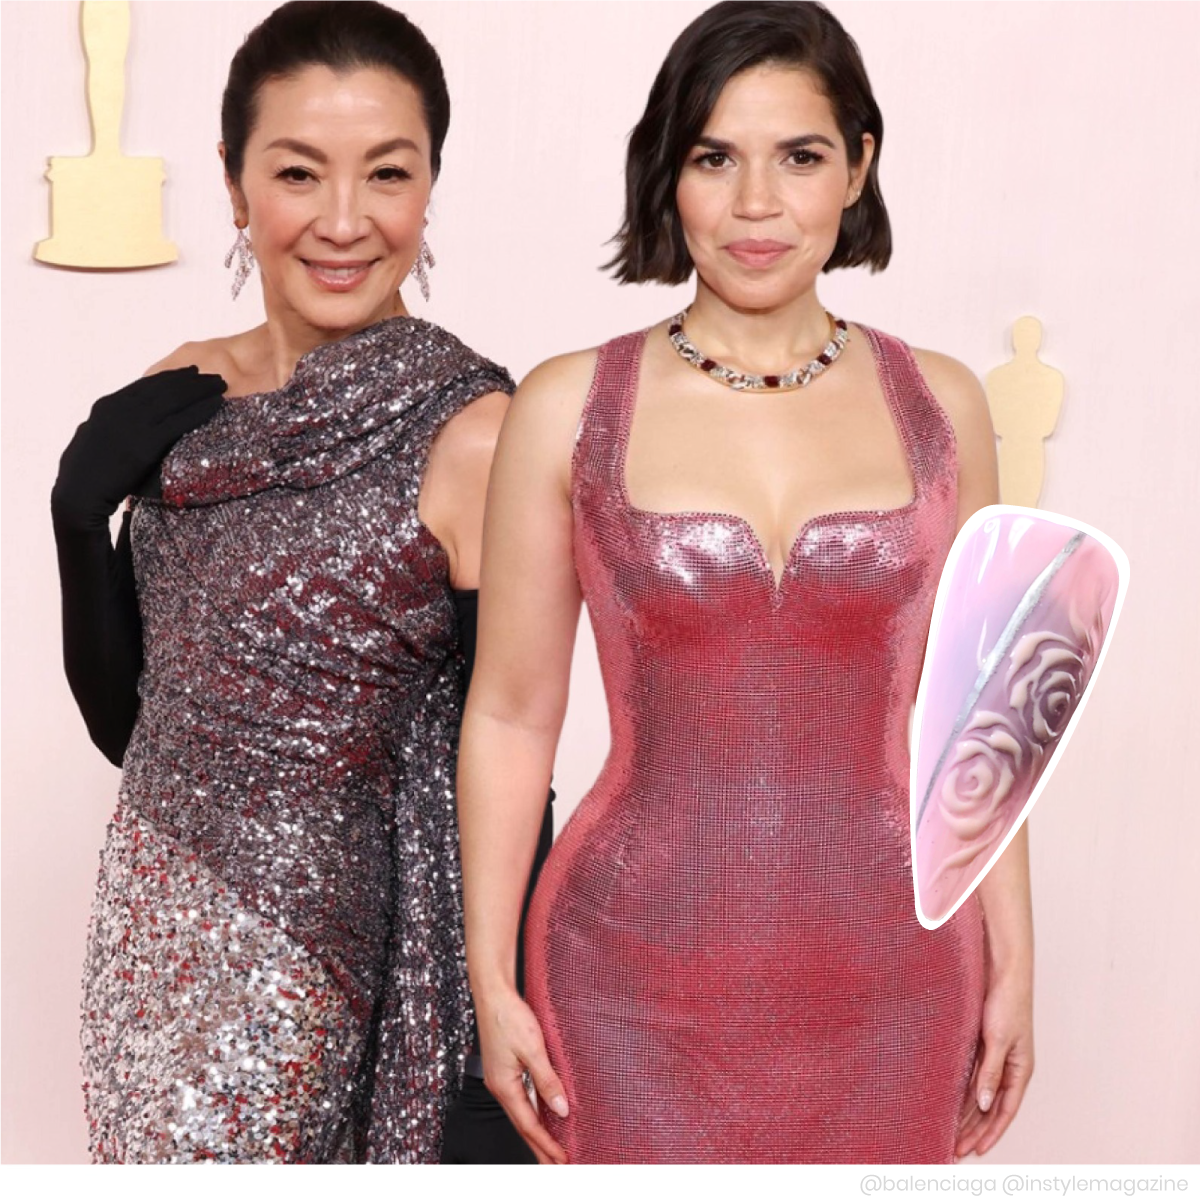
Embracing the Metal and Chain Fashion Trend in Nail Art
ARTICLE BY ALISHA RIMANDO | PUBLISHED IN 2024
The 2024 awards season was not just a showcase of cinematic excellence and musical talent; it also served as a platform for the emergence of a bold and captivating fashion trend: metal and chains. From the glitz and glamour of the Golden Globes to the high-energy spectacle of the Grammy Awards and the iconic elegance of the Oscars, the red carpet became a runway for celebrities to showcase their innovative interpretations of this trend. As the trend continues to captivate fashion enthusiasts worldwide, it’s only natural for GlossaryLive to explore how it translates into other realms of nail art styling.
At the Golden Globes, Hollywood’s elite dazzled audiences with their avant-garde interpretations of the metallic trend. Gowns adorned in metallic sequins and mesh with intricate metal details set the stage for a night of opulence and glamour. Inspired by these elegant displays, GlossaryLive’s resident nail artist Aigul Fritzke incorporated metallic accents onto soft nude and white nail designs for a more conservative complement to the metallic nod.
The Grammy Awards, known for its celebration of creativity and individuality, provided the perfect backdrop for musicians and performers to push the boundaries of fashion. Artists embraced the metal and chain trend with enthusiasm, incorporating silver metallic looks from head to toe and donning edgy chain ensembles revealing almost all. Taking cues from these daring looks, we experimented with metallic gel polishes and chain accents to create a haute couture design that reflected the fearless spirit of Miley Cyrus at the Grammy Awards.

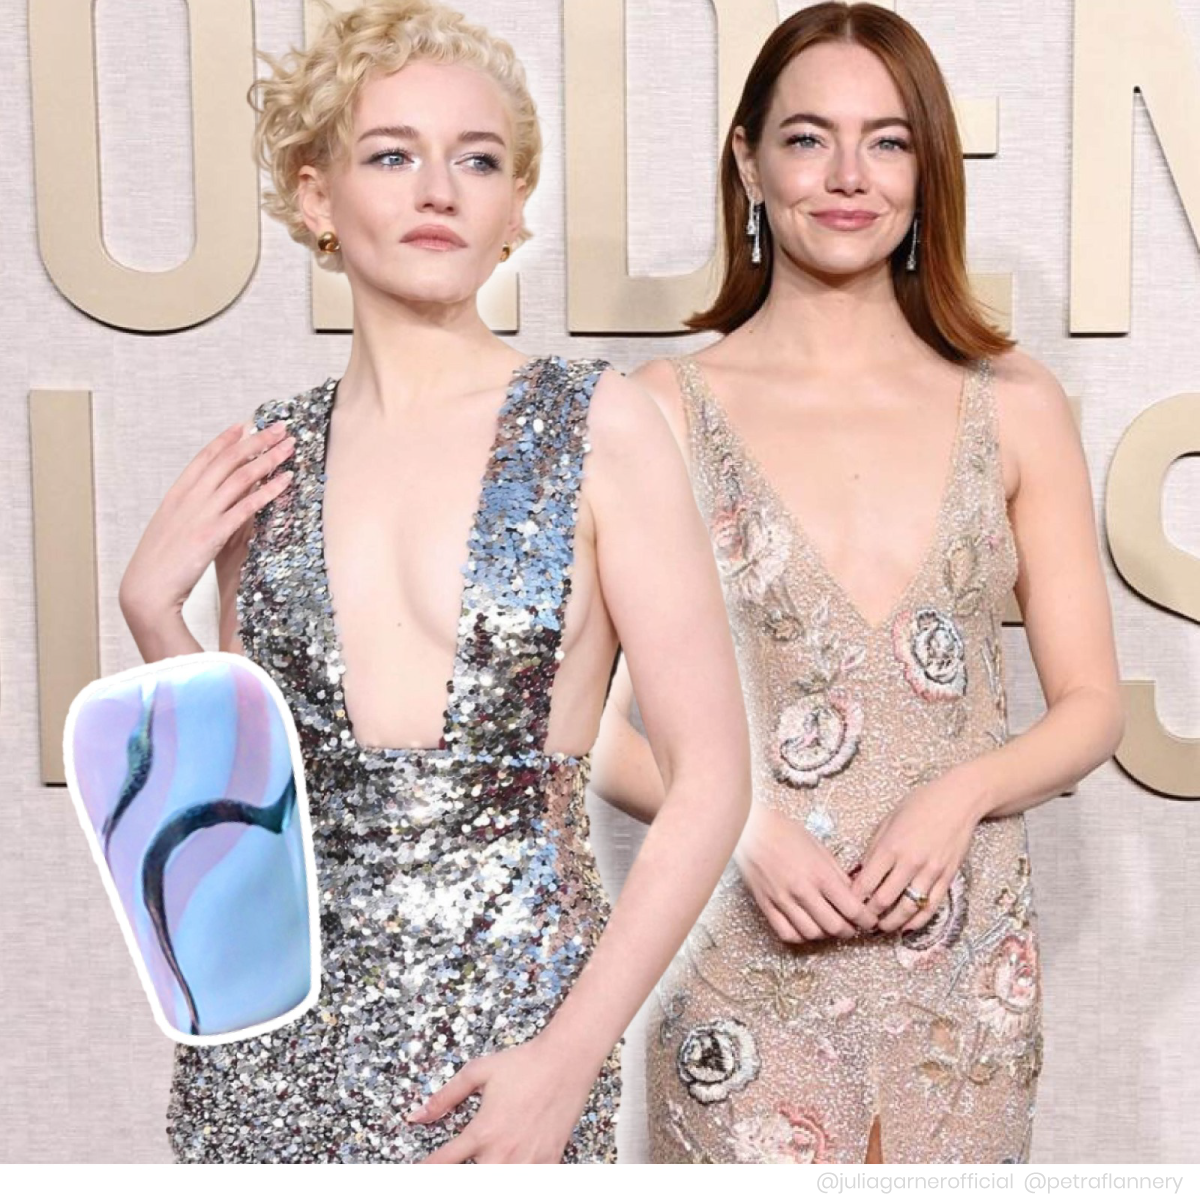
As the awards season culminated in the prestigious Oscars ceremony, the metal and chain trend reached new heights of sophistication and elegance. Hollywood’s leading ladies graced the red carpet in reflective couture creations to continue the metallic movement. Inspired by the delicate feminine hue of America Ferrera’s sequined gown GlossaryLive created a romantic rosette nail look to compliment the timeless glamour of the Oscars red carpet.
For those looking to incorporate the metal and chain trend into their nail art repertoire, there are countless ways to experiment and express creativity. Consider using metallic nail polishes in shades of gold, silver, and bronze to achieve a luxe, reflective finish. Add dimension and texture with metallic foils, studs, and chains, layering them over gel polish or chrome for a multi-dimensional effect. Experiment with chain accents along the cuticle or tips for a modern twist on classic colors.
Whether you’re channeling the glamour of the Golden Globes, the edgy energy of the Grammy Awards, or the timeless elegance of the Oscars, embracing the metal and chain trend in nail art allows your clients to make a bold statement and express their individual style. So why not take inspiration from the red carpet and let your nail looks steal the spotlight? With a little creativity and a touch of metallic flair, you can elevate your nail services to red carpet-worthy status and shine bright like a Hollywood star.