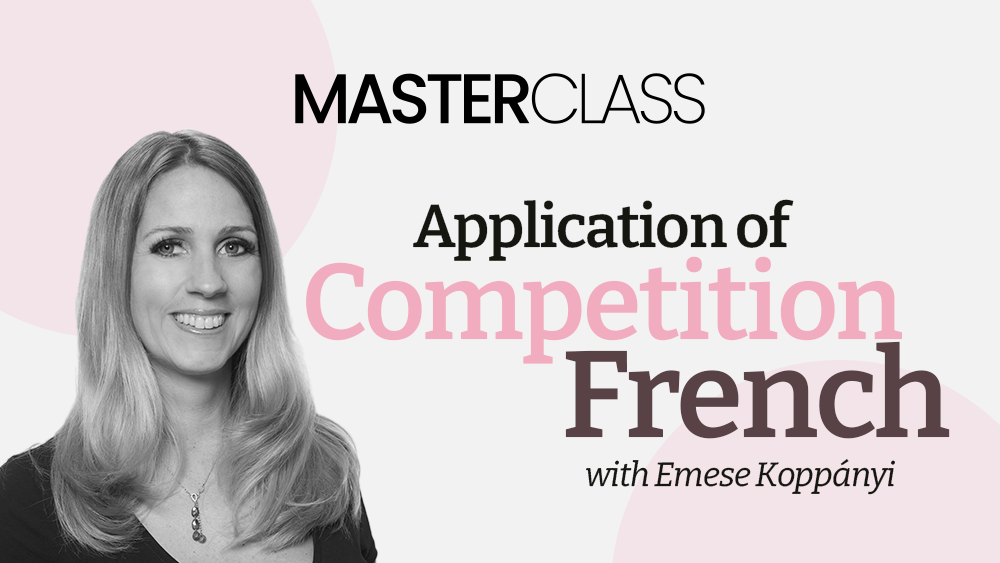
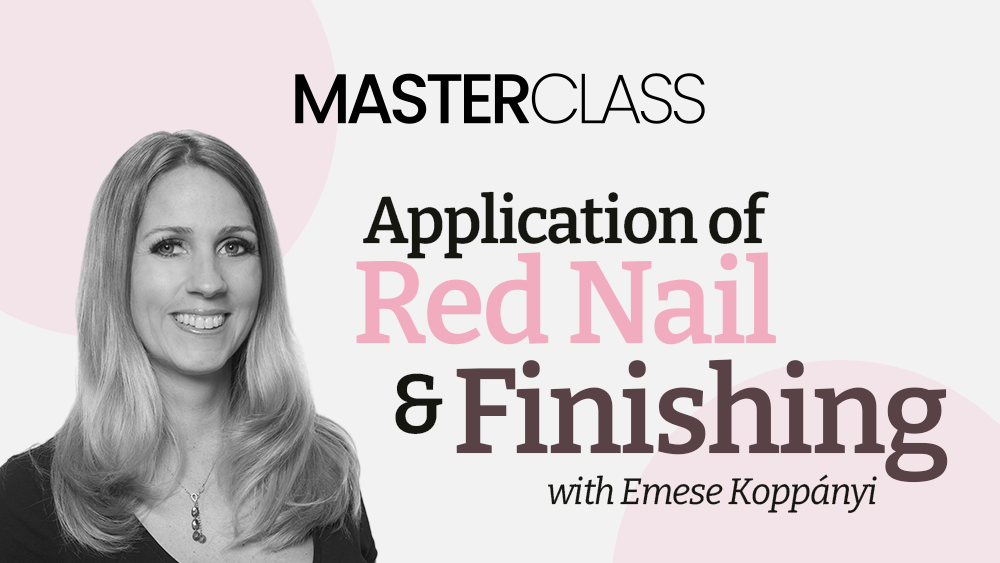
Crystal Magic
Crystal Magic
![]()
Shin Ji Min
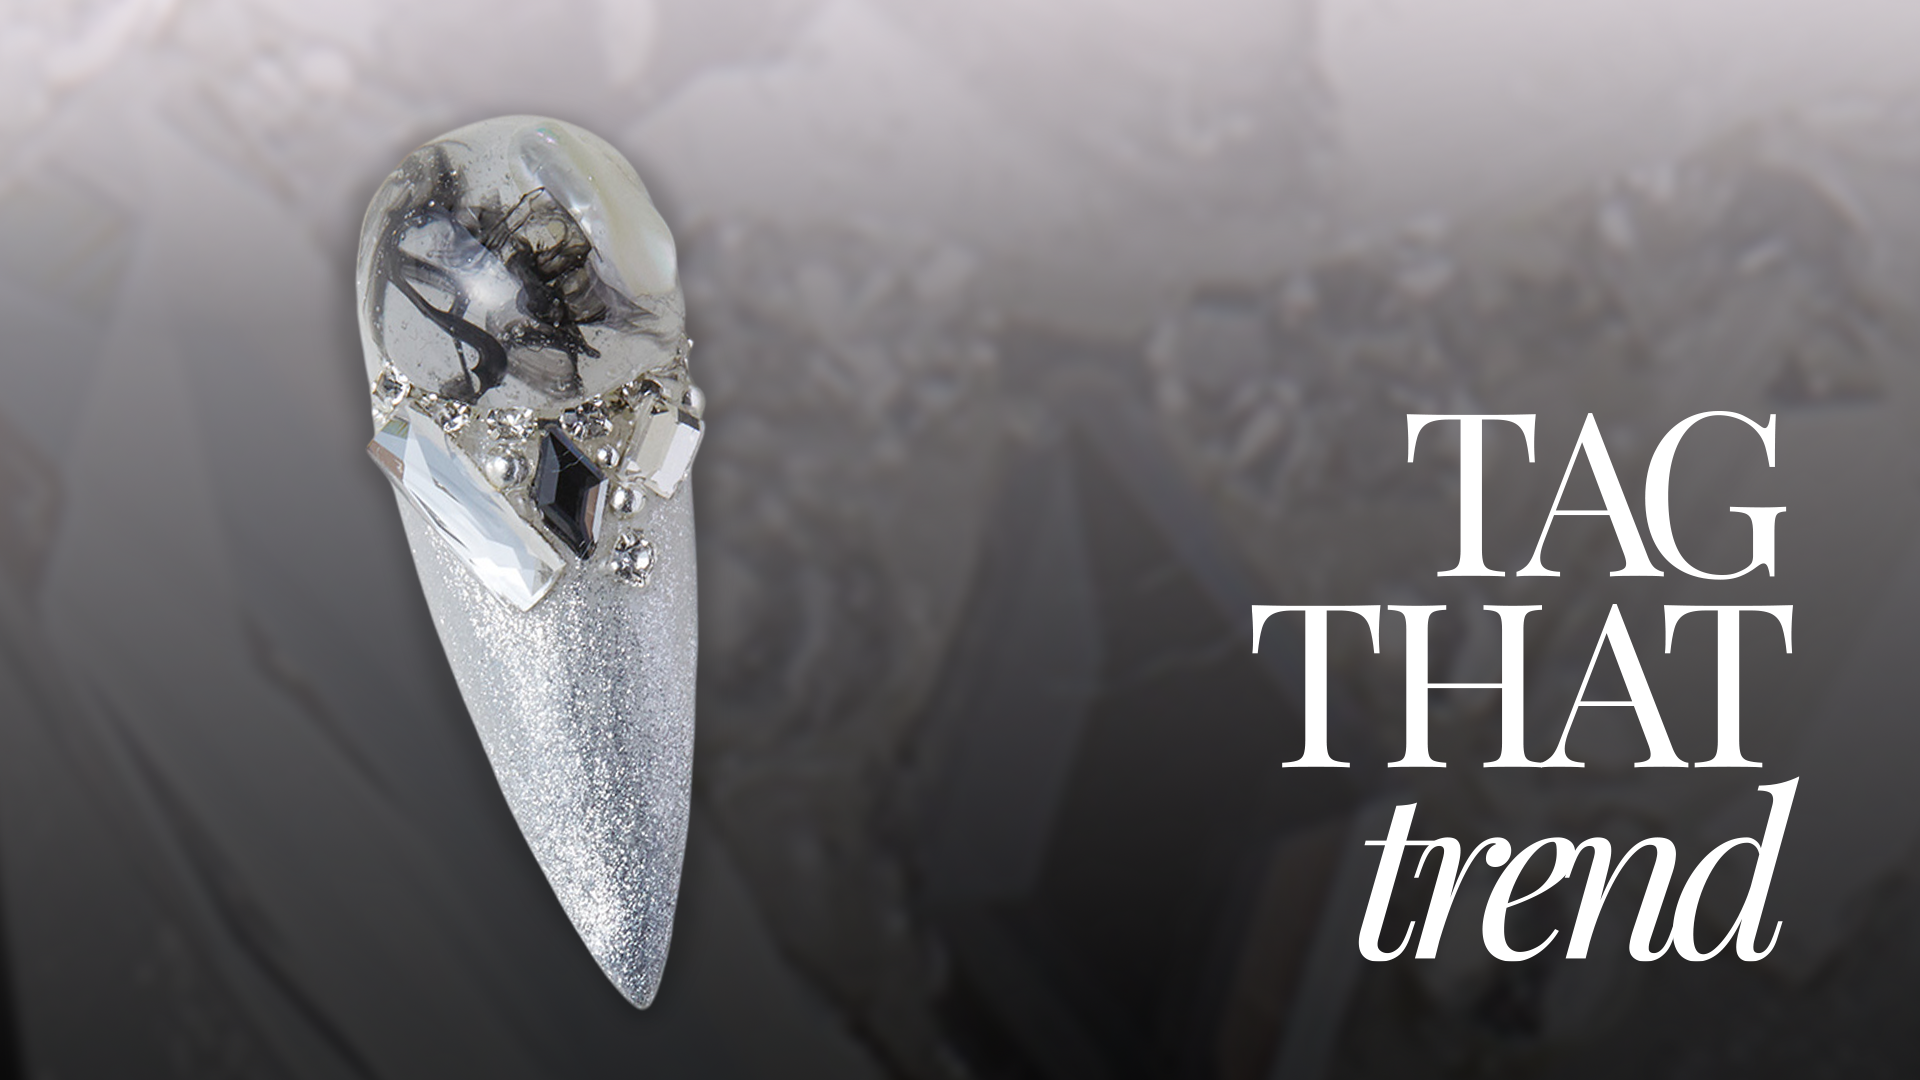
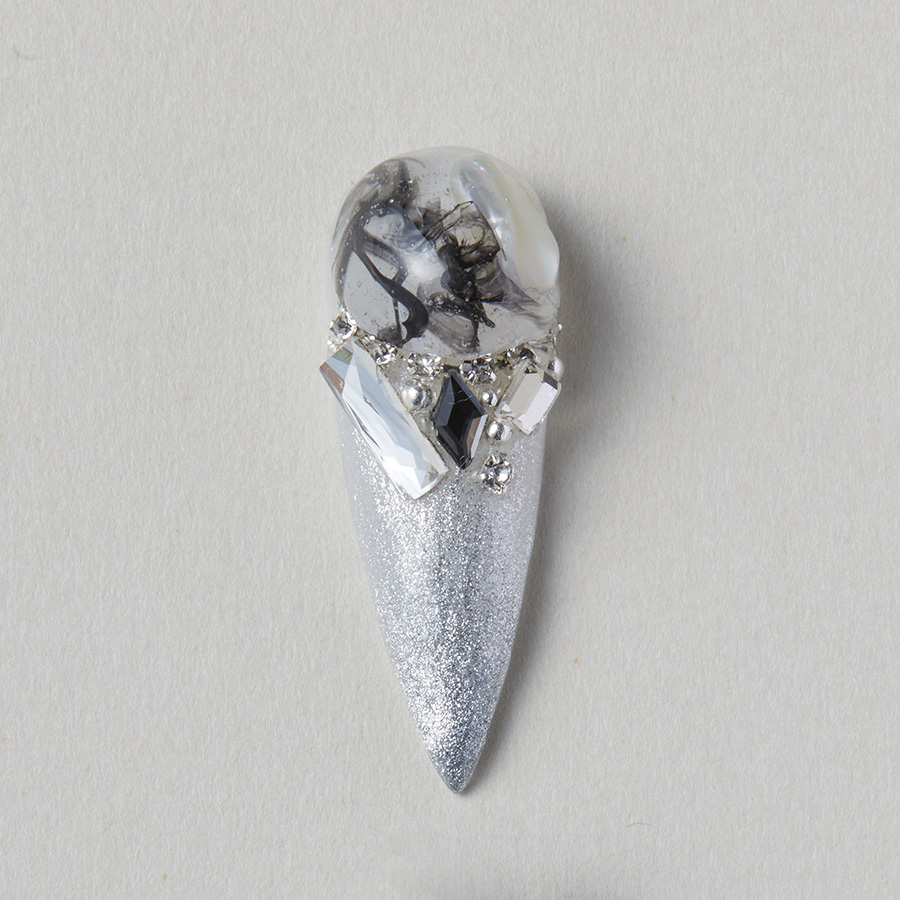
If you’re looking for the ultimate holiday nail inspiration, Shin Ji Min from Korea has delivered a look that combines elegance, sparkle, and artful details. Her shimmering silver almond nails are a statement in themselves, but it’s the intricate additions that truly make this design stand out.
PRODUCTS USED
- Nail File
- DGEL Signature Fit Base Gel
- DGEL Signature Top Gel
- DGEL Pumpin Clear Gel (BIO, MID, SIC)
- DGEL Mini Bold Gemstone Series Tint & Magnet Gel (MP.309)
- DGEL x JINI Painting Color Gel (PJ008)
- DGEL Disney Trend Color Gel (DT.11)
- DGEL It’s Jini Brush (1 Liner, Gradation)
- DGEL Gel Cleaner
- DGEL Brush Cleaner
- Embellishments
- Dust Brush
- Tweezers
- DGEL LED Lamp
STEPS
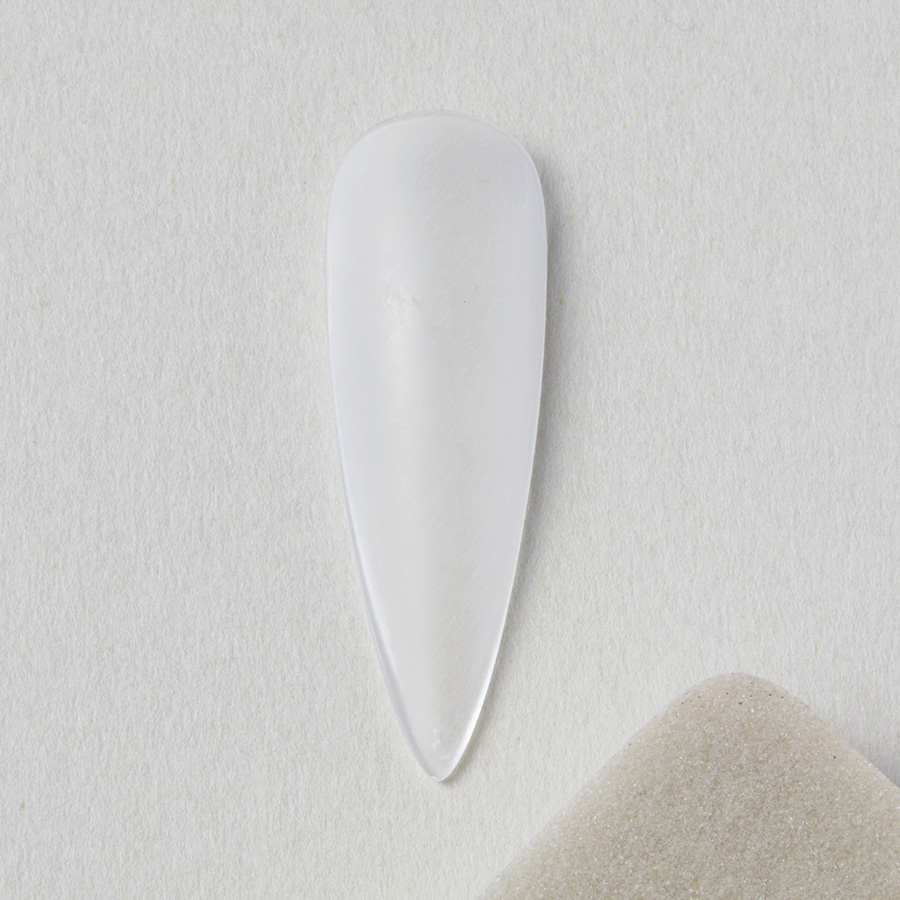
Buff the shine off of the nail tip.
Apply Signature Fit Base Gel then cure.
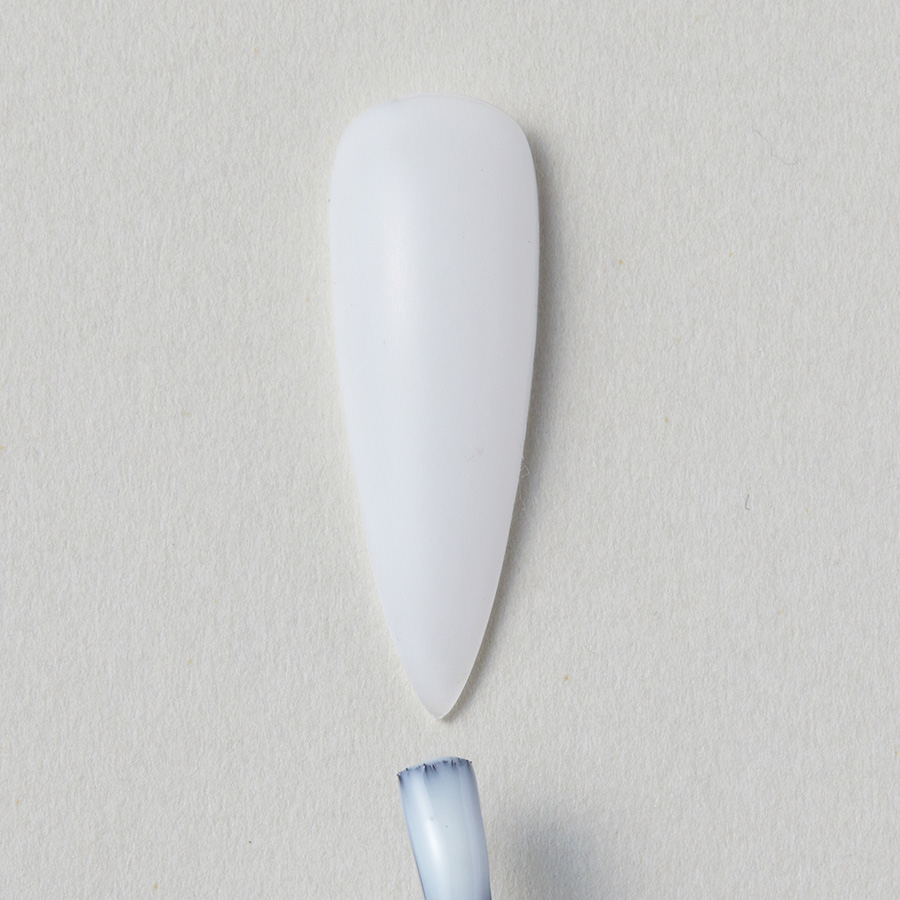
Apply DGEL DT.11 or a soft white gel polish and cure.
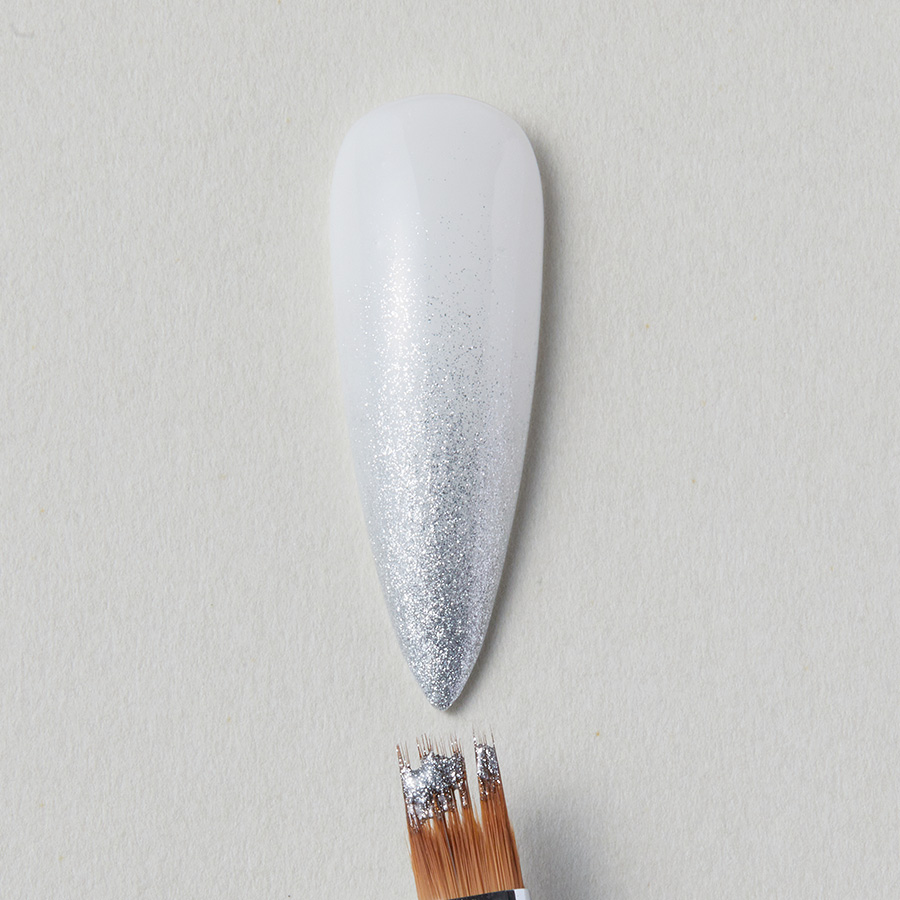
Apply MP.309 or a silver gel polish on the lower third of the nail and fade up the nail with a graduation brush.
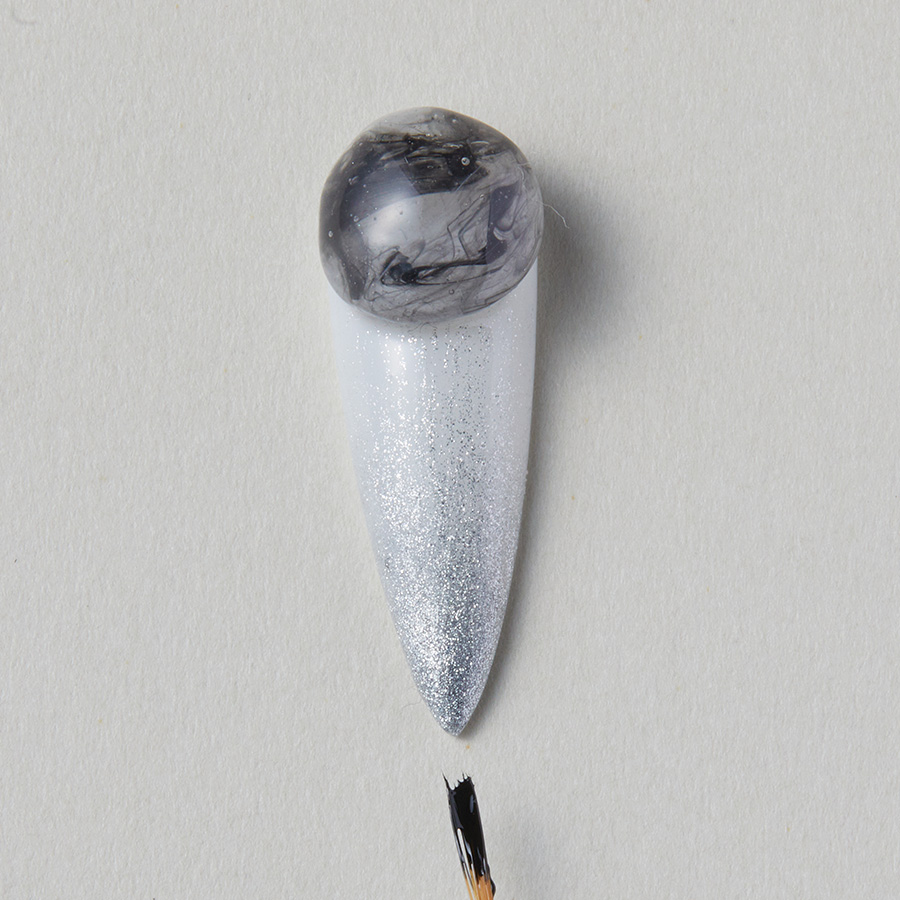
Swirl a liner brush with black gel polish into a bead of clear builder gel to create a marble effect. Attach to the nail and cure.
Add embellishments on the marble ball using Pumping clear gel SIC type then cure.
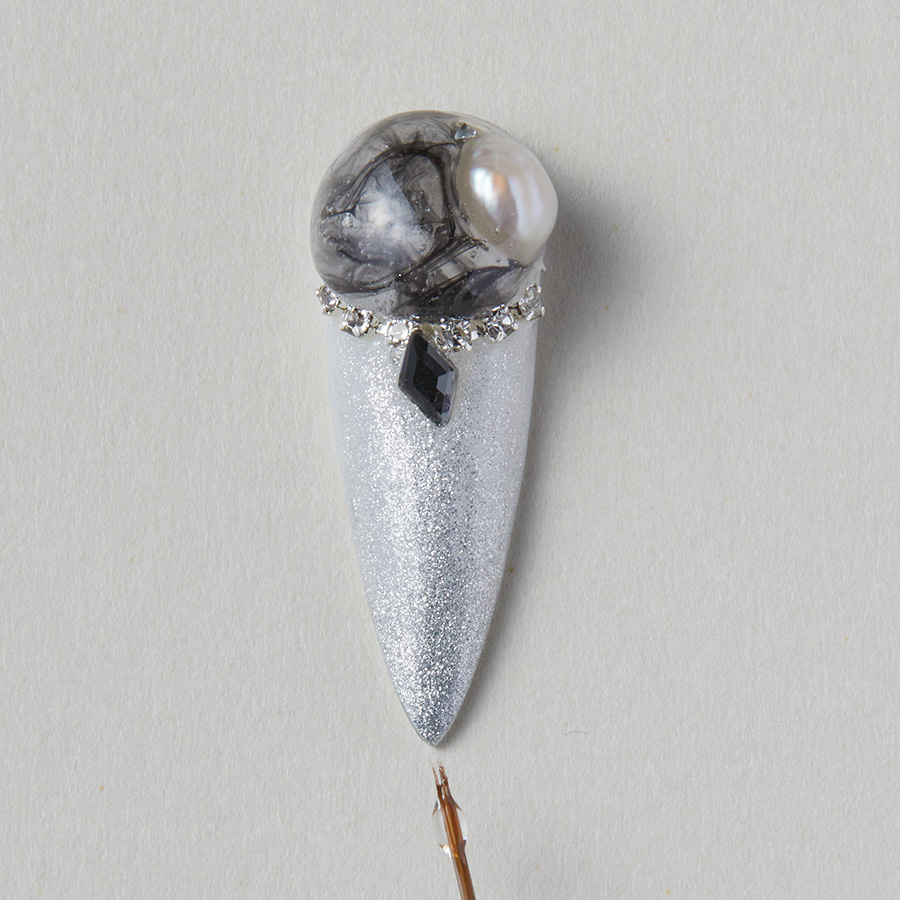
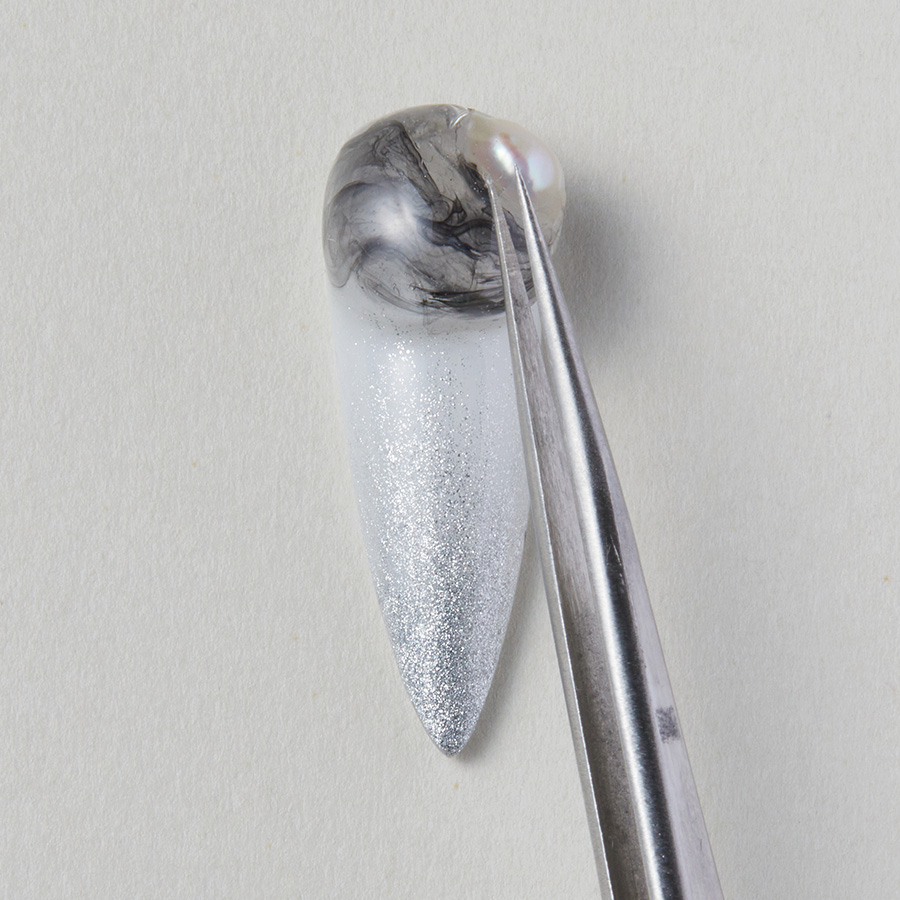
Add a chain of embellishments around the ball with clear gel and cure.
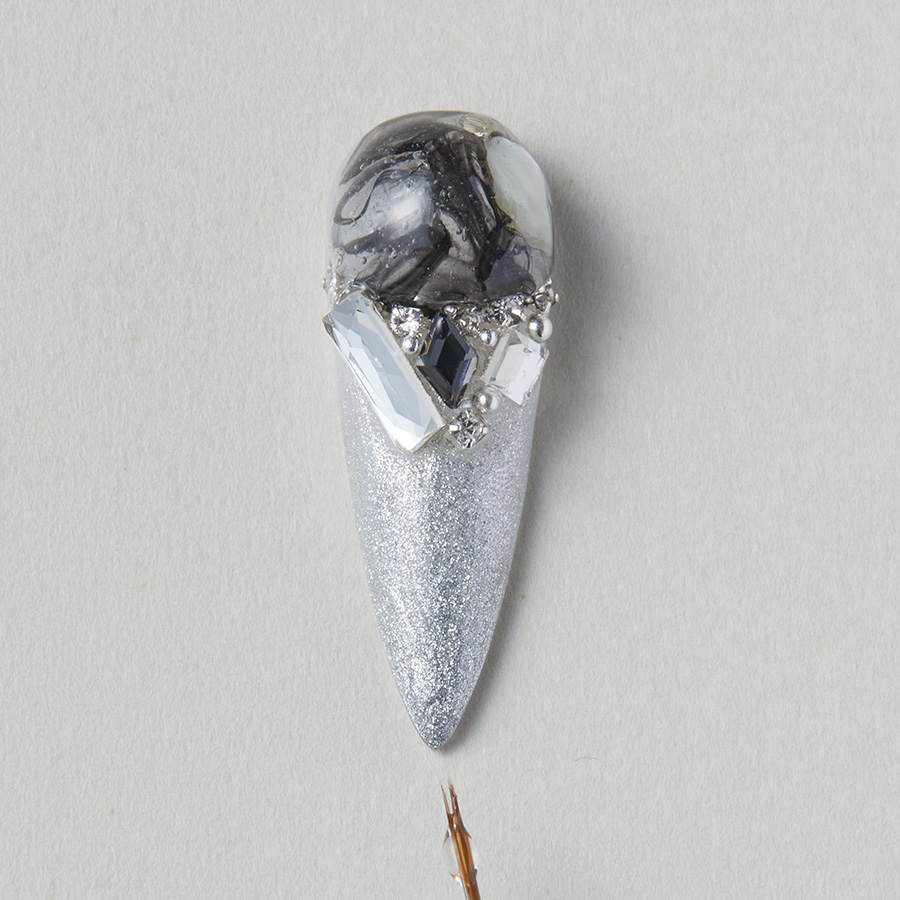
Secure additional embellishments in various shapes and sizes with gel and cure.
Apply Signature Fit Non-wipe 8 Top Gel then cure.

MORE TAG THAT TREND
RELATED VIDEOS


MORE TO EXPLORE


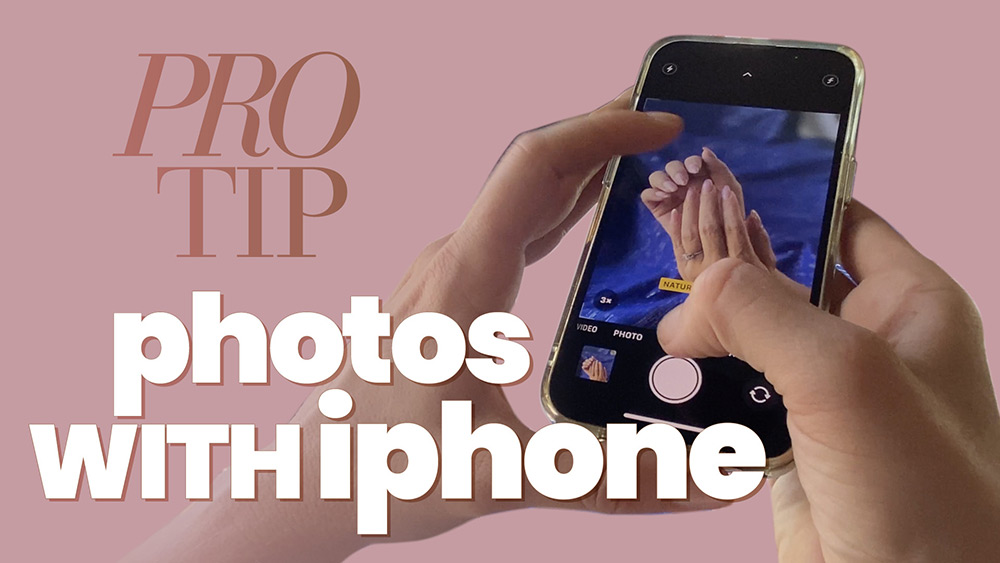

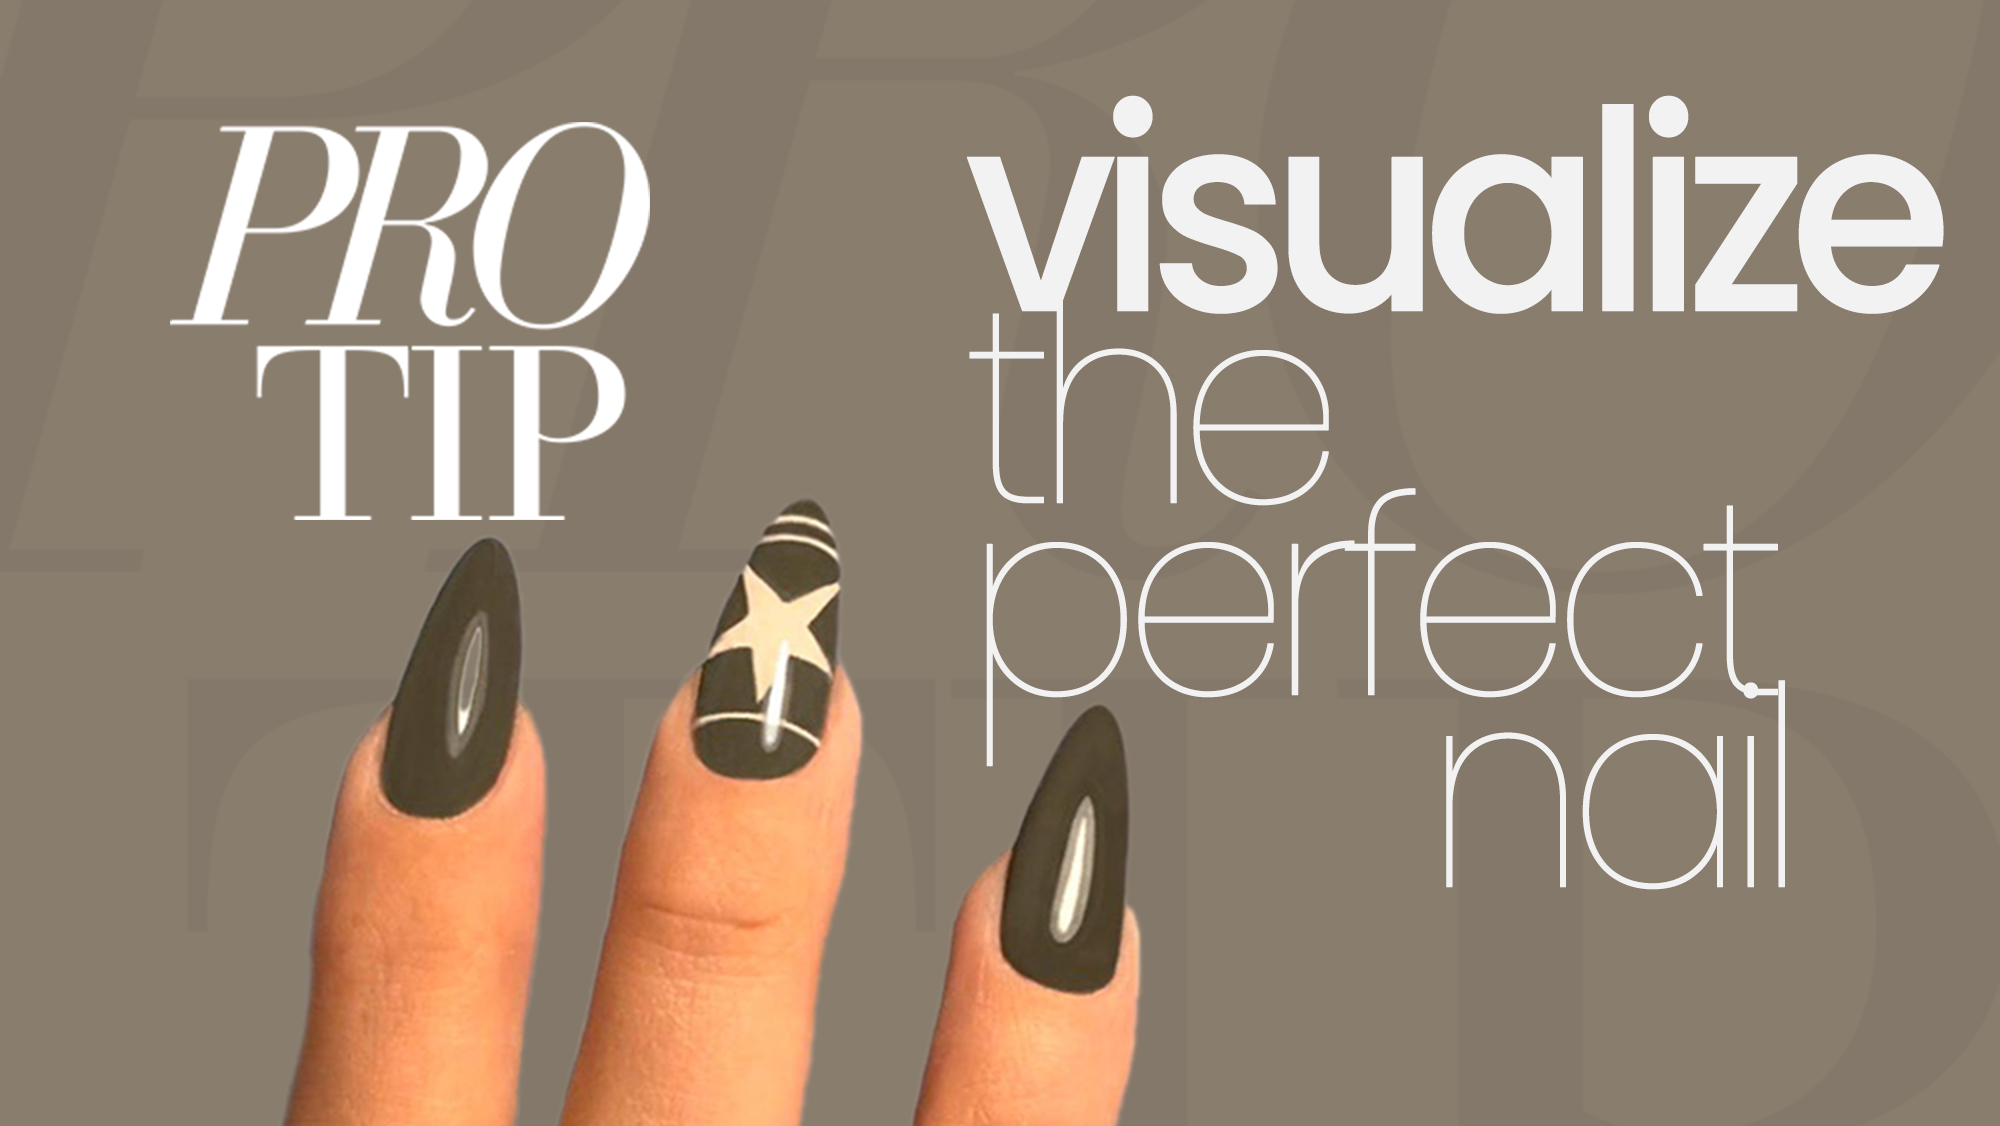
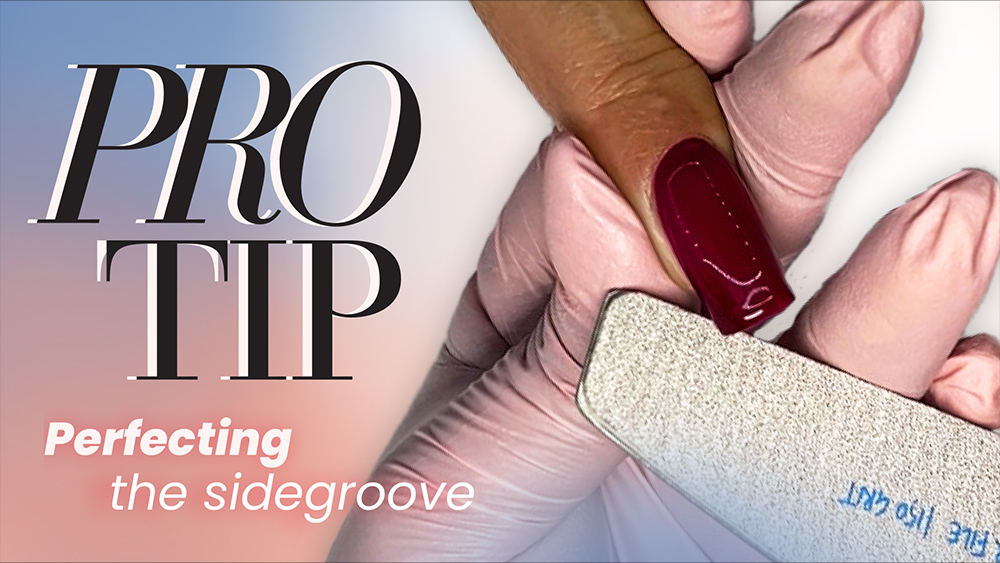
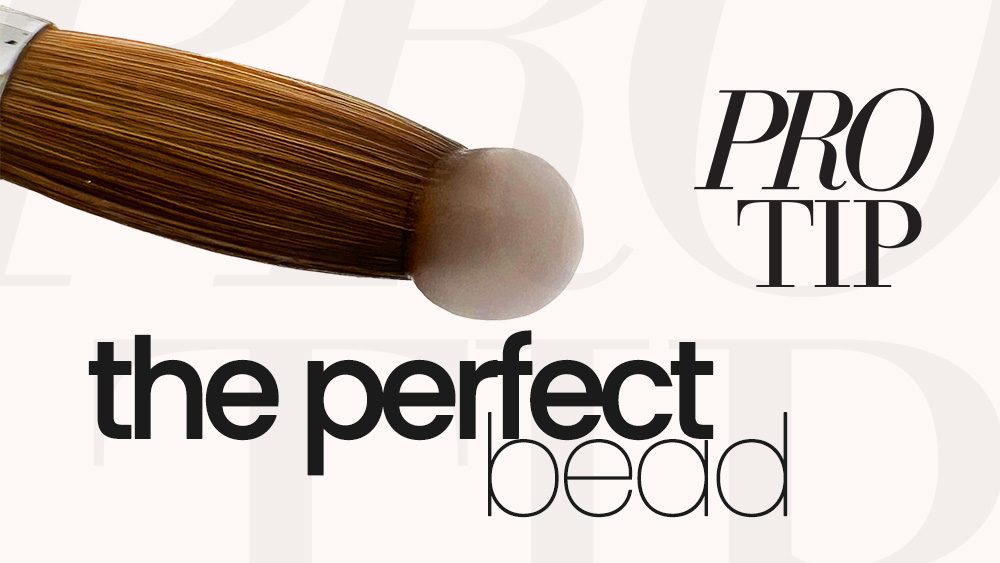
Visualizing the Perfect Nail
![]()
![]()
Visualizing the Perfect Nail
Many nail technicians find it hard to get consitancy and speed in their salon work or competition nails over time because they are working without visualizing the final outcome. Once you have the final look in your mind of what you want to acheive, the outcome on the hand becomes easier so every movement and motion is purposful.
SEE MORE PRO TIPS


RELATED VIDEOS
MORE TO EXPLORE


Peppermint Twist
UP NEXT
![]()
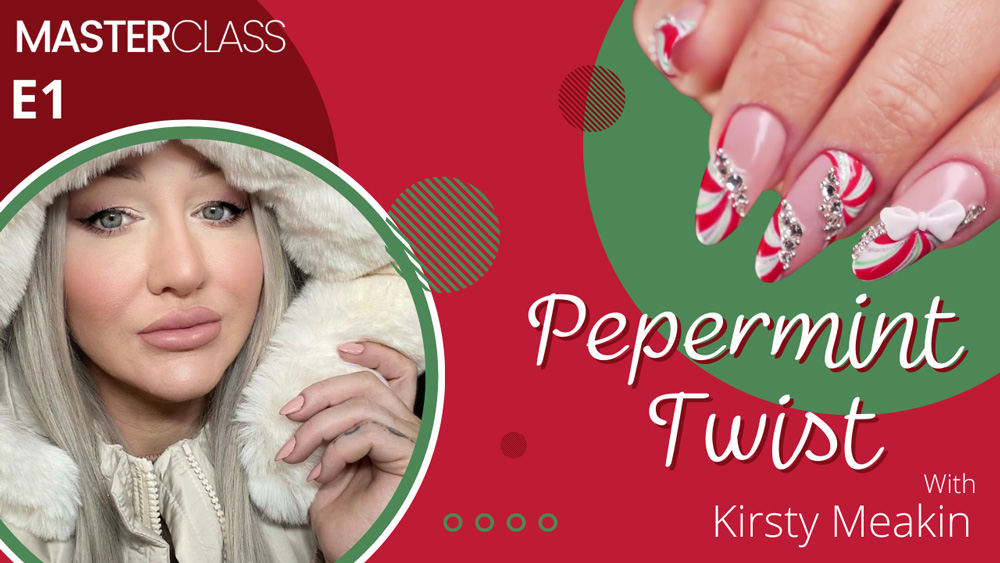
Peppermint Twist
Kirsty Meakin’s Peppermint Twist holiday nail art tutorial is a must-watch for anyone wanting festive, eye-catching nails. As a UK award-winning educator and social media influencer, Kirsty brings her signature creativity and expertise to this step-by-step design. The Peppermint Twist look combines classic holiday colors and a fun, swirling pattern that’s both stylish and simple to recreate. Perfect for adding a festive touch to any outfit, this tutorial is ideal for both beginners and pros looking for inspiration. Watch and learn how to make this sweet and seasonal design, sure to delight clients or friends alike!
SEE MORE MASTER CLASS


RELATED VIDEOS
MORE TO EXPLORE
Snowflake
UP NEXT
![]()
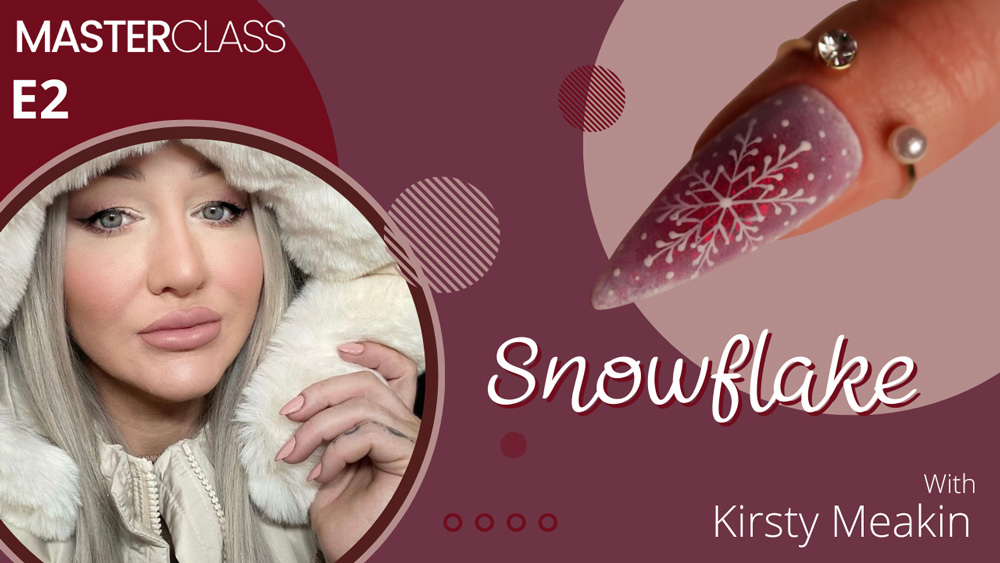
Snowflake
Kirsty Meakin’s snowflake nail art tutorial is a holiday essential for anyone wanting to create a layered, multidimensional nail design. In this step-by-step guide, Kirsty shows how to layer gel colors and different finishes to create depth and a truly captivating winter look. Her technique makes the snowflake pop, creating a frosty, elegant effect perfect for the season. Ideal for both beginners and advanced nail artists, this tutorial offers tips on achieving that extra level of detail clients love. Watch and learn how to bring the beauty of a snowy day right to your fingertips!
SEE MORE MASTER CLASS
RELATED VIDEOS
MORE TO EXPLORE
Christmas Cookie
UP NEXT
![]()
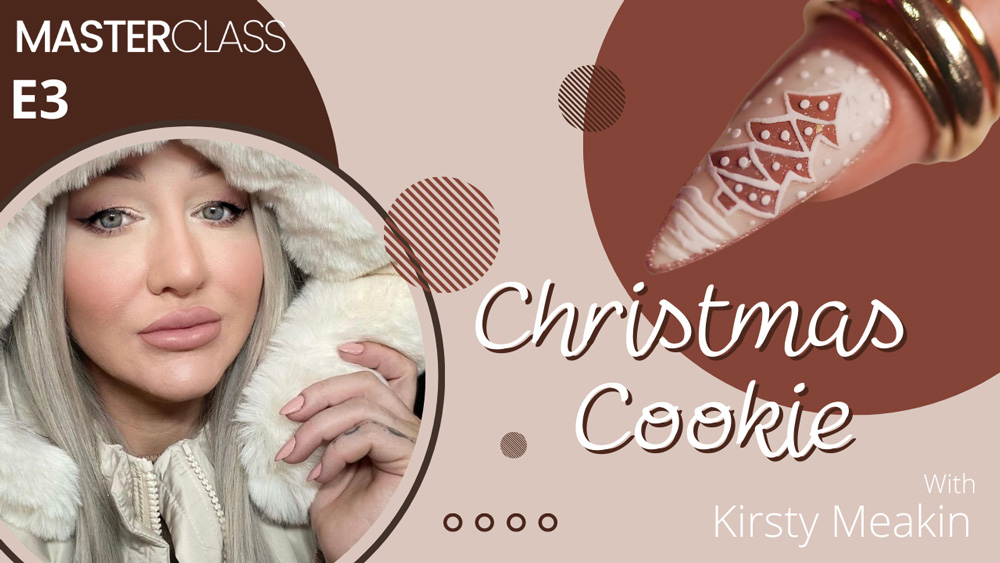
Christmas Cookie
Kirsty Meakin’s Christmas cookie nail art tutorial is perfect for capturing festive holiday cheer! In this gingerbread tree design, she demonstrates how to create a charming 3D frosting effect that adds texture and realism to holiday nails. This playful look works beautifully as an accent nail and brings the essence of holiday baking right to your fingertips. Kirsty’s tutorial also provides the techniques needed to craft other decorated cookie designs, making it versatile for creating custom holiday-inspired looks. Watch and learn how to add a sweet, festive touch to your nail art that clients will adore!
SEE MORE MASTER CLASS
RELATED VIDEOS
MORE TO EXPLORE

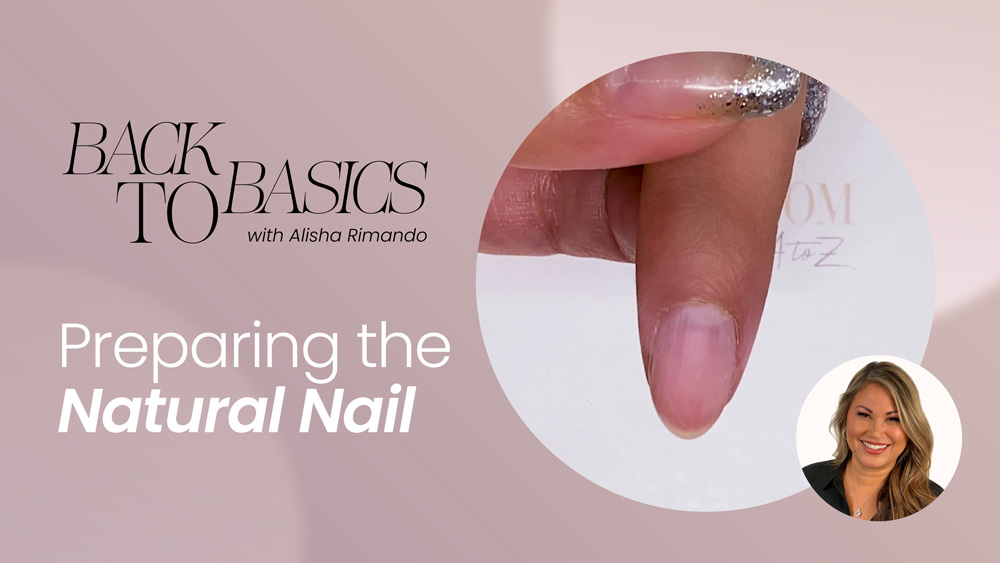
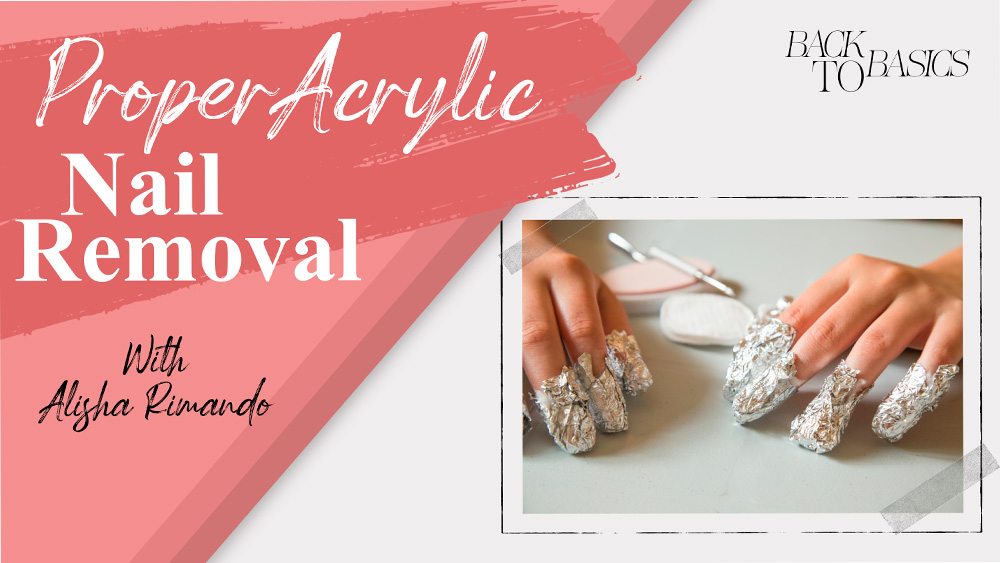
Client Hand Placement
![]()
Client Hand Placement
This video is essential for nail techs dealing with shoulder and arm soreness from working in the salon. World Champion Alisha Rimando explains a common cause of these aches and shares a pro tip on how a simple adjustment can ease strain. Her expert insight will help you work more comfortably, improve your posture, and protect your body long-term. If you’re serious about staying pain-free in your nail career, don’t miss this advice from one of the industry’s top pros!
SEE MORE PRO TIPS


RELATED VIDEOS
MORE TO EXPLORE

Celebrity Brands - Holiday Edition
![]()
Celebrity Brands - Holiday Edition
Alisha Rimando’s Fenty Beauty-inspired nail art tutorial shows how anything around us can spark creative nail designs. Inspired by the glamorous packaging of Fenty’s Gloss Bomb Vault, Alisha transforms this beauty must-have into a stunning holiday nail look. In the video, she shares simple steps to create nails that mirror the festive, luxurious feel of the season. Clients love original, personalized art, so look around—whether it’s beauty packaging, holiday decorations, or seasonal colors, anything can inspire your next design. Watch Alisha’s tutorial to see how easy it is to turn inspiration into art!
UP NEXT ON STYLE FILES
RELATED VIDEOS
MORE TO EXPLORE

Nail Magnetism
Nail Magnetism
![]()
Genki Itou
Genki Itou, a celebrated Japanese manicurist, has spent over a decade redefining nail artistry with his groundbreaking techniques and designs. Known for his meticulous attention to detail and a creative flair that merges traditional and contemporary styles, Itou has made a lasting impact on the nail industry in Japan and beyond. In this Tag That Trend tutorial, Itou demonstrates his unique approach to creating flawless geometric nail art, showcasing how to achieve sharp lines and perfect angles with ease.
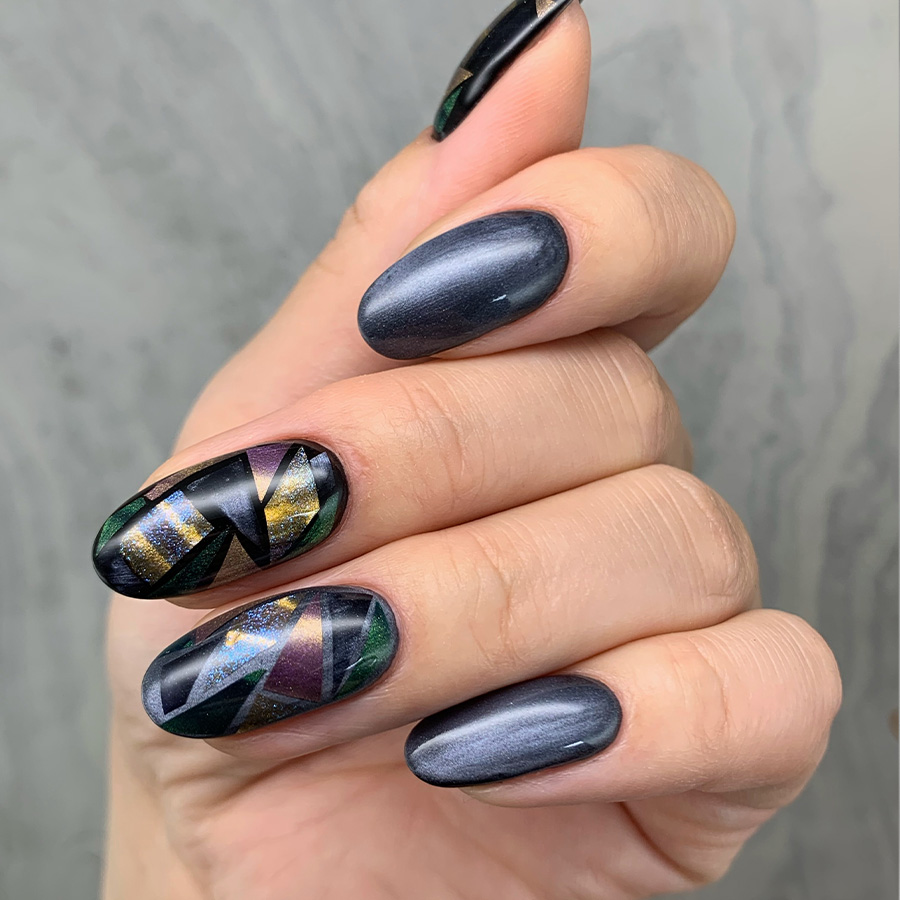
PRODUCTS USED
- Gel Base coat
- Black Gel
- Magnetic Gel Polish various colors
- Clear Builder Gel
- Tweezer
- Scissors
- Gel Top Coat
STEPS
Apply Gel Base to the nail & cure.
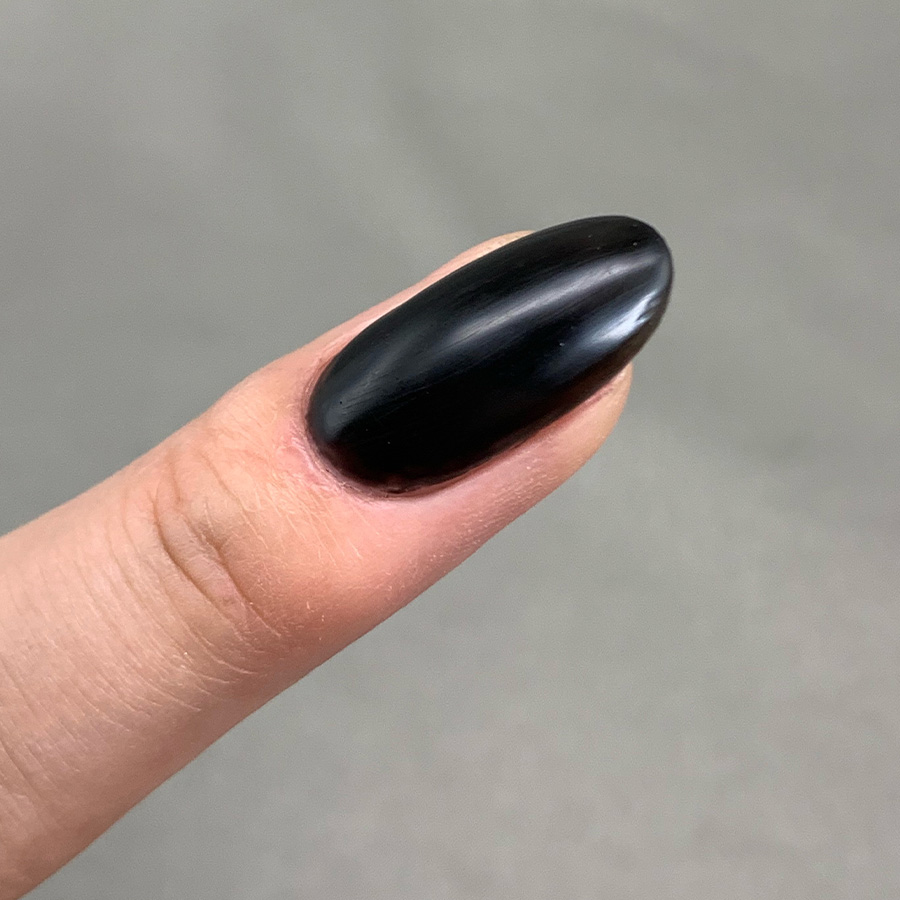
Apply a coat of black gel polish & cure; apply a second coat of black gel polish if needed for a complete & even coverage.
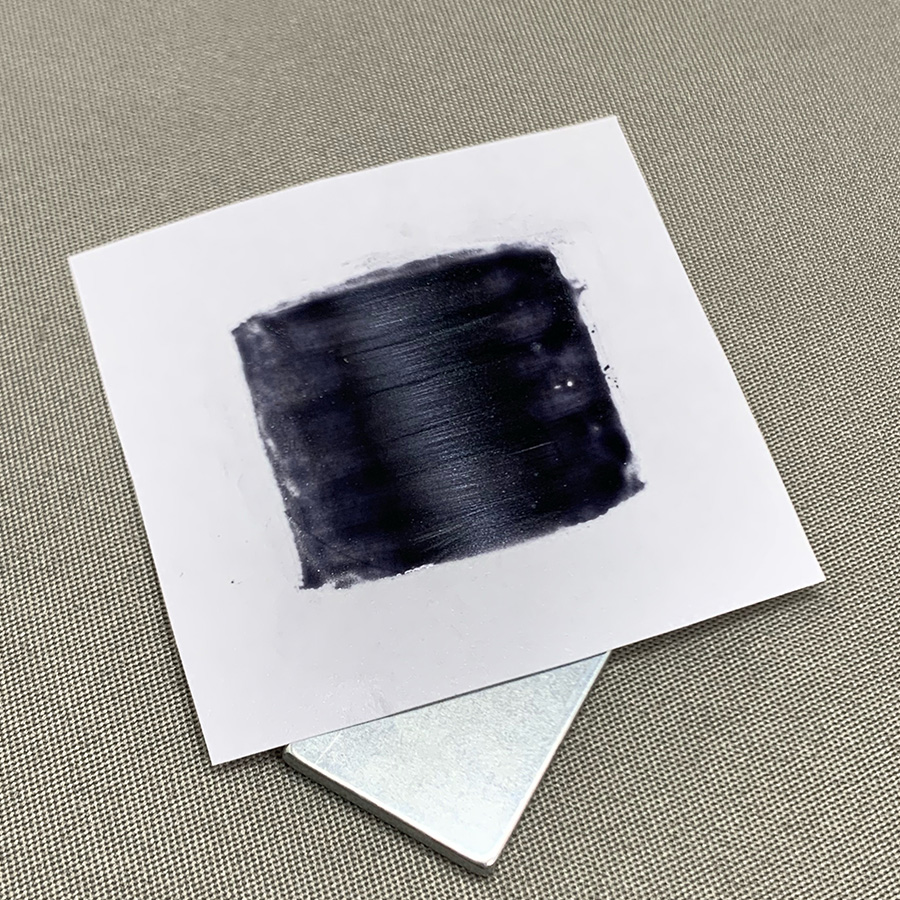
On the slick-sided paper square, apply magnetic gel polish, use a magnet to create effect & cure.
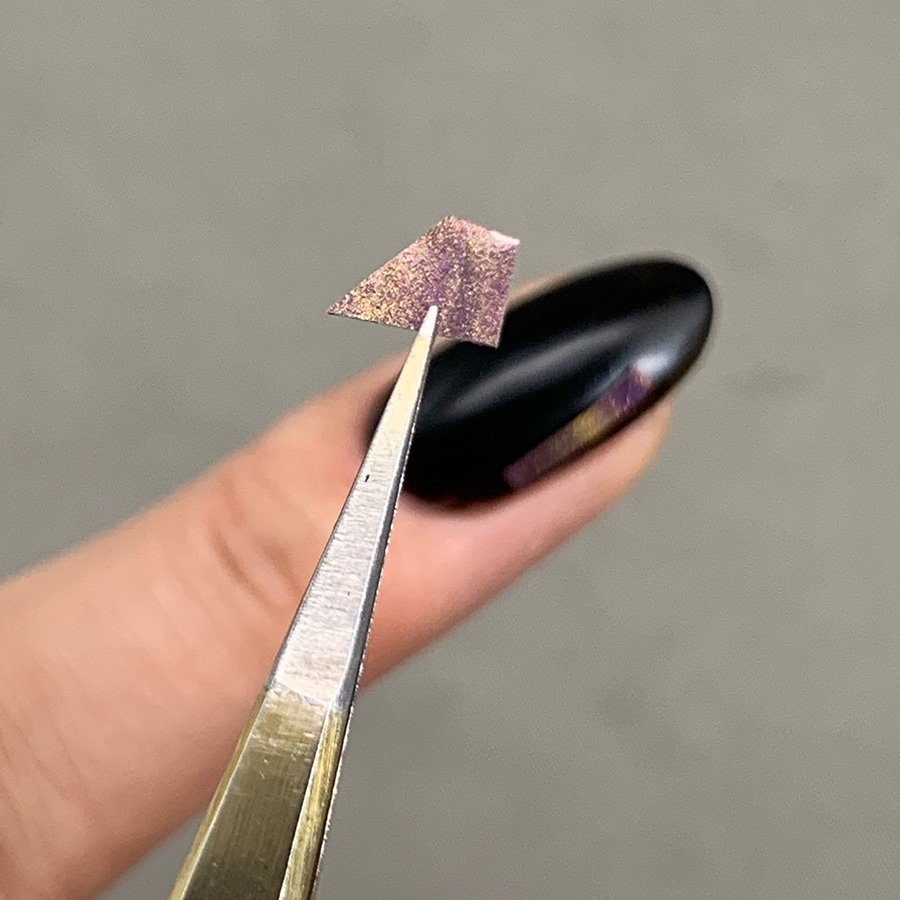
Trim the magnetic gel sheets to the desired shape & apply shapes to nail to create your design.
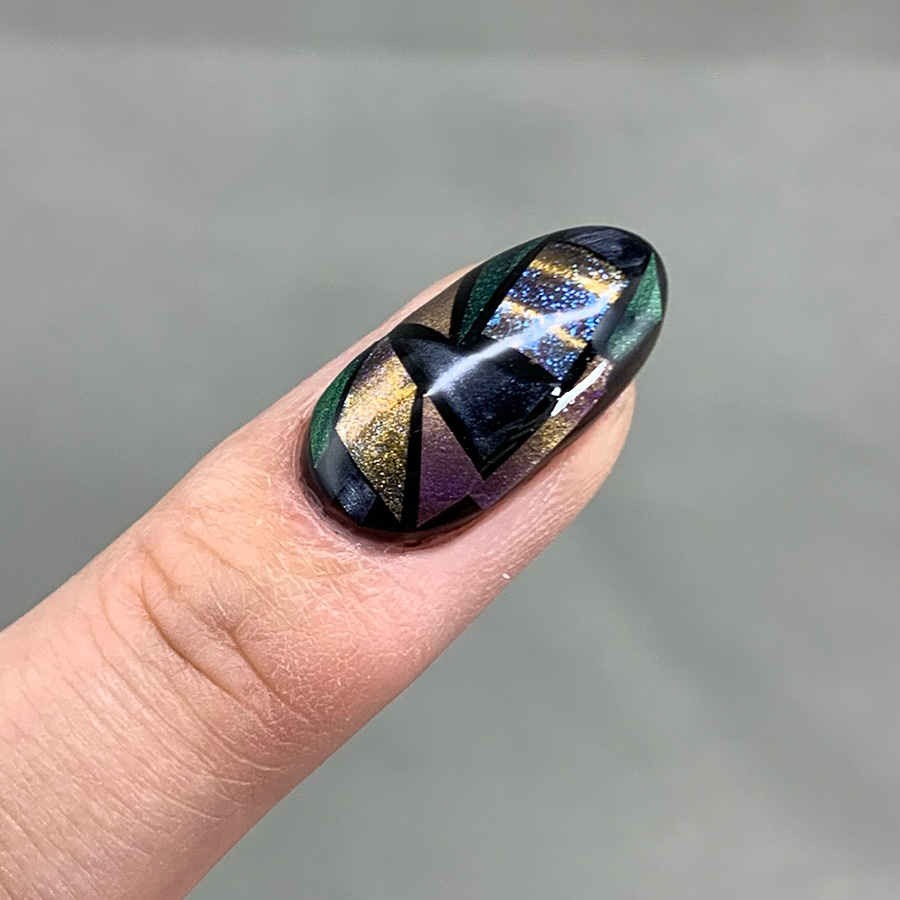
Apply a coat of Clear Builder Gel over the entire nail to smooth & fill in any unevenness and cure.
Apply Gel Top Coat & cure for the finished look.
MORE TAG THAT TREND
RELATED VIDEOS
MORE TO EXPLORE
Mastering Geometric Nail Art with Genki Itou
TAG THAT TREND
A Tutorial by Japan’s Renowned Nail Artist
ARTICLE BY ALISHA RIMANDO| PUBLISHED IN 2024
Genki Itou, a celebrated Japanese manicurist, has spent over a decade redefining nail artistry with his groundbreaking techniques and designs. Known for his meticulous attention to detail and a creative flair that merges traditional and contemporary styles, Itou has made a lasting impact on the nail industry in Japan and beyond. His innovative approach and dedication to his craft have placed him among the top figures in the field, earning the respect of clients and peers worldwide.
In this Tag That Trend tutorial, Itou demonstrates his unique approach to creating flawless geometric nail art, showcasing how to achieve sharp lines and perfect angles with ease. Geometric designs require both precision and an eye for composition, and Itou’s step-by-step method makes it accessible for artists at all levels. His expert tips focus on balancing colors, achieving symmetry, and using tools effectively to create a polished, professional look.
Whether you’re a beginner or a seasoned pro, this tutorial offers valuable insights into mastering geometric nail art with elegance and precision. Following Itou’s techniques, you can bring a modern, stylish edge to your nail art repertoire while learning from one of the industry’s best.
Don’t miss this chance to elevate your skills and explore the artistry that has made Genki Itou a globally recognized name in nail design!