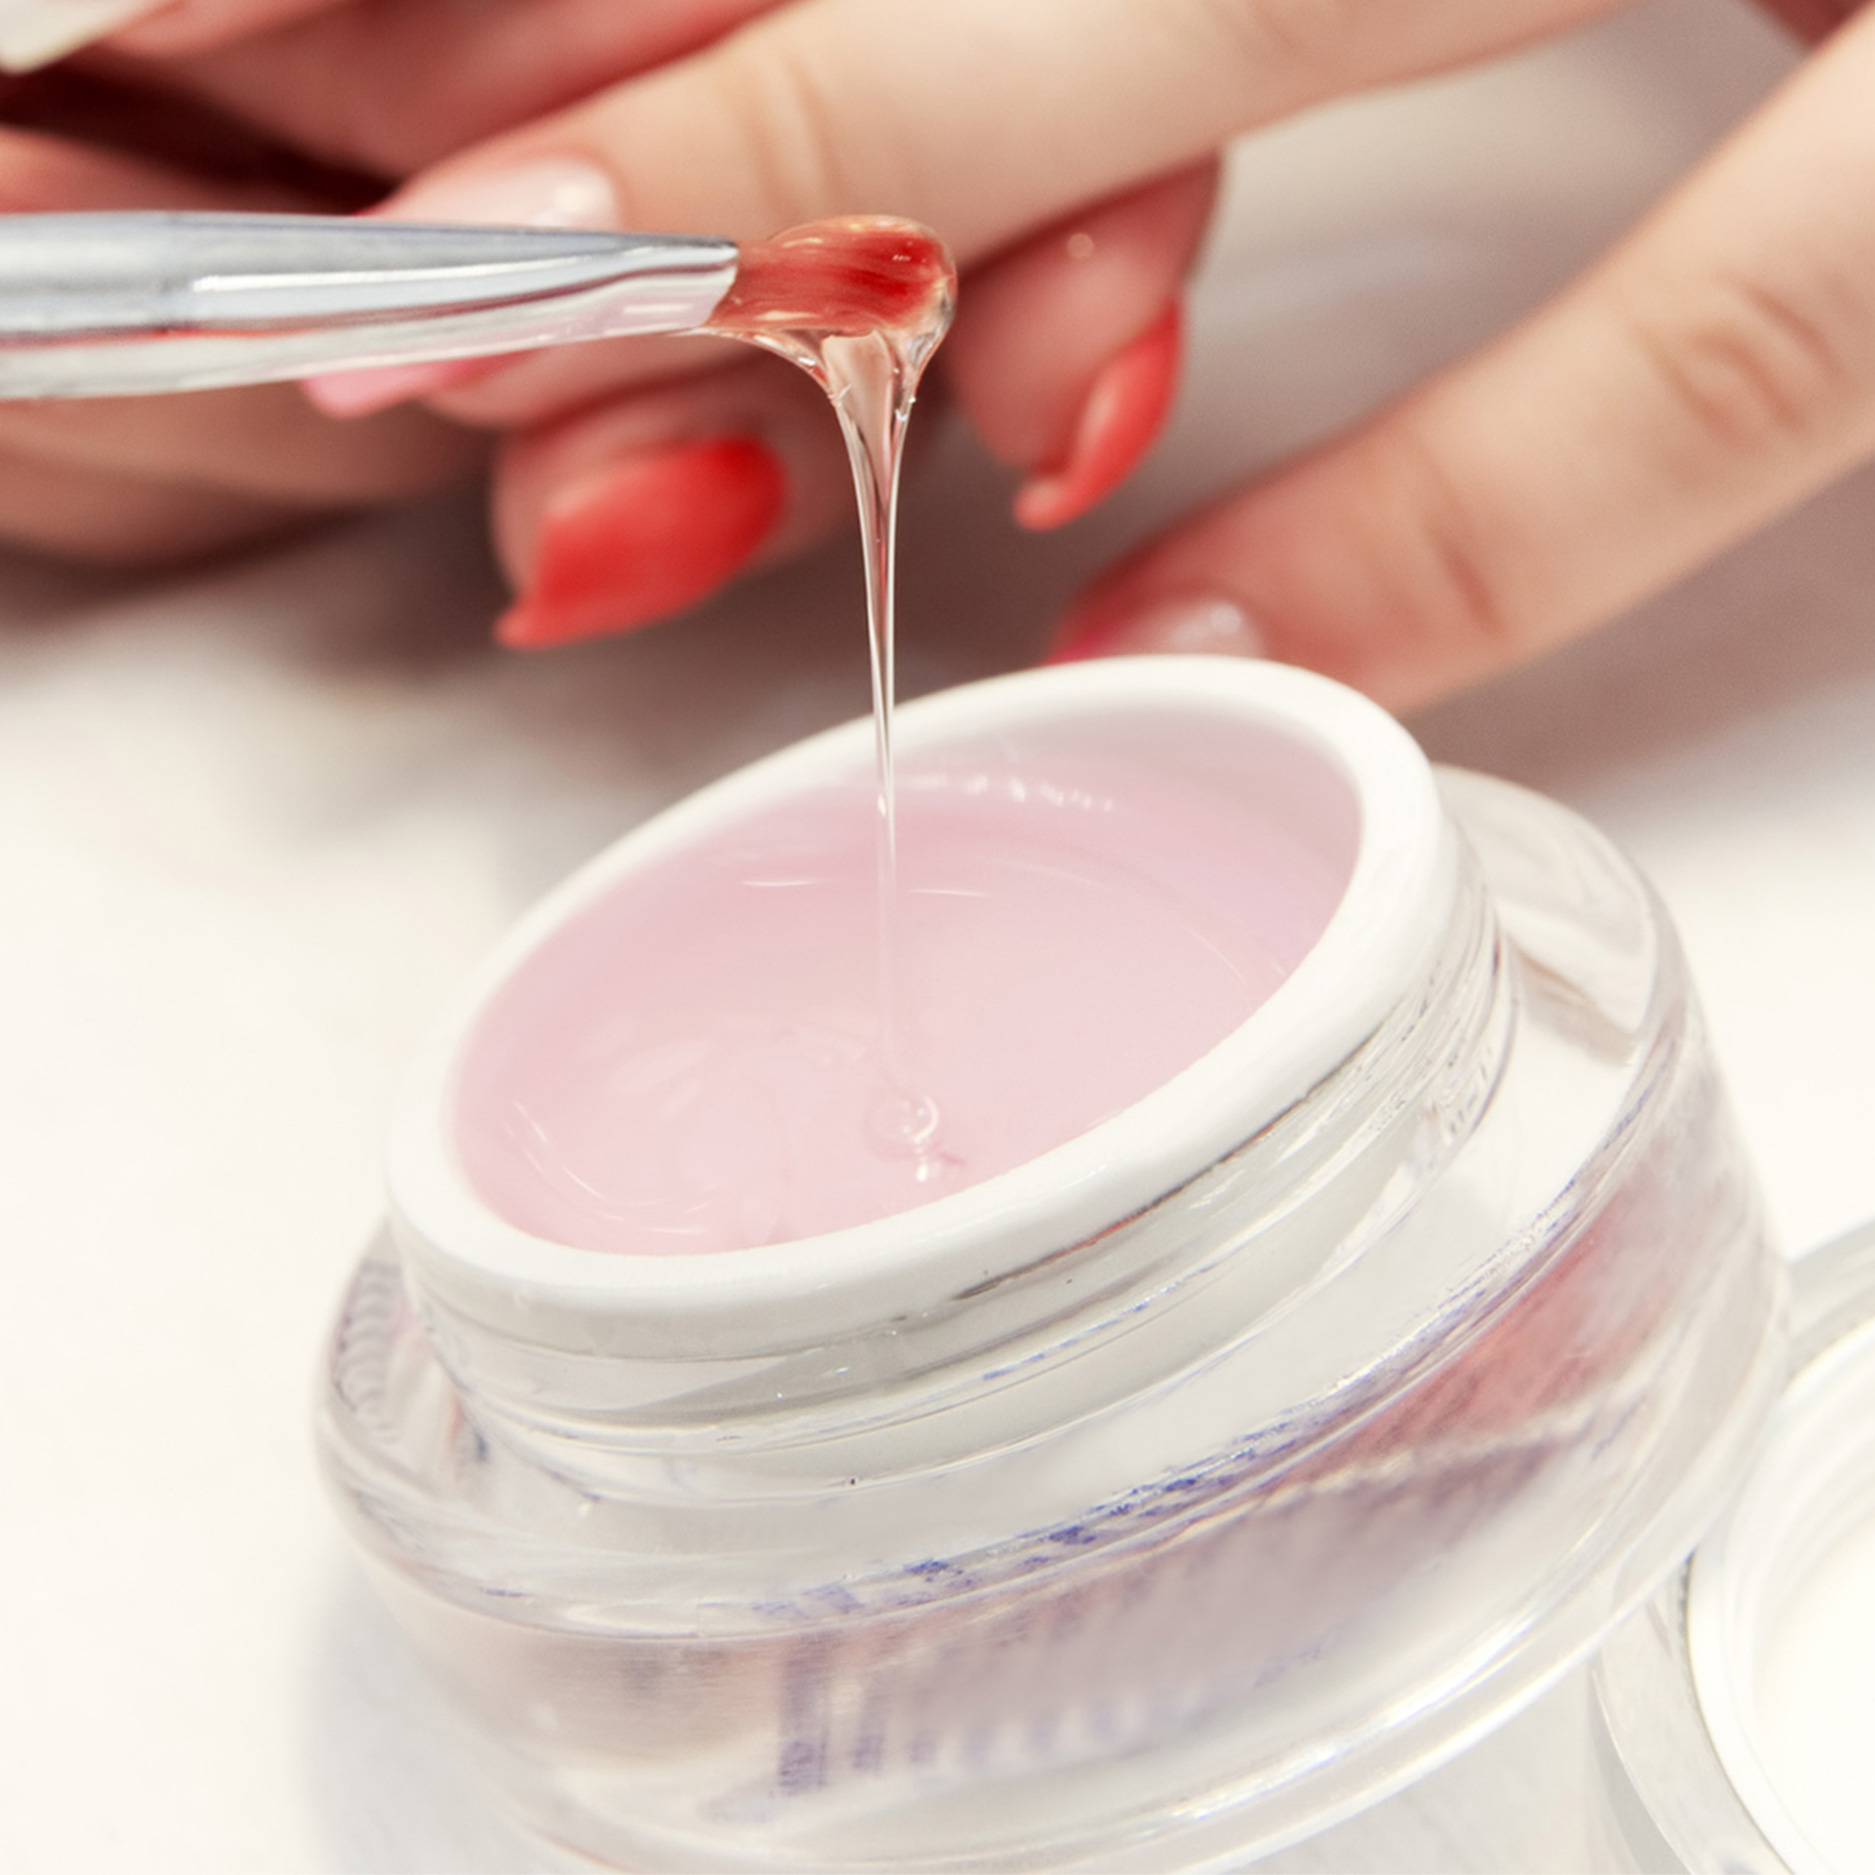
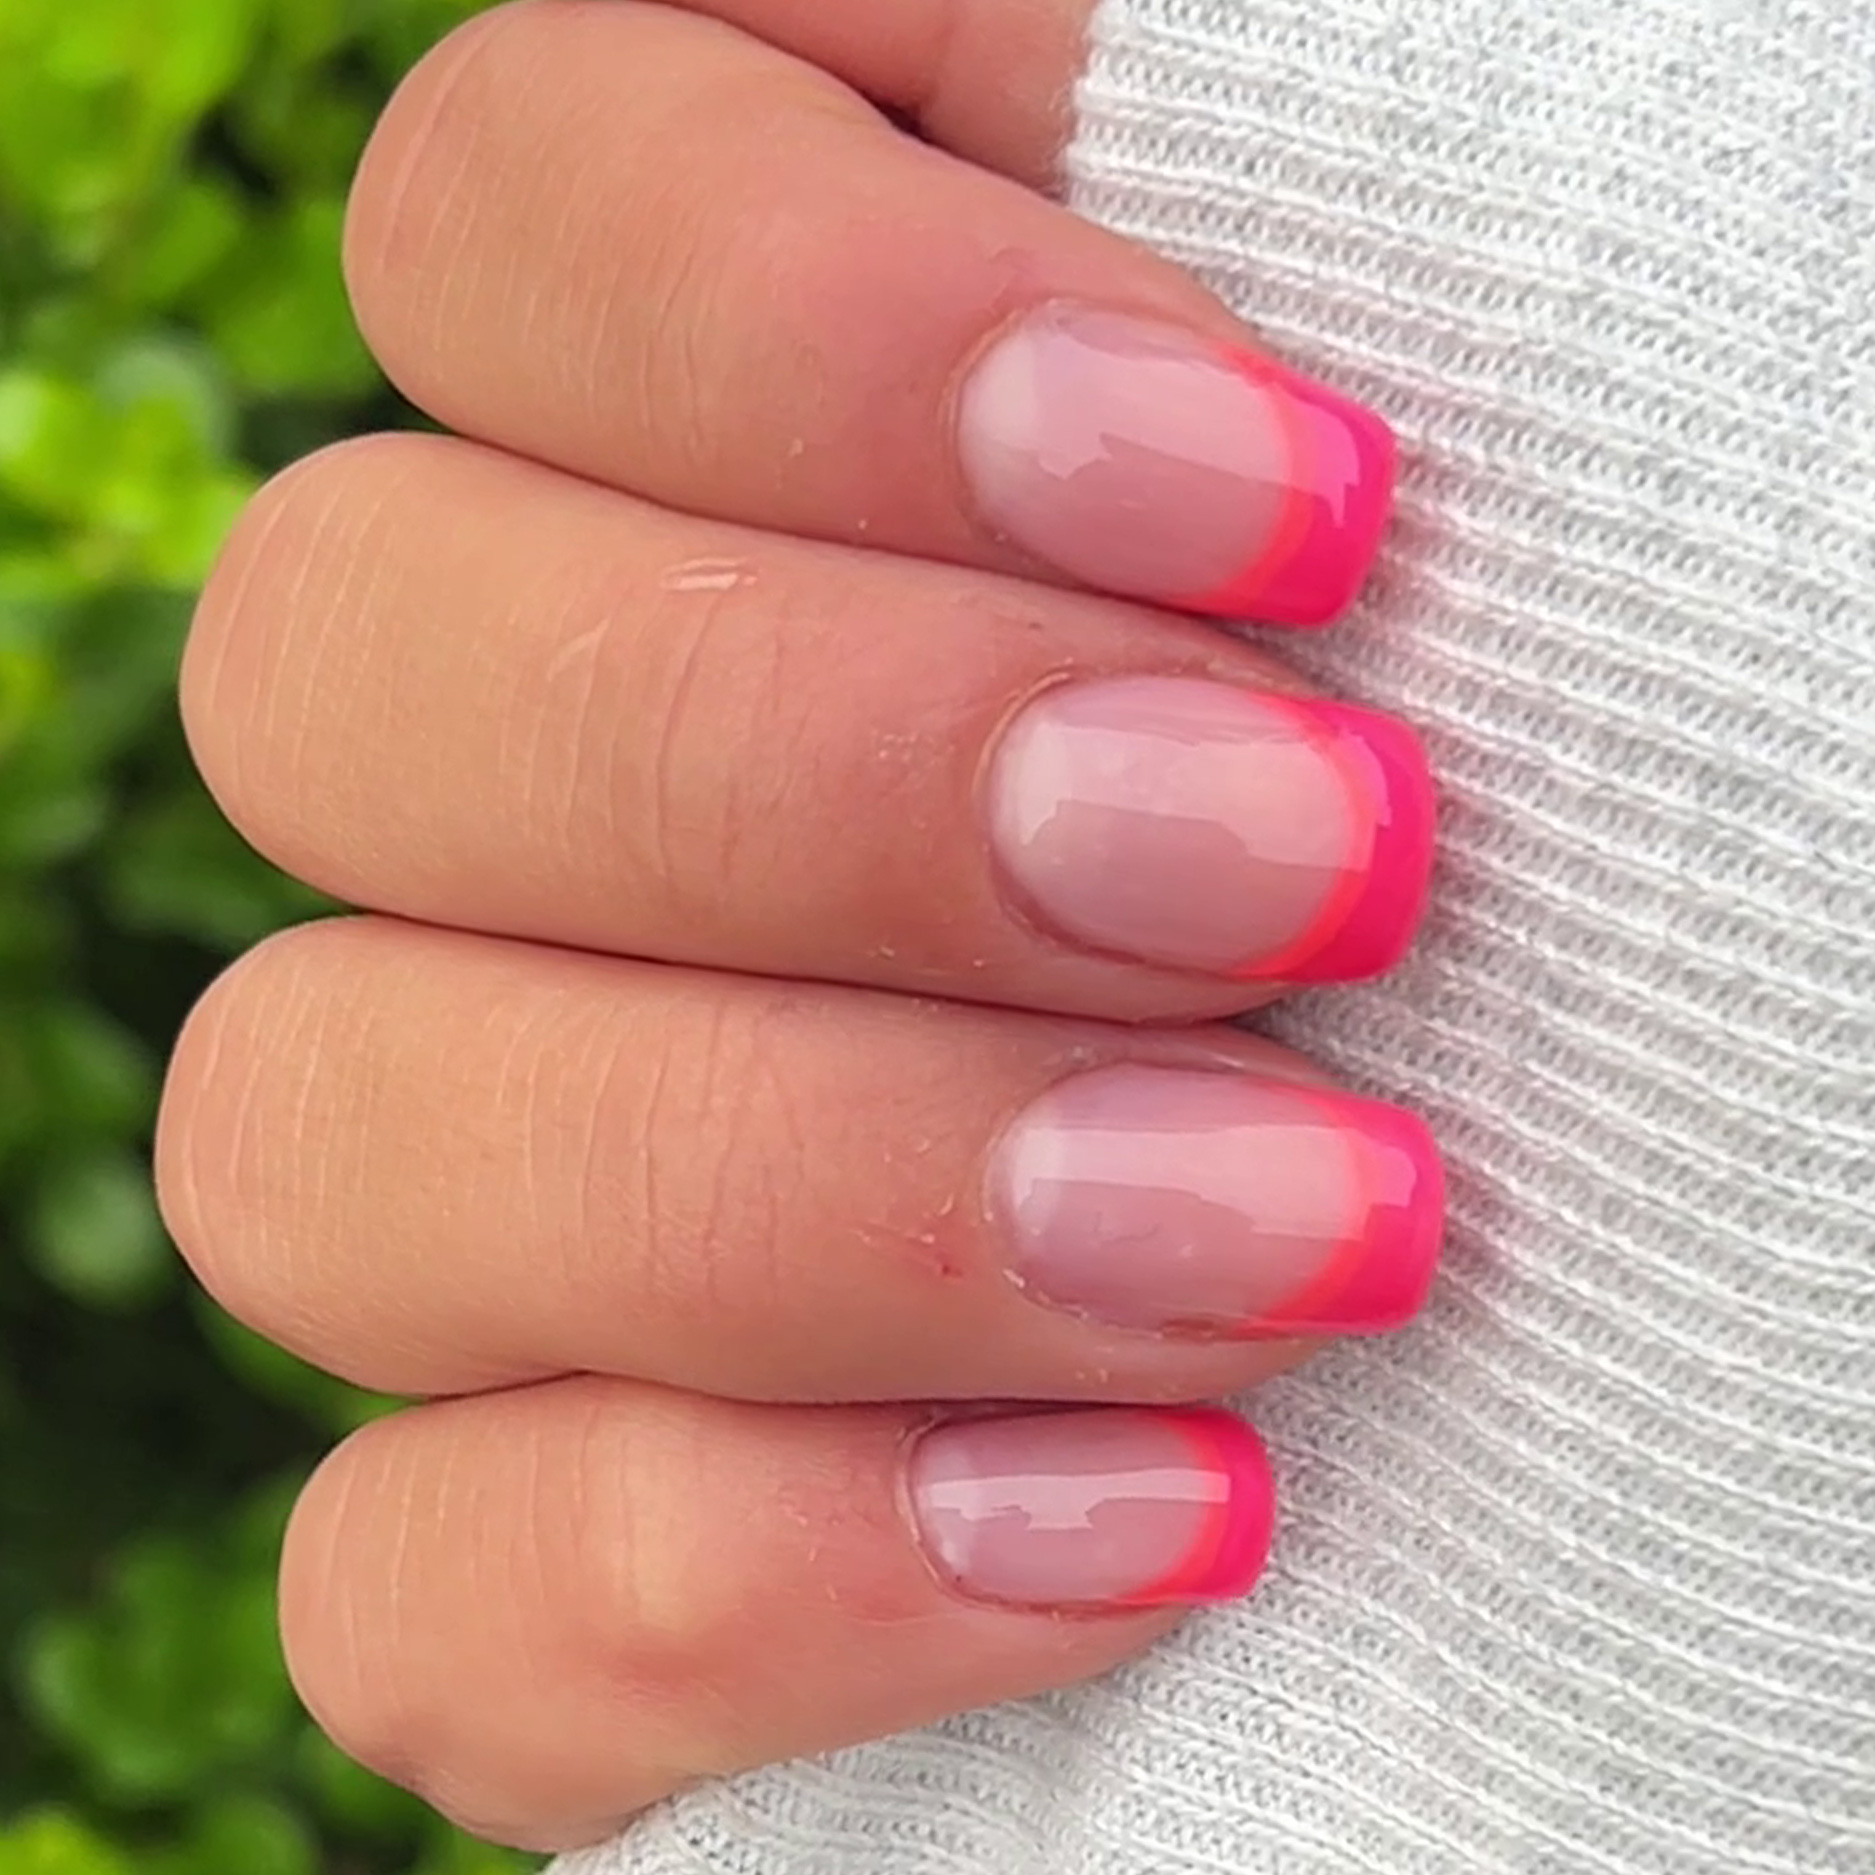
UV GEL
Recommended Products
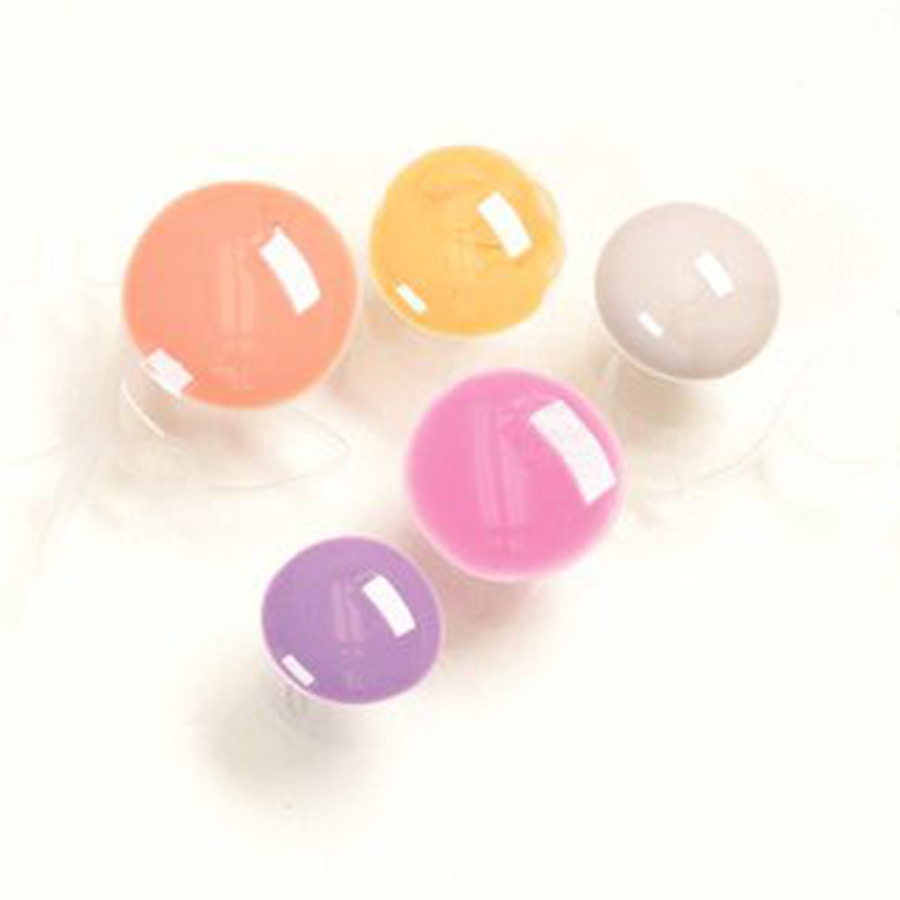
E-Nail Couture Candy Jelly
LED/UV Builder Gel
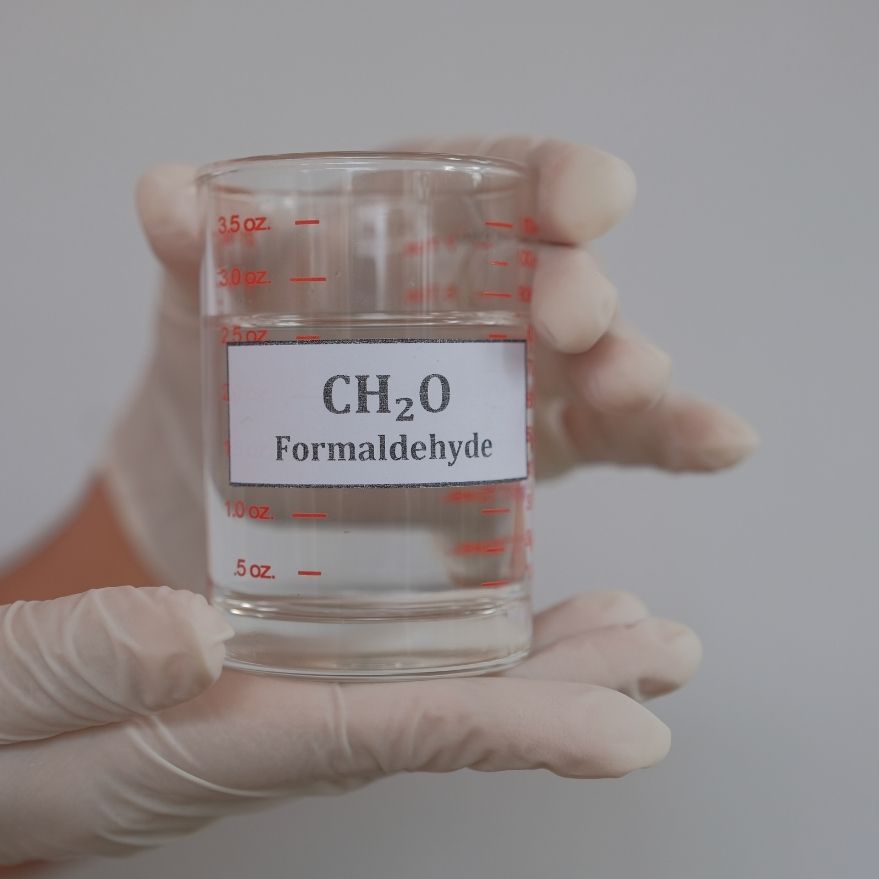
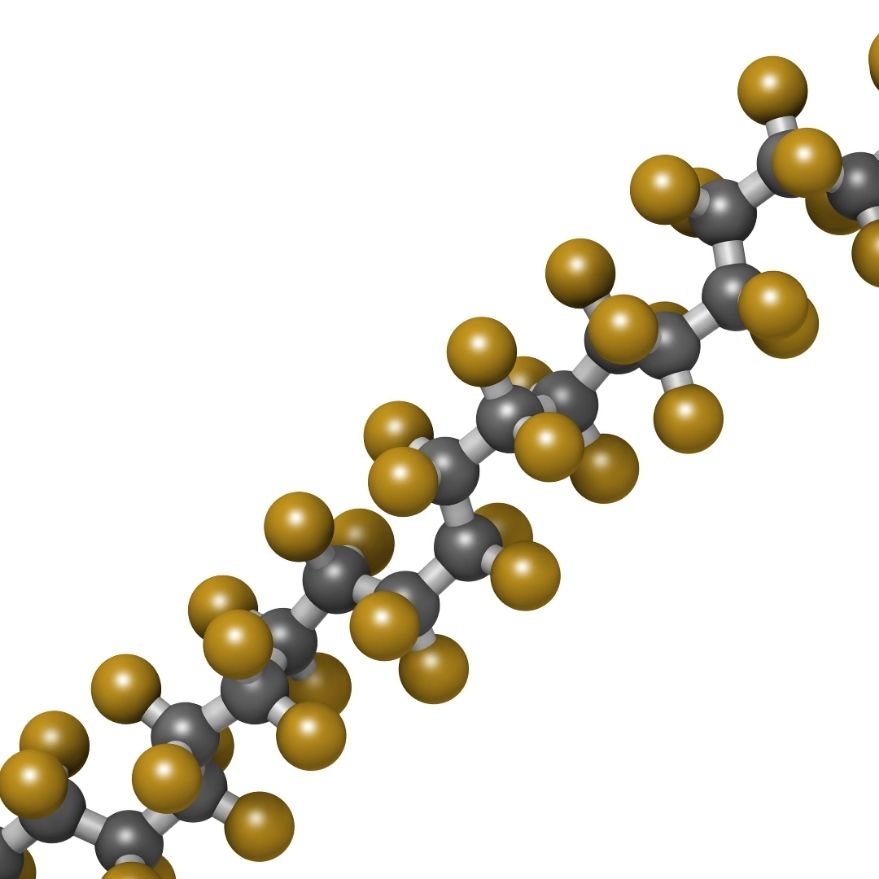
UV GEL [yoo-vee-jel]
What it is: A partially polymerized acrylate, with a gel-like consistency, that includes a photoinitiator that fully cures or polymerizes when exposed to a specialized range of UV light. Available in various forms and shades of hard and soft gel for a multitude of uses in the nail industry.
How to use it: Used as an artificial nail enhancement or a nail art medium for the creation and decoration of nails.
How to apply it: Float onto a nail form or over a nail tip to strengthen, extend or color the nail, or used with fine brushes to create nail designs and cured in a UV lamp.
How to remove it: File off or dissolve with remover according to the type of gel and the manufacturer’s instructions.
How to store it: Store with lids tightly closed in a cool, dry place and keep away from heat and light.
VIDEOS RELATED TO THIS TERM

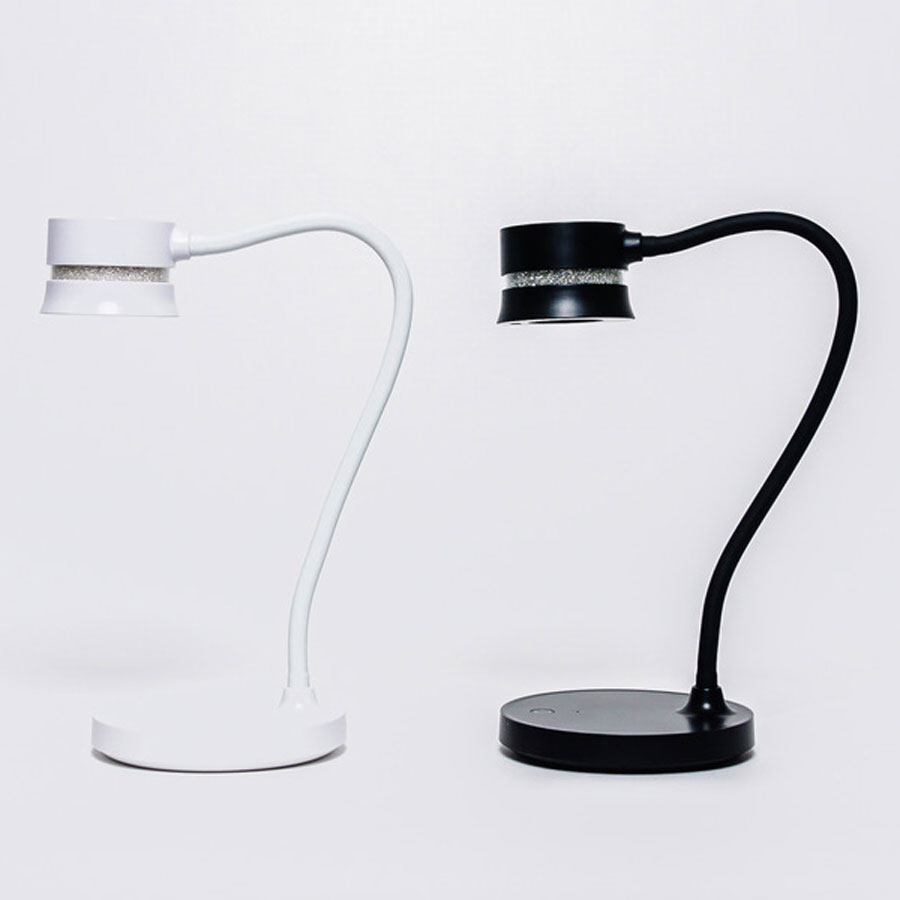
UV DESK LAMP
Recommended Products
Kupa
UV Duet Lamp
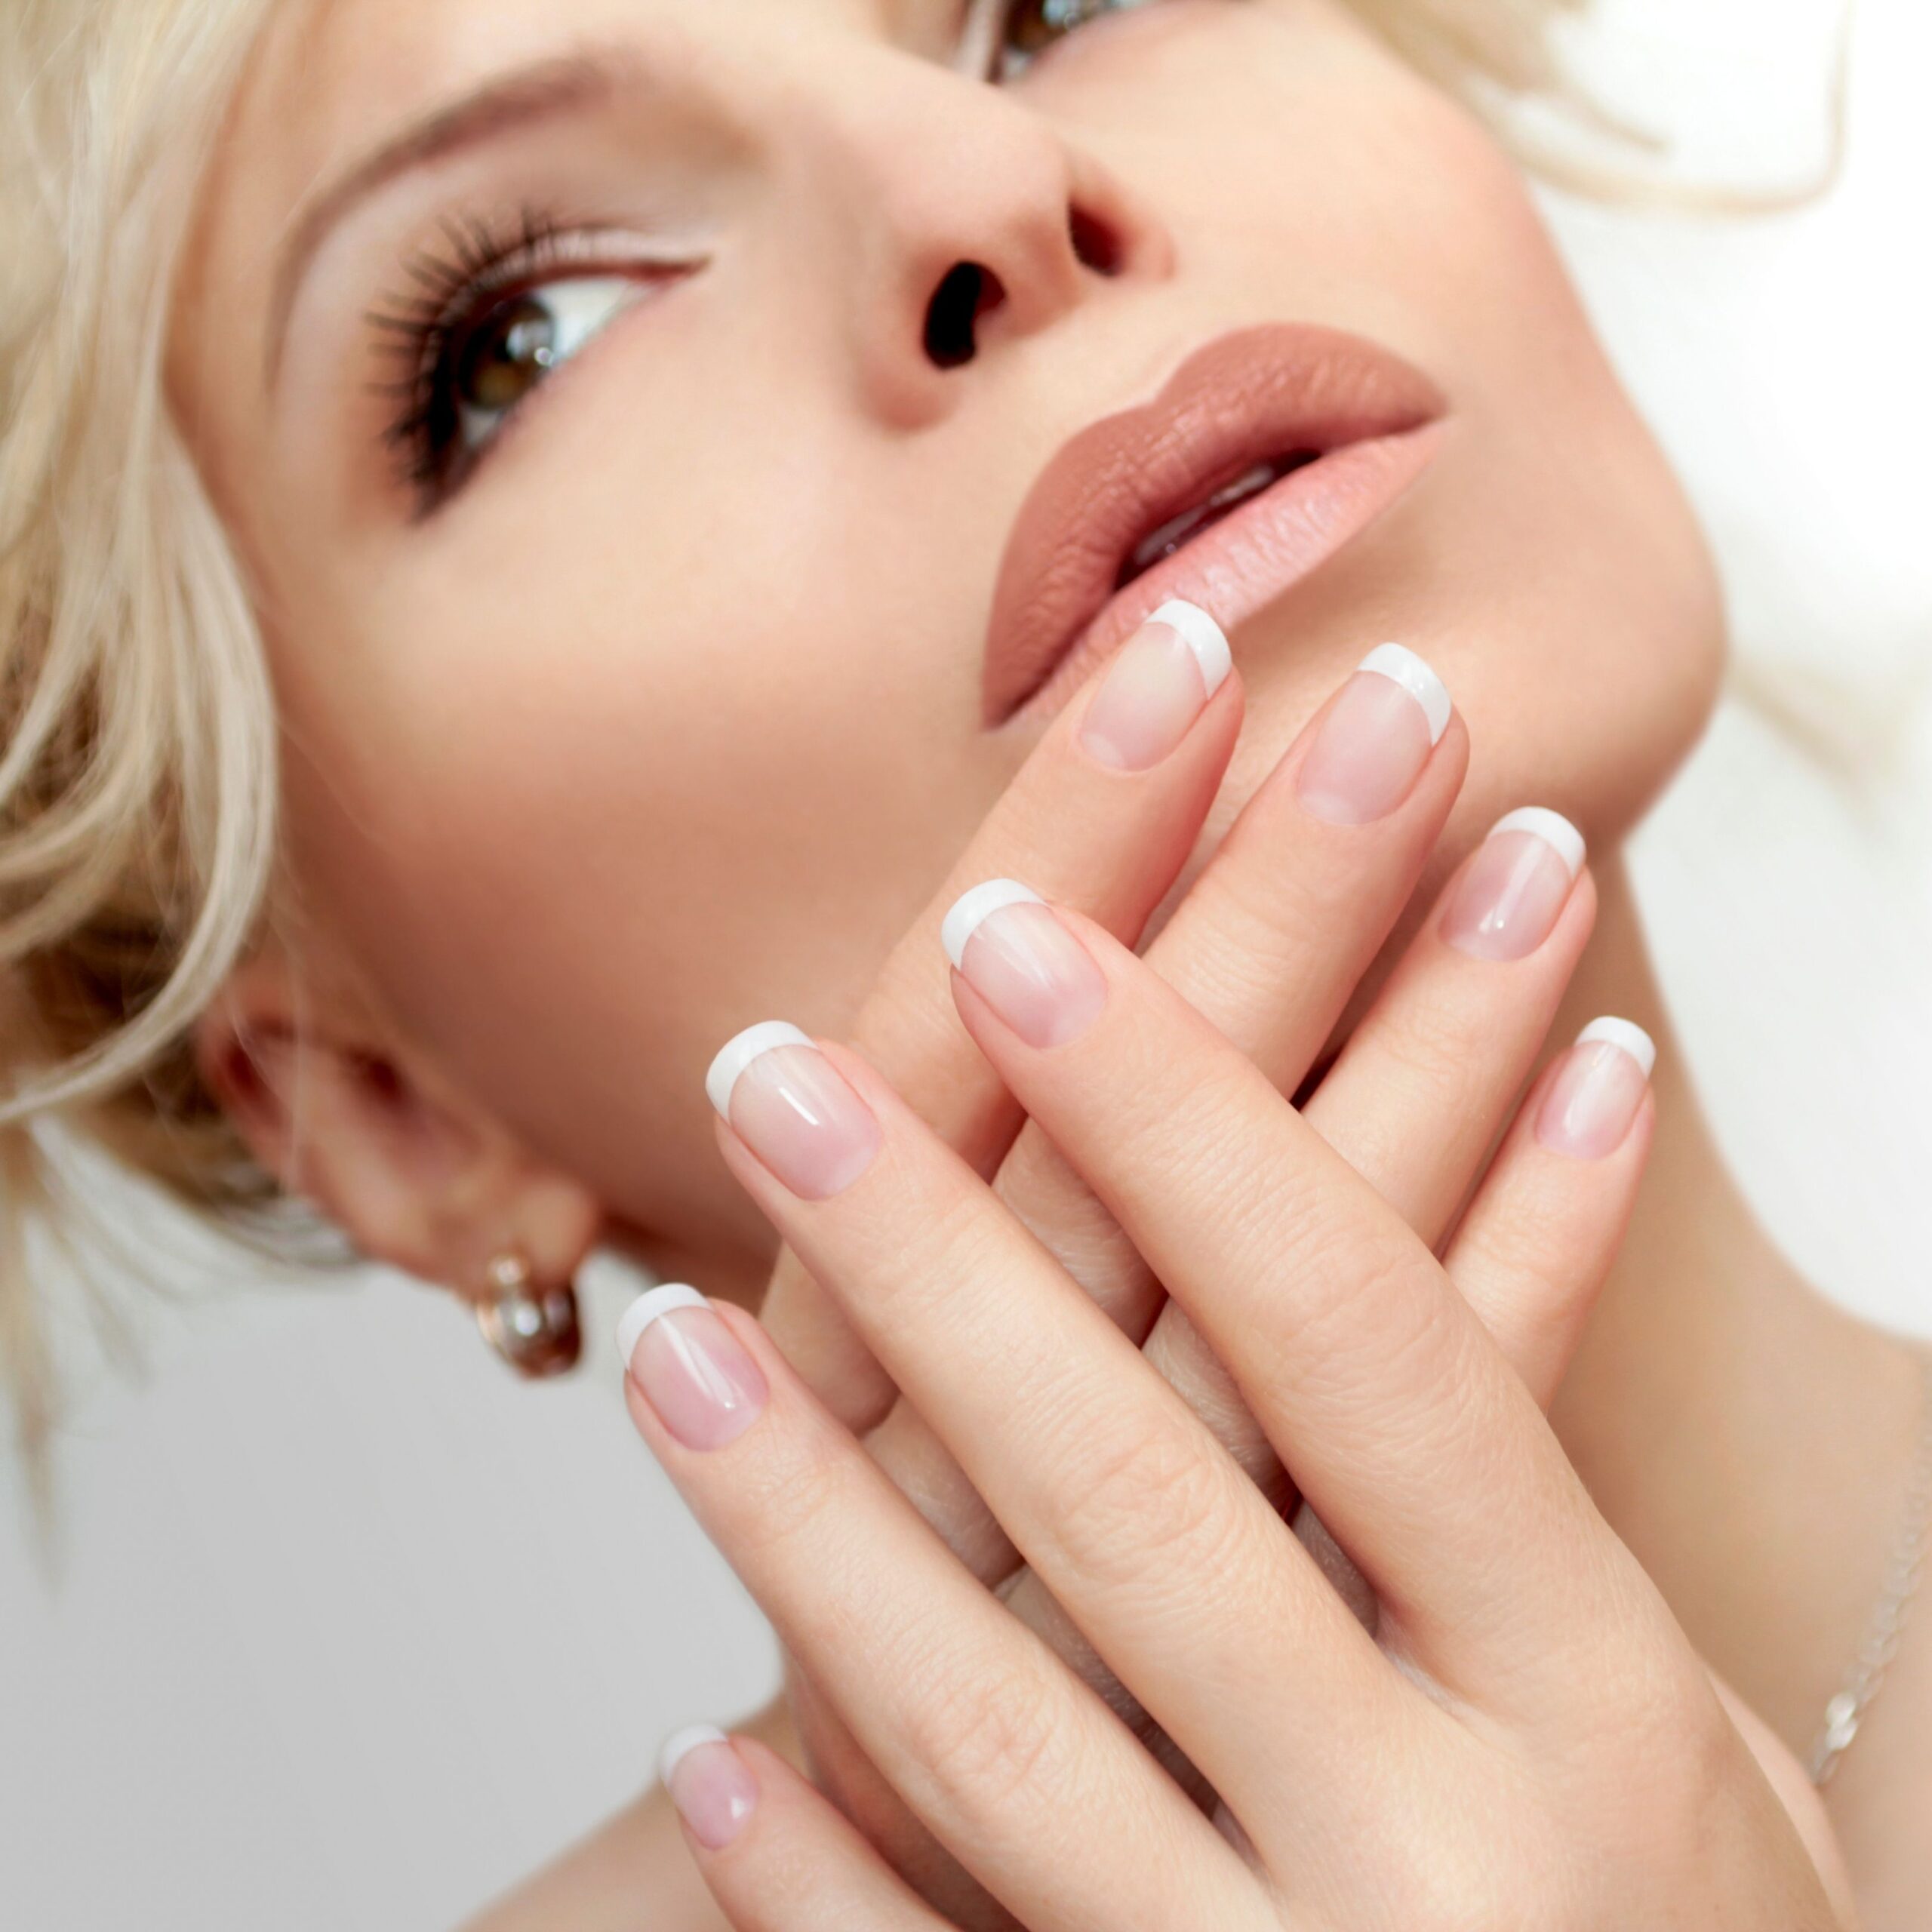
UV DESK LAMP [yoo-vee desk lamp]
What it is: A desk lamp that emits white light for general task lighting and can change to ultra violet light for flash curing nail products.
How to use it: A UV desk lamp can be used on a nail station to provide task lighting for nail services. Because of it’s dual capabilities, it can also be used to flash cure photo-sensitive products such as gels, gel polishes and acrygels by guidling the nails to the light to allow the sensor to initiate the UV light transition. After a programmed amount of time, the UV light will switch back to white light.
How to clean: Gently wipe the lamp with a damp cloth to clean. Spray with a disinfectant when needed. Spot clean the base with acetone if needed.
How to store: Power off and store on a nail station or in a safe place.
VIDEOS RELATED TO THIS TERM
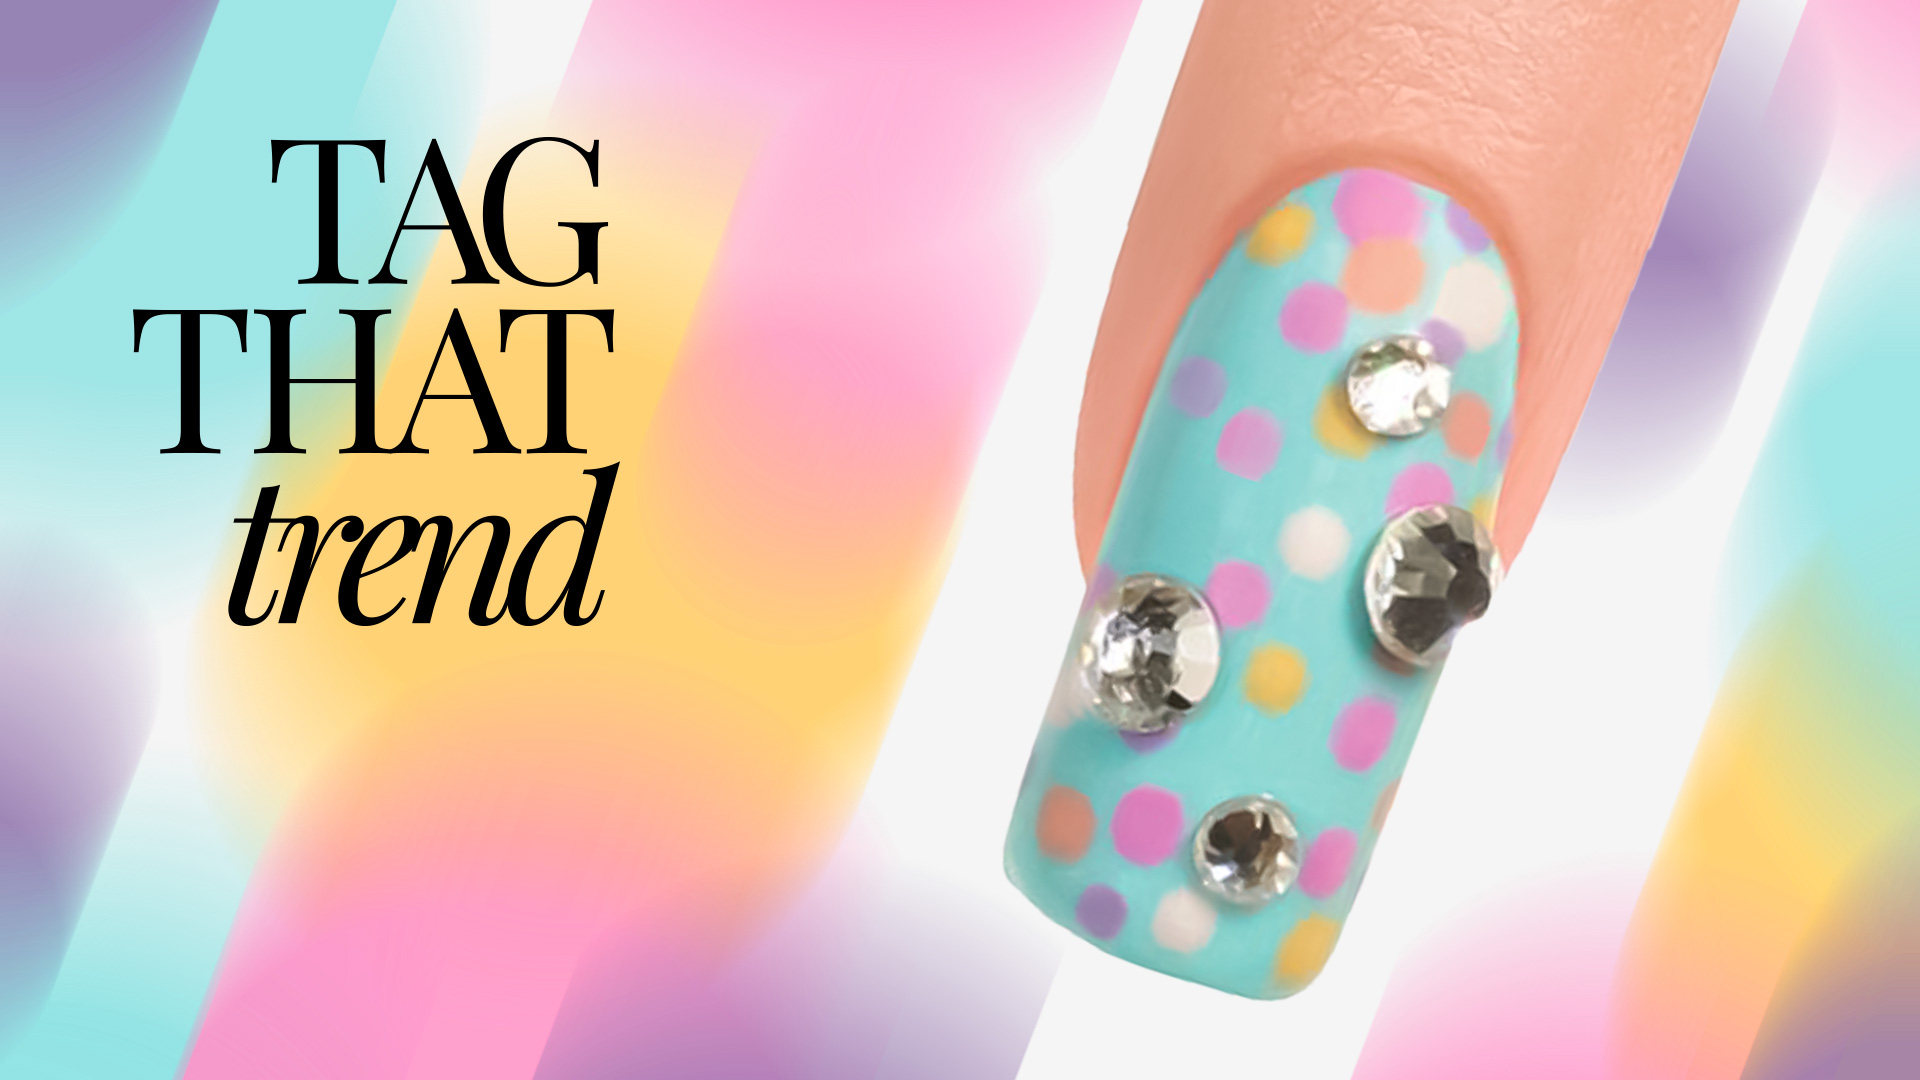
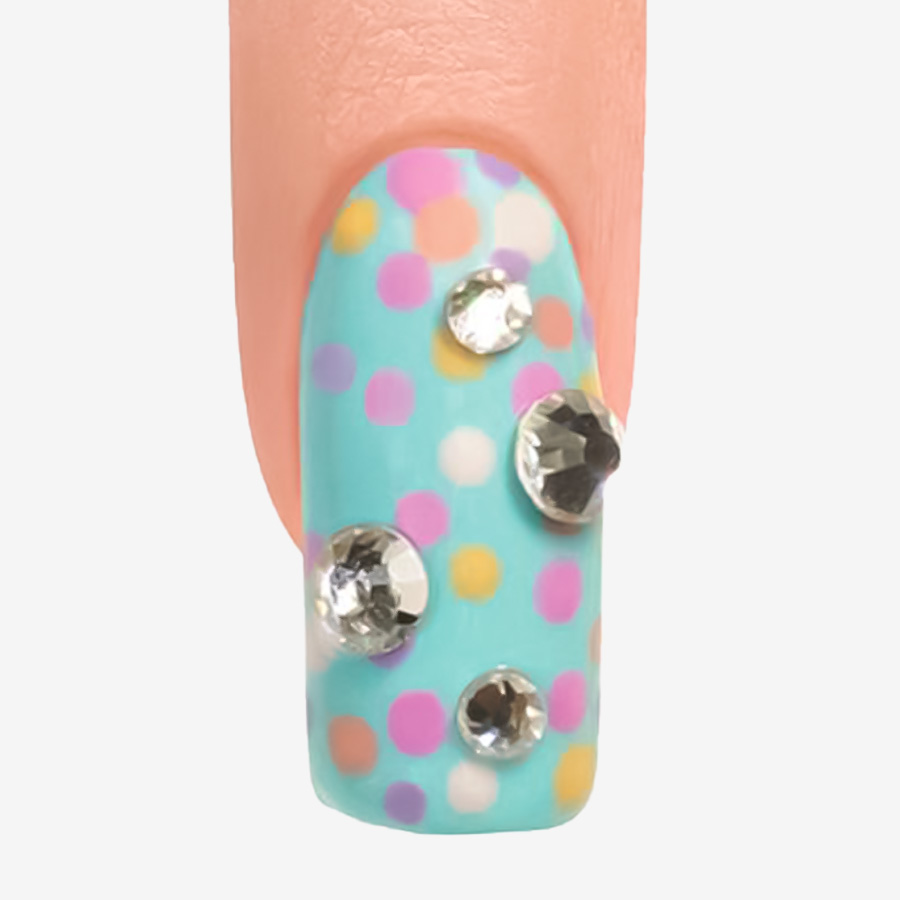
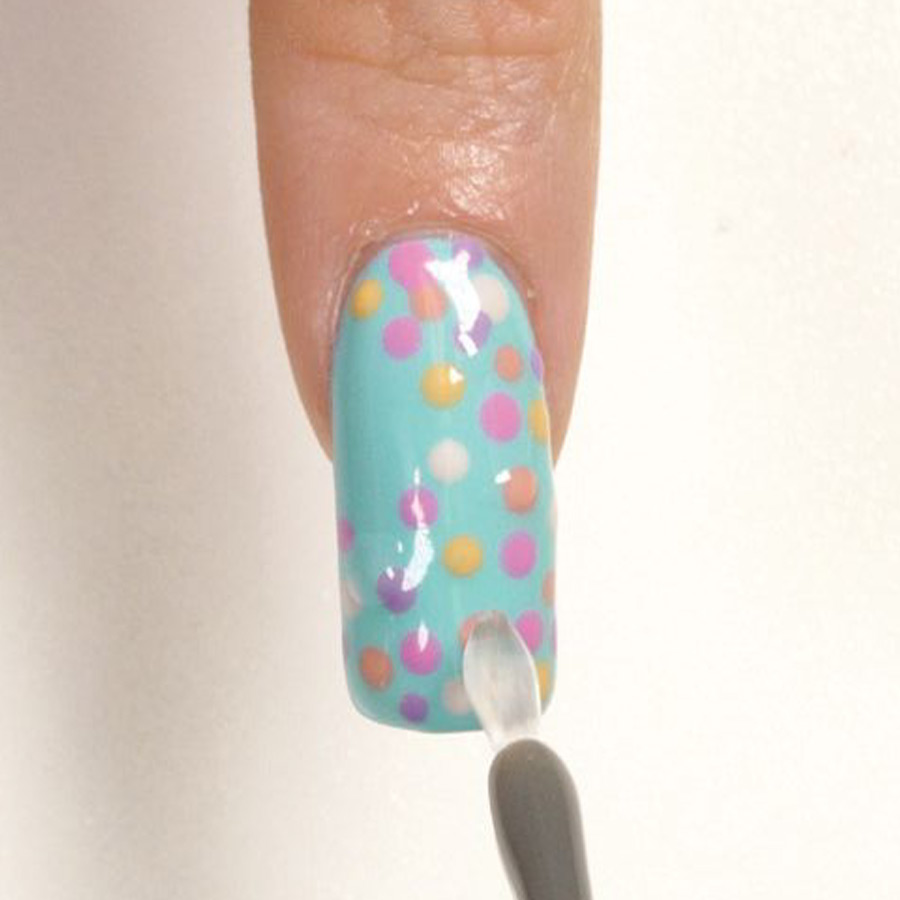
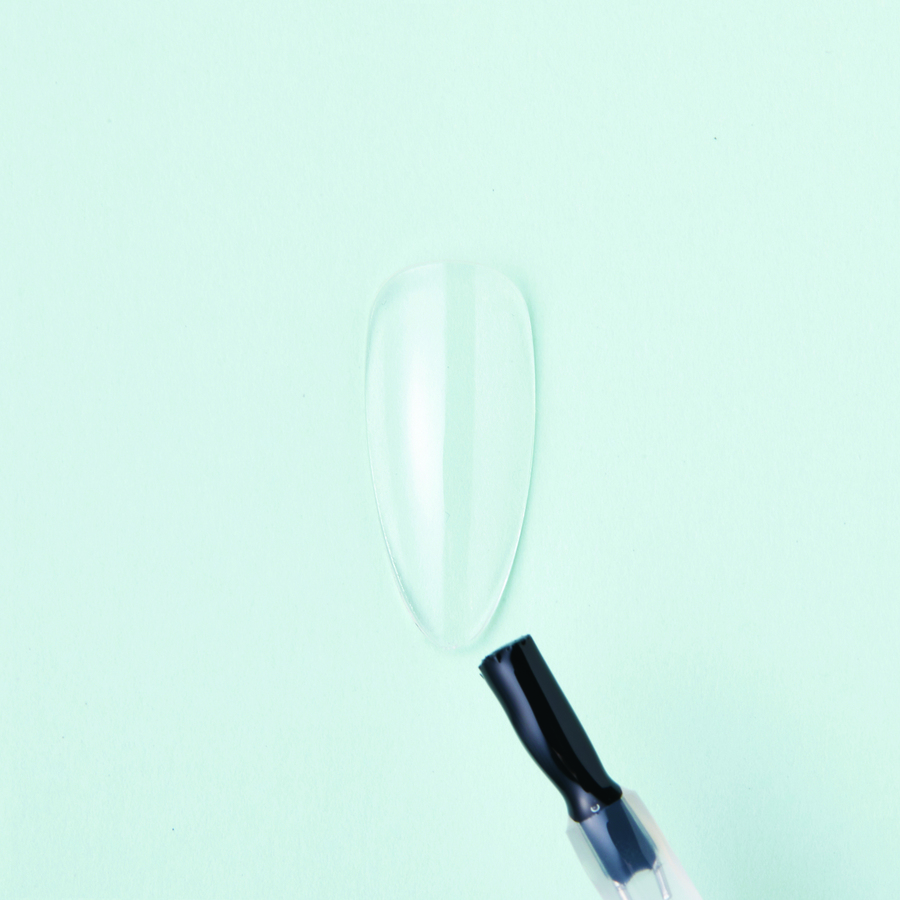
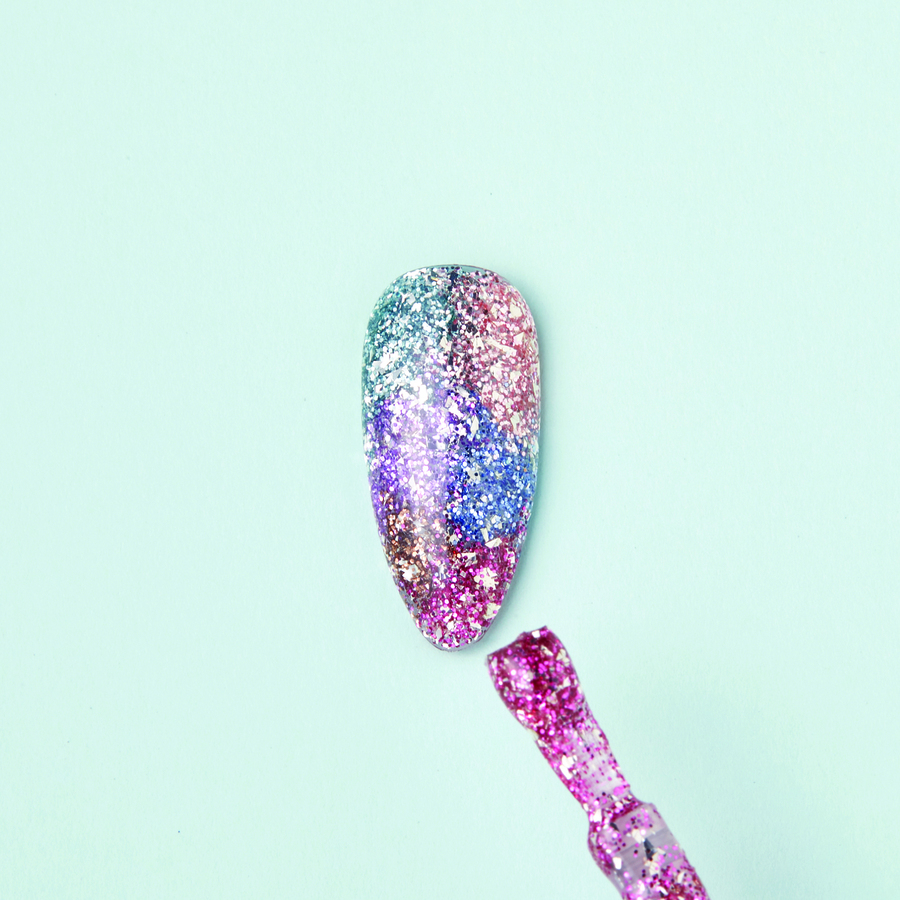
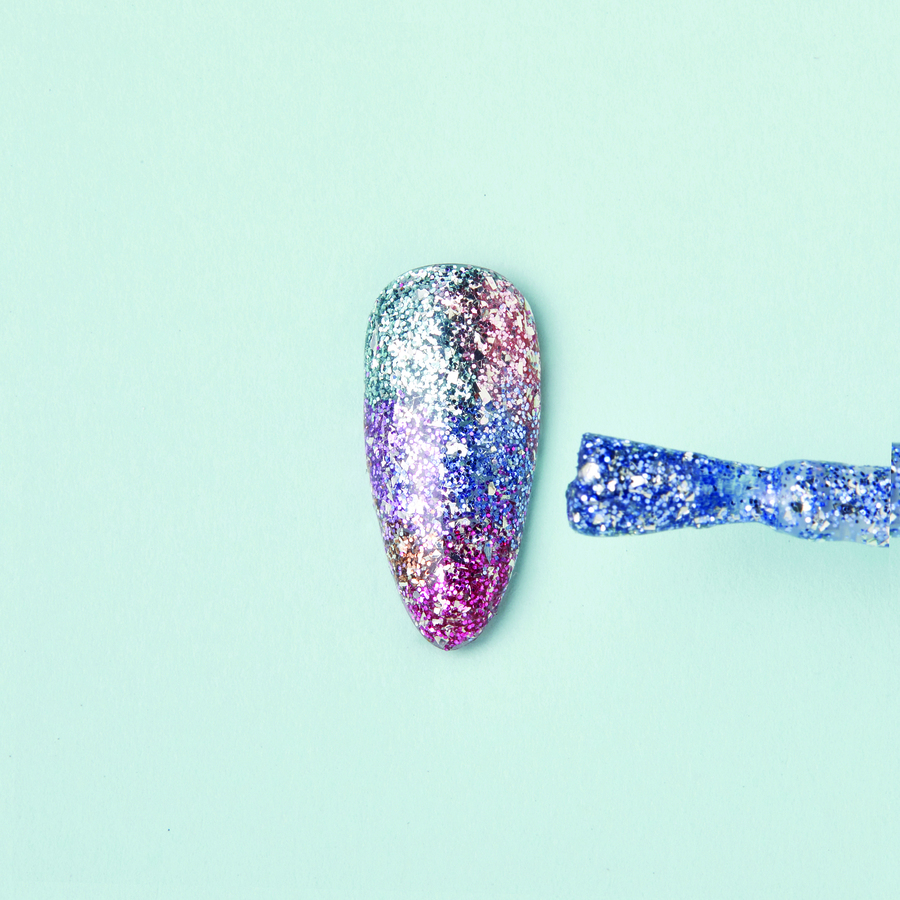
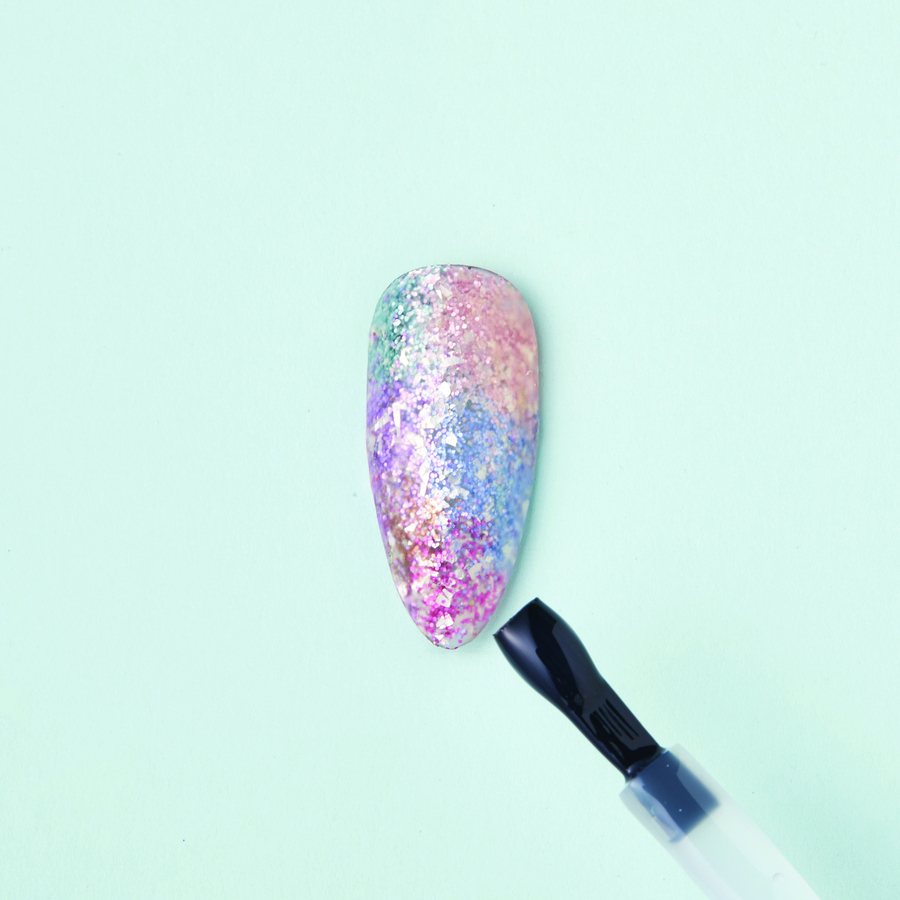
Confetti & Bling
Confetti & Bling
![]()
Alisha Rimando
This quick design looks great on any color, in any size, on one nail or on all 10! Mix with other nail art looks or add bling to take it up a notch. For summer fun or birthday celebrations, this hand-crafted nail art can be accomplished in minutes.
PRODUCTS USED
- Bonding Gel
- UV/LED lamp
- Artistic Marbling Tool
- A Selection of Pastel Gel Polishes
- Glossing Gel
- Nail Surface Cleanser
- Lint-free Wipes
- Crystals
- Artistic Sani Tongs
 DOWNLOAD WORKBOOK
STEPS
Apply Bonding Gel. Then cure in the UV/LED lamp for 5-seconds.
Apply Anything Is Popsicle, then cure in the UV/LED lamp for 30-seconds. Repeat for the second coat.
Place a dot of Bubblegum Is Poppin’, Sorbae All Day, Scoop There It Is!, Summer Stunner & Sunshine Tan Line on the Artistic glass palette.
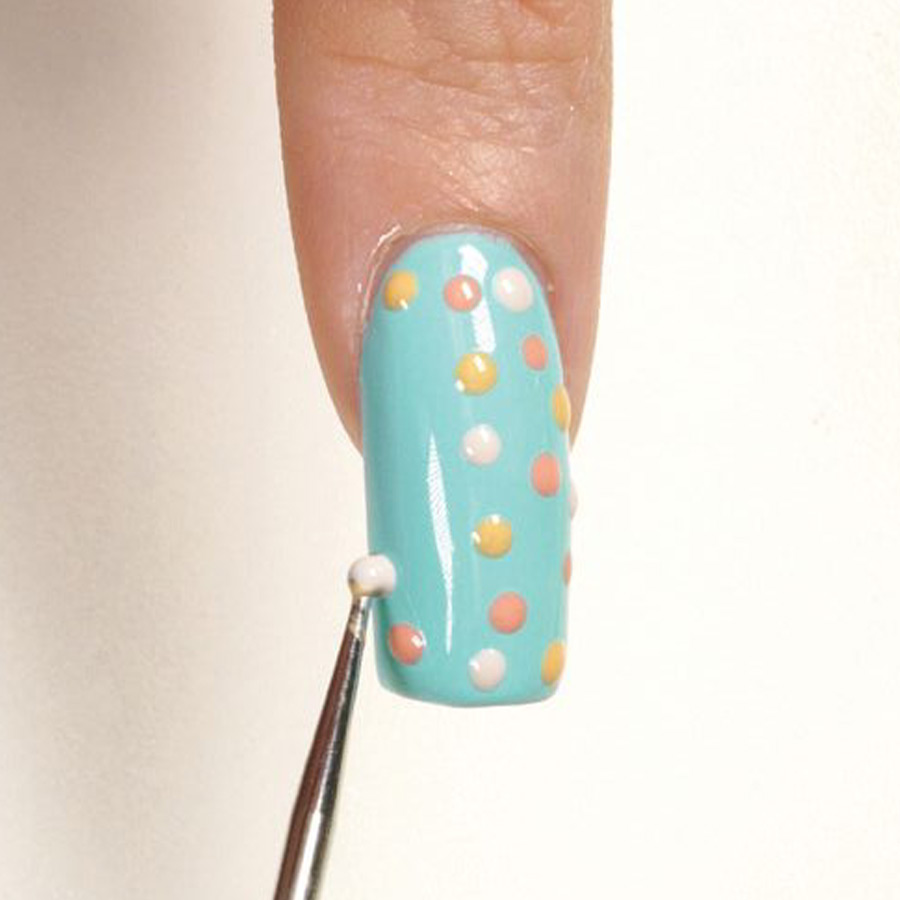
Using the Artistic Marbling Tool, apply a dot of Bubblegum Is Poppin’, Sorbae All Day, Scoop There It Is!, Summer Stunner, Sunshine Tan Line on the nail. Then cure in the UV/LED lamp for 30-seconds.
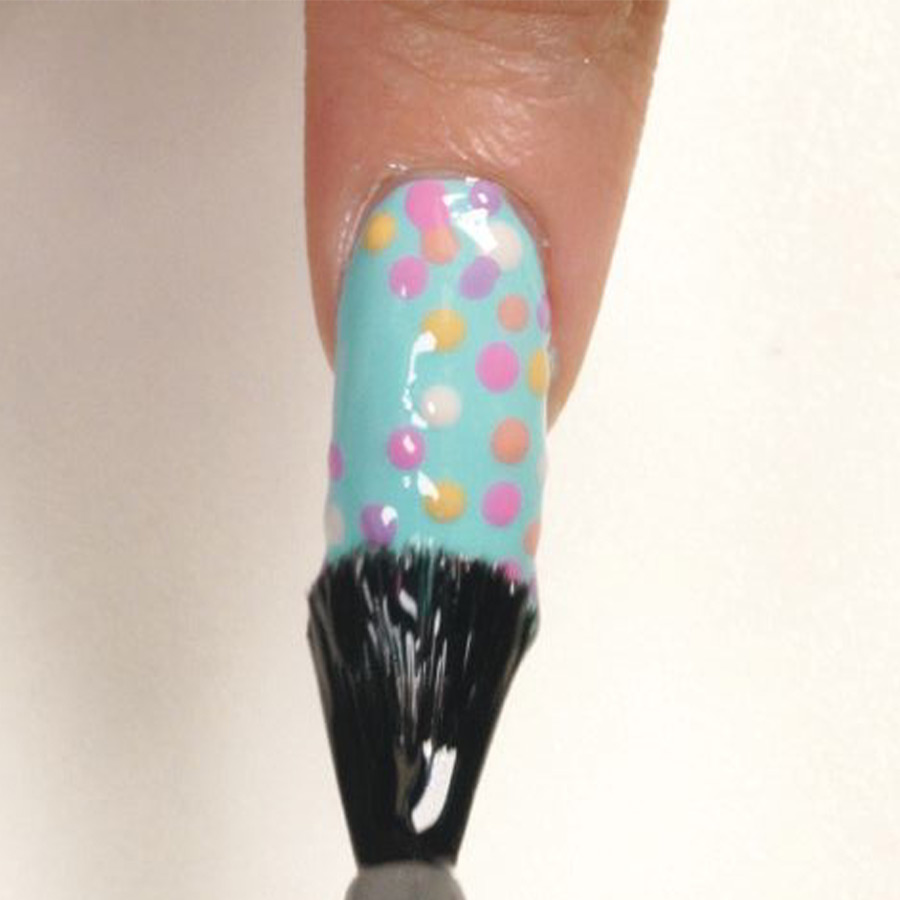
Apply Glossing Gel then cure in the UV/LED lamp for 30-seconds. Cleanse with Nail Surface Cleanser & a lint-free wipe.
Apply a drop of Bonding Gel on the nail where you would like to place the crystals.
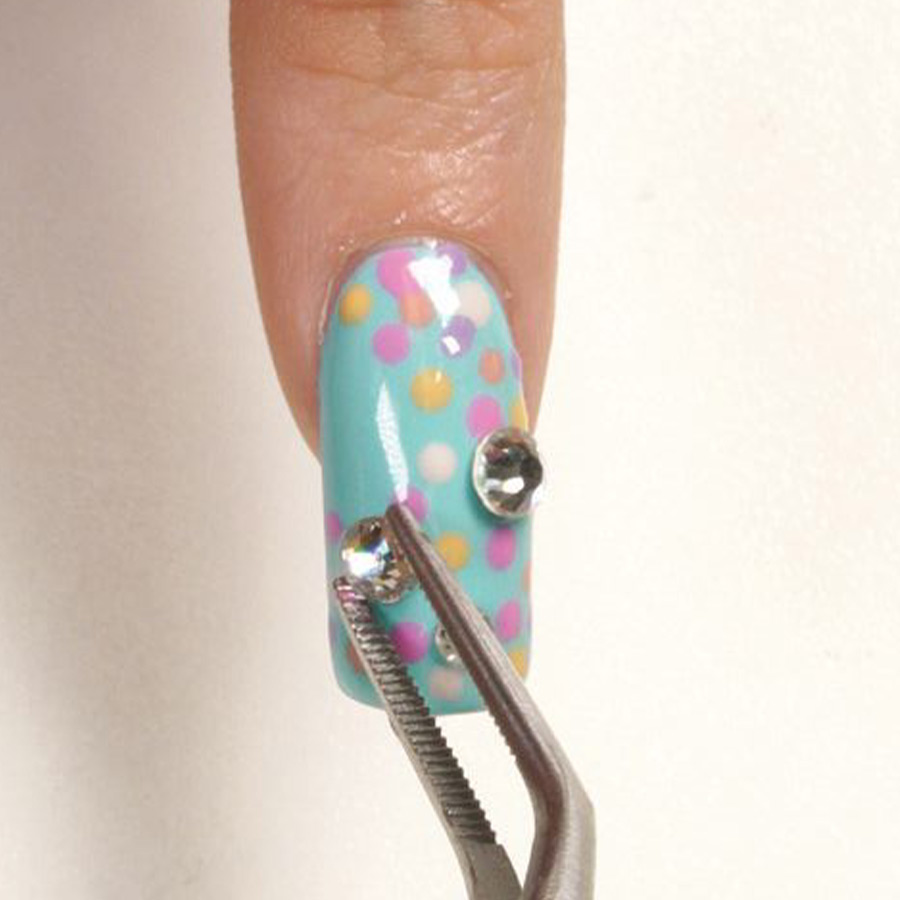
Use the Artistic Sani Tongs to place the crystals on the nail. Then cure in the UV/LED lamp for 5-seconds. Cleanse with Nail Surface Cleanser & a lint-free wipe.

MORE TAG THAT TREND
View all Tag That Trend
RELATED VIDEOS
MORE TO EXPLORE
Prep the natural nail using a 180-grit file, remove dust. Apply “Prep It!”, then two thin coats of Flex It! “Cover Peach”, curing each coat for 60-seconds.
Prep Apply a thin, even coat of HD Pro “Matt It!” Cure for 60-seconds.
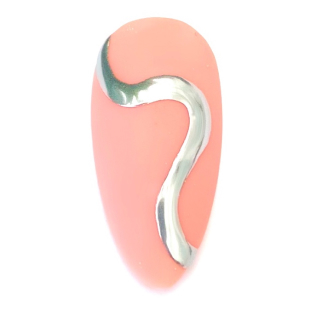
Use the HD Pro Long liner brush and HD Pro Art Gel in “Graphite” to create a wavy line. Cure for 30-seconds, then rub line with a dusting brush.
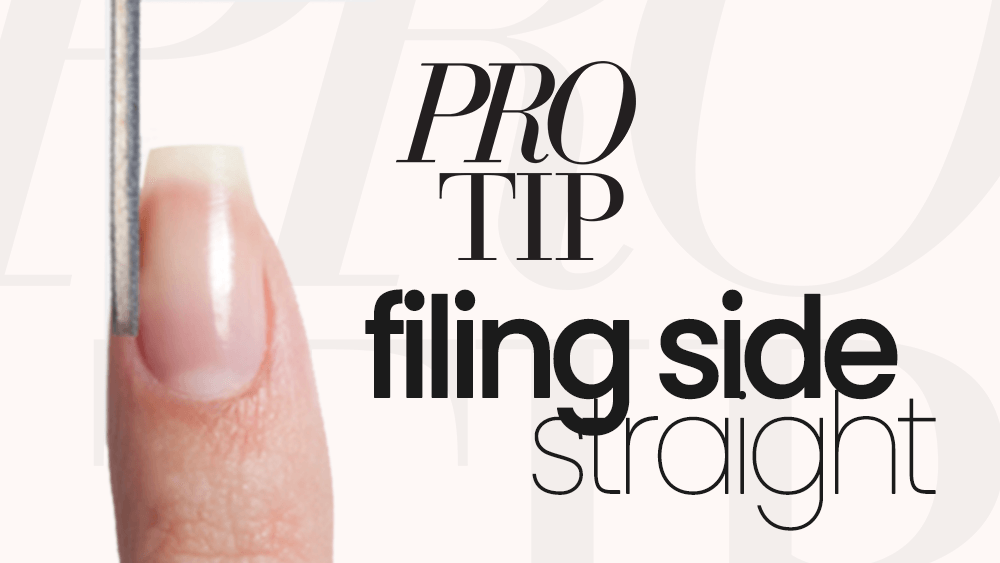
Filing Side Straight
![]()
Filing Side Straight
Getting your sidewalls straight can be difficult. A lot has to do with body position and other factors you don’t even think of. Learn the tricks from world champion, Alisha Rimando. She explains the things to look for when trying to keep your nails perfectly straight!
SEE MORE PRO TIPS
RELATED VIDEOS
MORE TO EXPLORE
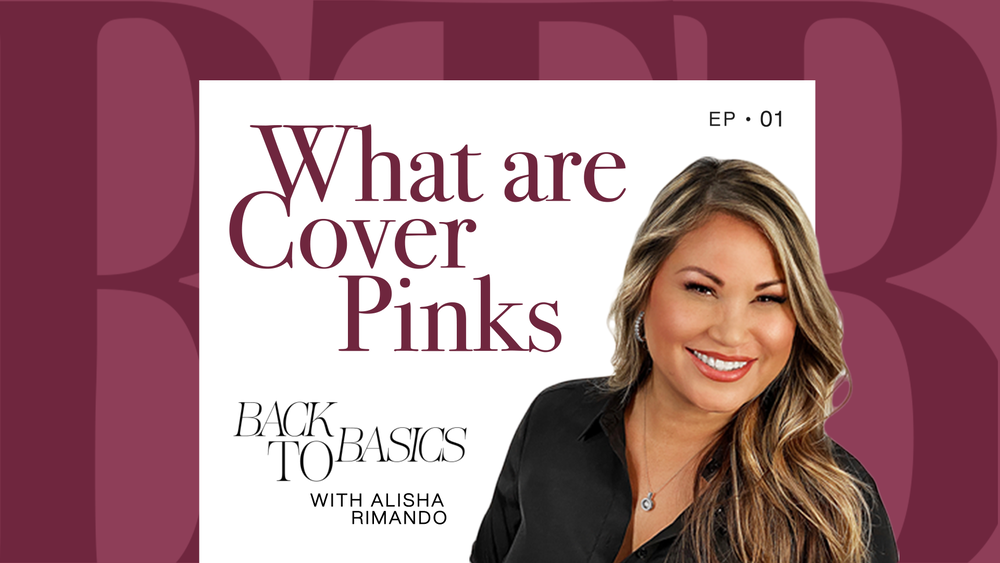
What Are Cover Pinks
![]()
What are Cover Pinks
Cover pink nail powders were created to make every nail client the perfect hand model! Alisha Rimando explains how simple powder pigments transformed the nail industry, telling the story of the day cover pink powders were created and why. Learn how picking up a bead of liquid and powder is different with these special camouflage pink powders and how using the techniques learned in this video can transform your client’s flawed, bitten and damaged nail plates into nail perfection.

SEE MORE BACK TO BASICS
RELATED VIDEOS
MORE TO EXPLORE

Holding Your Nippers
![]()
Holding Your Nippers
Have you considered there might be a way to hold your nail nippers for a better view during nail prep? Hazel Dixon shares a new way of using your cuticle nippers for a better view of the nipper blades while working.
SEE MORE PRO TIPS
RELATED VIDEOS
MORE TO EXPLORE
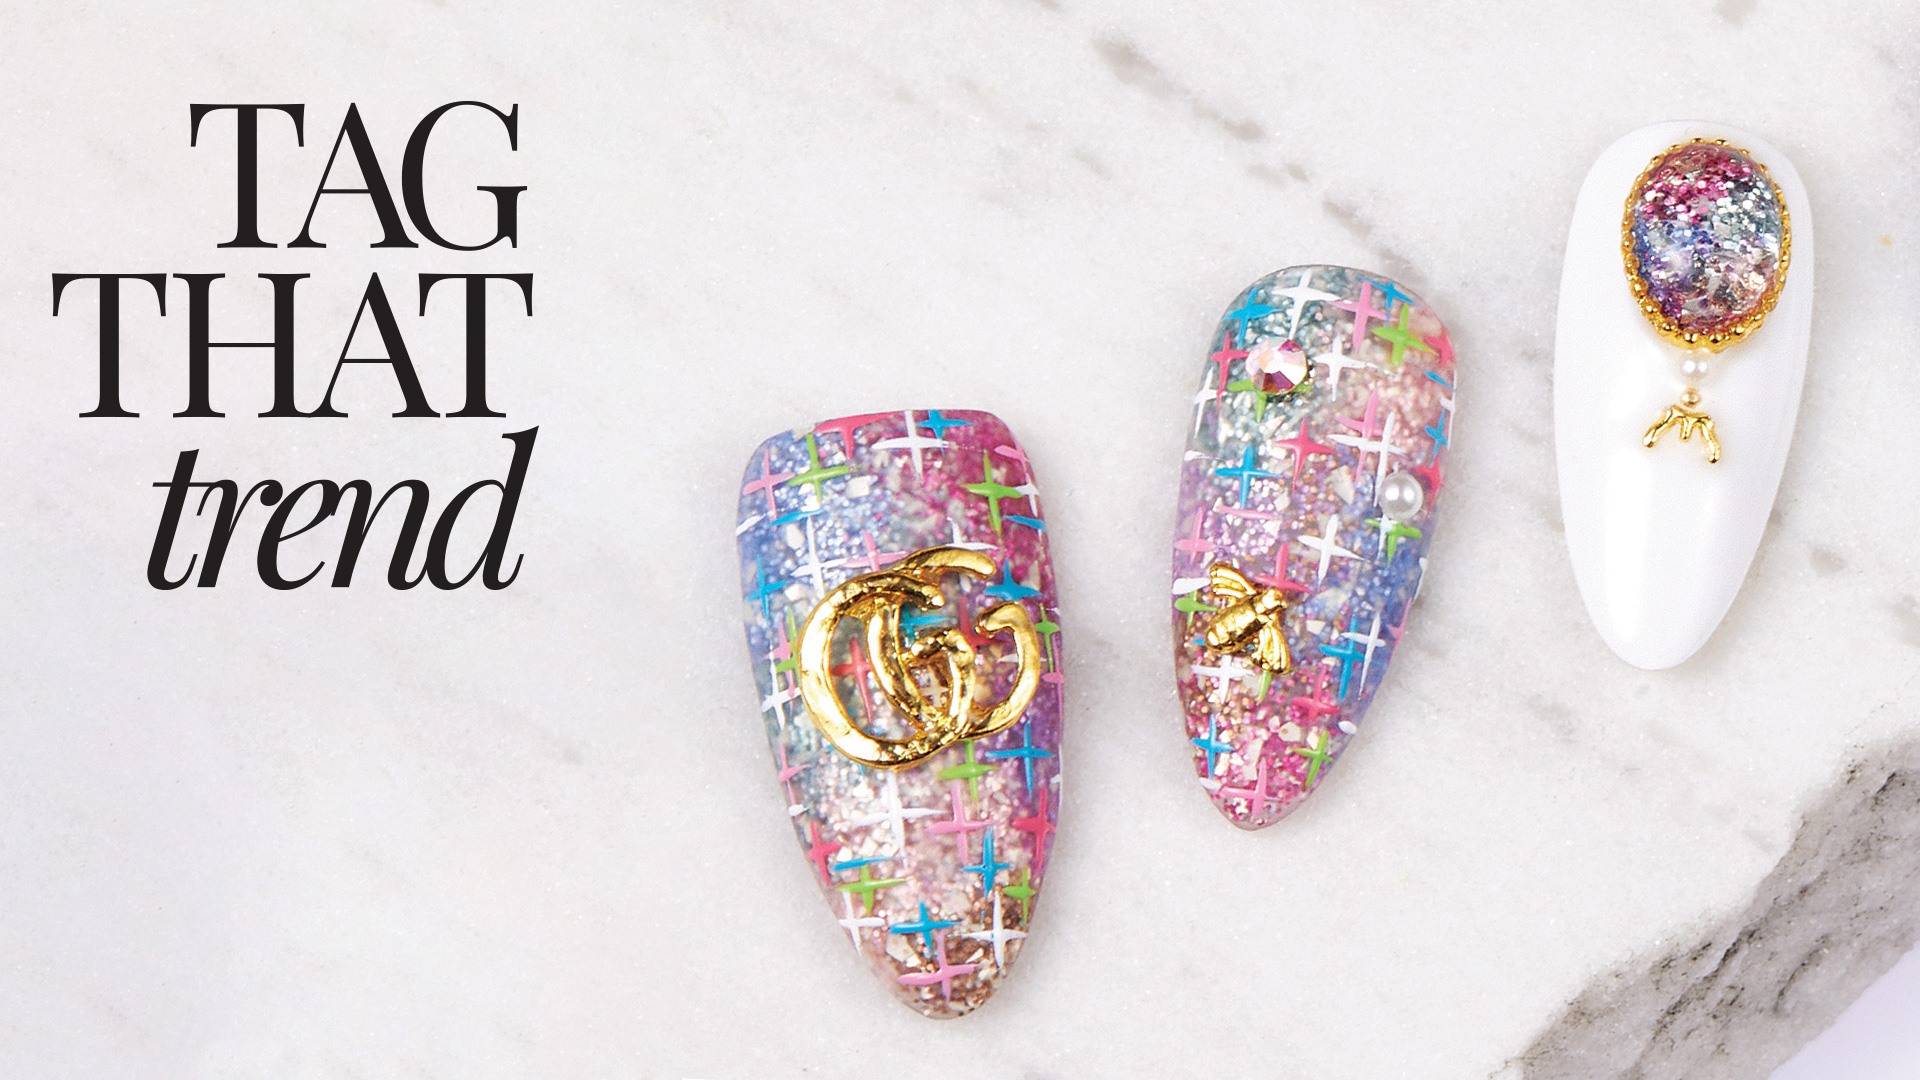
Glitter Retro Tweed
Glitter Retro Tweed
![]()
Kang A Hyeon
Kang A Hyeon has been in nail industry since 2011. Since that time, Kang A Hyeon has worked as a nail technician at numerous salons before moving into the sphere of educator and to become a qualified DGEL instructor. Currently, A Hyeon develops nail products and presents lectures at various colleges. More recently, A Hyeon has been working as an editorial nail artist for various magazines including NAILHOLIC in Seoul.
PRODUCTS USED
- File
- DGEL Signature Base Gel
- Emi Nail Gel paints
- DGEL Mini Bold Non-Wipe Matte Top Gel
- DGEL
- Pumping Clear Gel (SIC)
- Aurora Queen Retro Collection Glitter Gel in AQ.121, AQ.122, AQ.123, AQ.124, AQ.125, AQ.128
- DGEL x JINI Painting Color Gel in PJ001, PJ007, PJ012, PJ013
- DGEL Disney Painting Gel (Minnie Mouse)
- DGEL Artist Brush (02 Liner, 03 Liner)
- DGEL Gel Cleaner
- DGEL Brush Cleaner
- Rhinestones
- dust brush
- DGEL LED Lamp
STEPS
Prepare the nail tip to the shape of your choice.
Apply Signature Base Gel & cure.
Marble the surface using AQ.121, AQ.122, AQ.123, AQ.124, AQ.125 & AQ.128 Glitter Gels, then cure.
Repeat step 3.
Apply Non-wipe Matte Top Gel & cure.
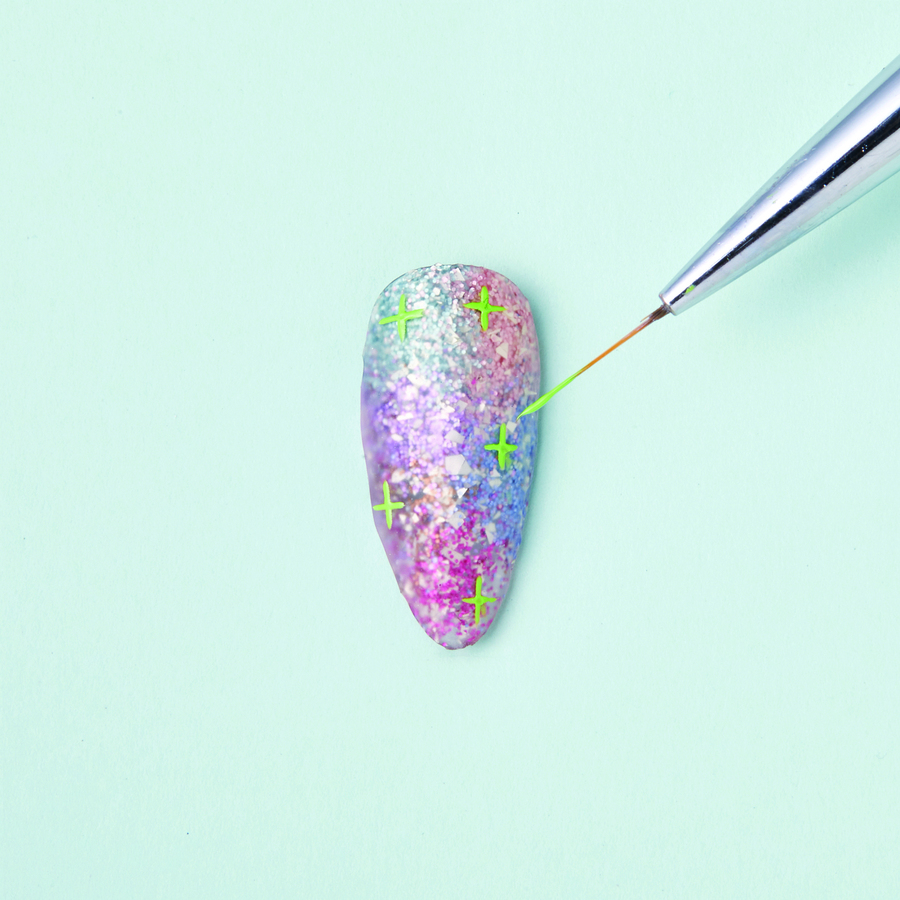
Start creating the tweed design using the PJ001 Painting Color Gel using the 03 liner brush & then cure.

Continue the tweed design using PJ013 Painting Color Gel using the 03 liner brush then cure.
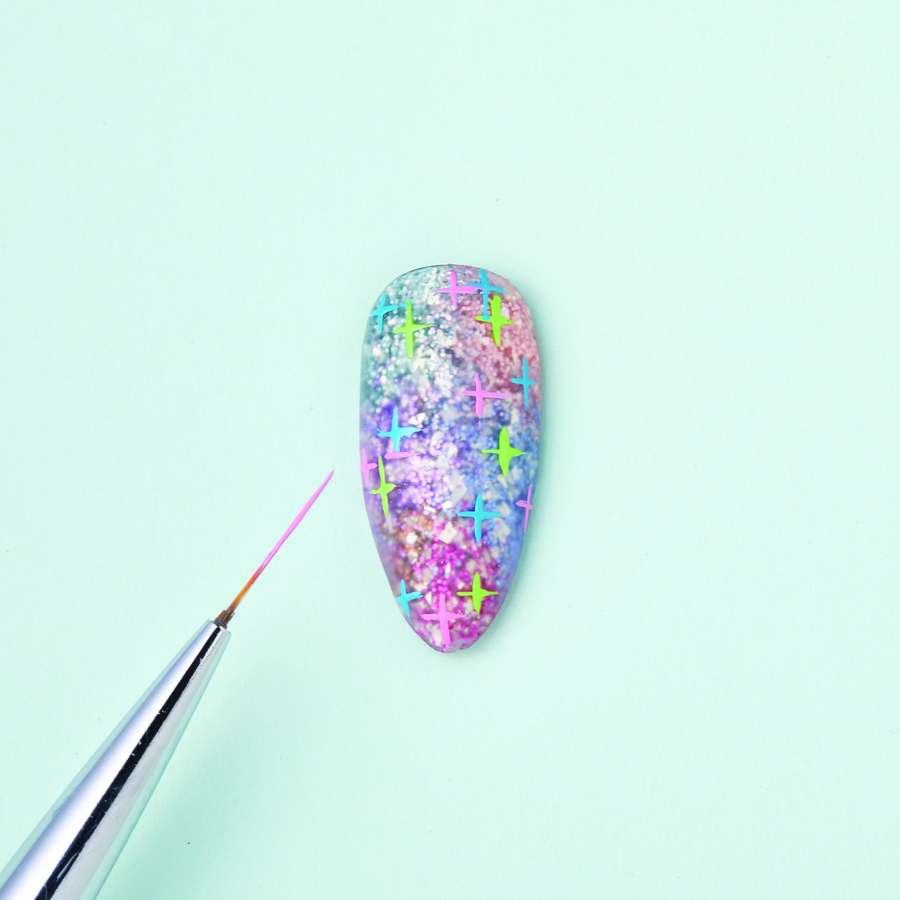
Now use PJ012 pink Painting Gel with the 03 liner brush to build the tweed design & cure.
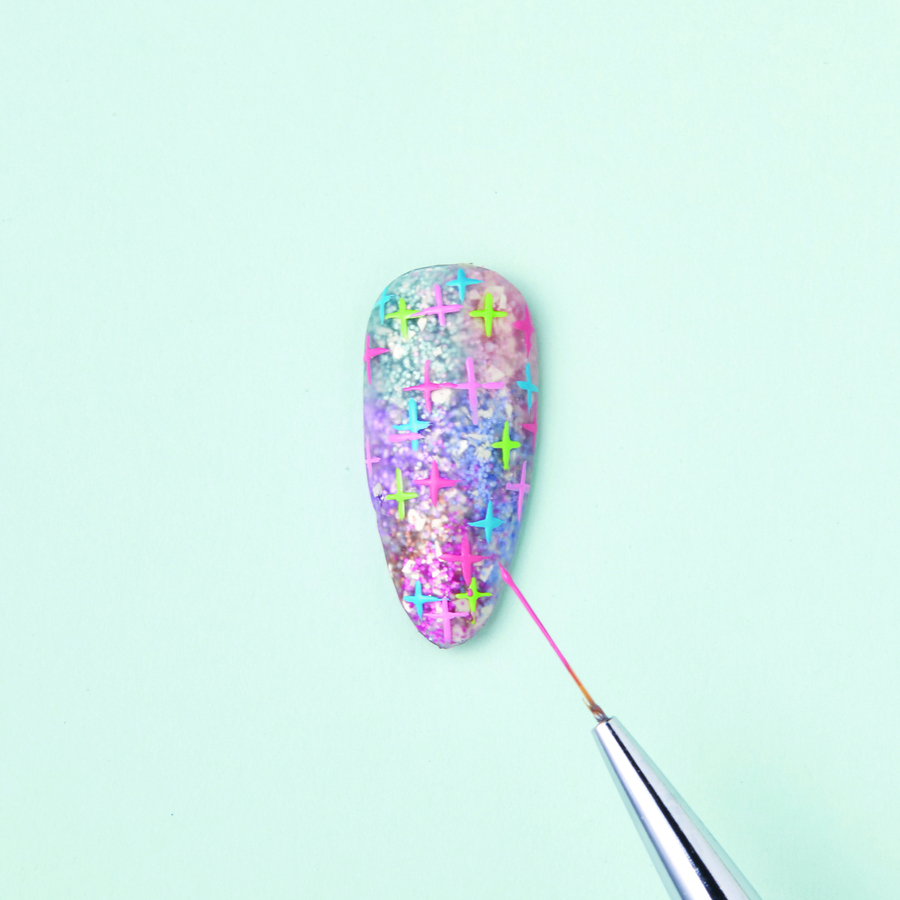
Keep building the layers of the tweed design using Disney Painting Gel in the Minnie Mouse shade using the 03 liner brush & cure.
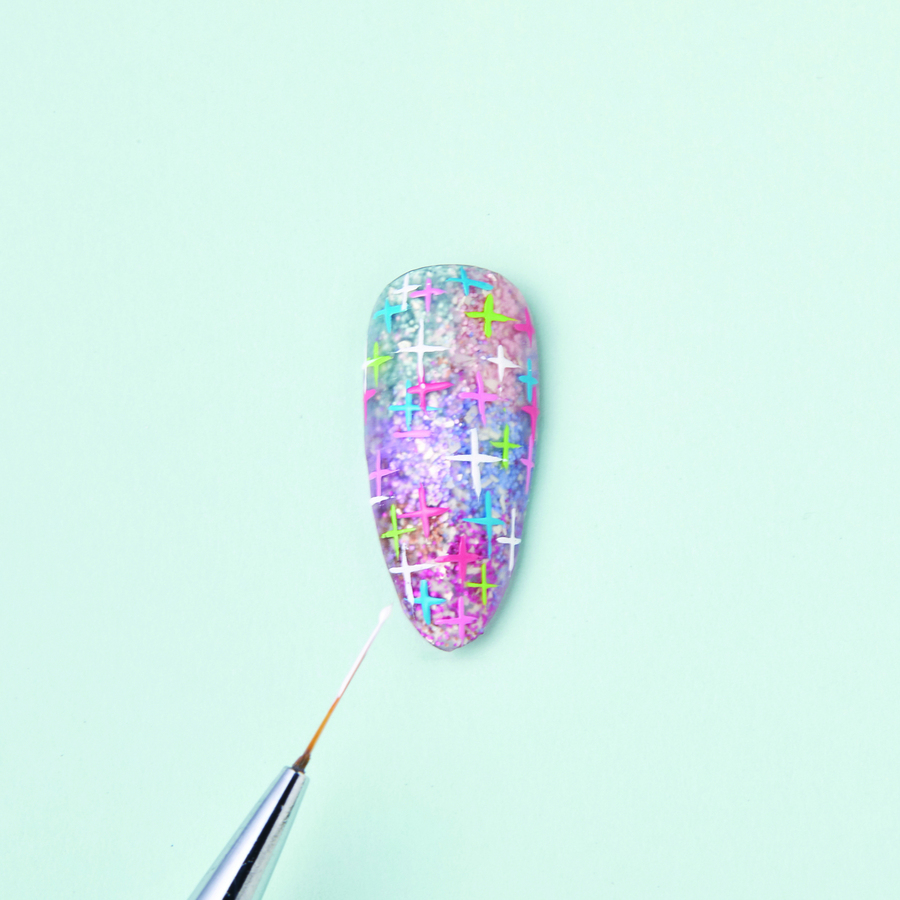
Add white crosses for the tweed effect using PJ007 Painting Color Gel with an 03 liner brush & cure.
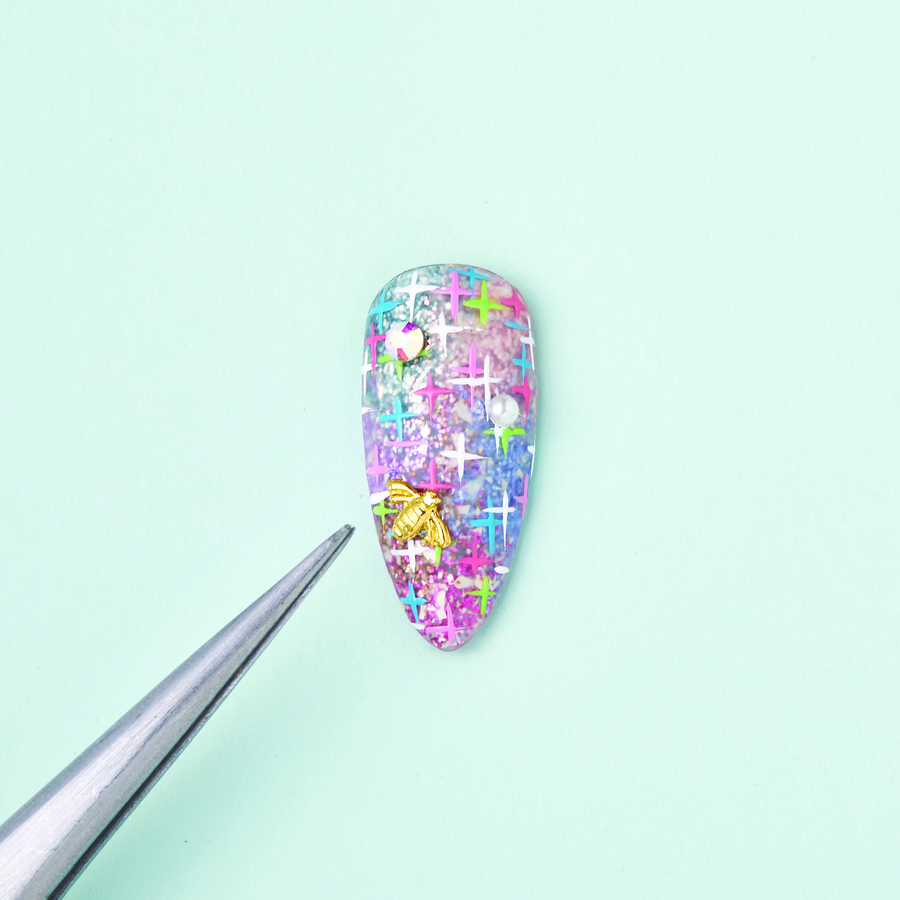
Complete the design by applying Pumping Clear Gel SIC using an 02 liner brush & add rhinestones & charms then cure.
MORE TAG THAT TREND
RELATED VIDEOS
MORE TO EXPLORE
Prep the natural nail using a 180-grit file, remove dust. Apply “Prep It!”, then two thin coats of Flex It! “Cover Peach”, curing each coat for 60-seconds.
Prep Apply a thin, even coat of HD Pro “Matt It!” Cure for 60-seconds.
Use the HD Pro Long liner brush and HD Pro Art Gel in “Graphite” to create a wavy line. Cure for 30-seconds, then rub line with a dusting brush.
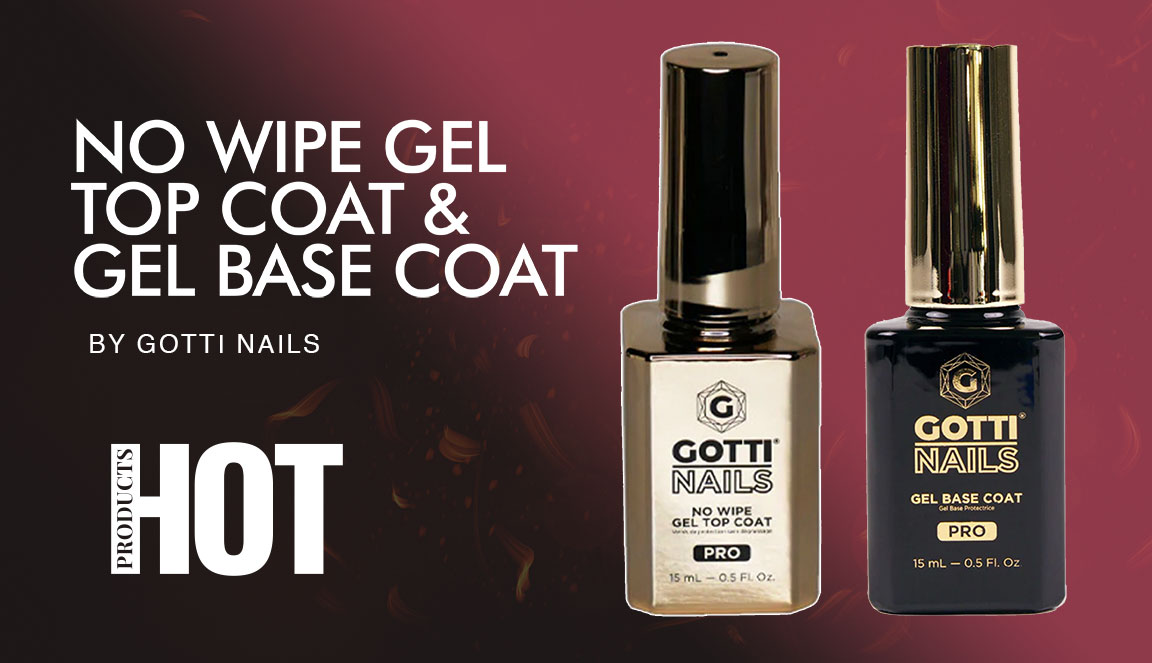
Gotti Nails Gel Base & Top Coat
![]()
Gotti Nails
Robert Nguyen claims, “I just wanted an amazing top coat with impeccable shine and strength. That’s how Gotti nails really started.” So GlossaryLive definitely had to try out this hot product and see just how one top coat could be so amazing it branched out to become an entire nail line. In this episode we also test the Gotti gel base coat and matte top coat too.
SEE MORE HOT PRODUCTS
RELATED VIDEOS
MORE TO EXPLORE
Camouflaging Flaws
![]()
Camouflaging Flaws
Fixing flaws in the natural nail is part of the job. If you can fix damage, discoloration and flaws in the nail while keeping them looking natural, your clients will never leave you. With cover pink or camouflage powders and a few simple techniques, you can fix any flaw or defect in the natural nail and provide perfect natural looking nails on every client.
SEE MORE BACK TO BASICS
RELATED VIDEOS
MORE TO EXPLORE
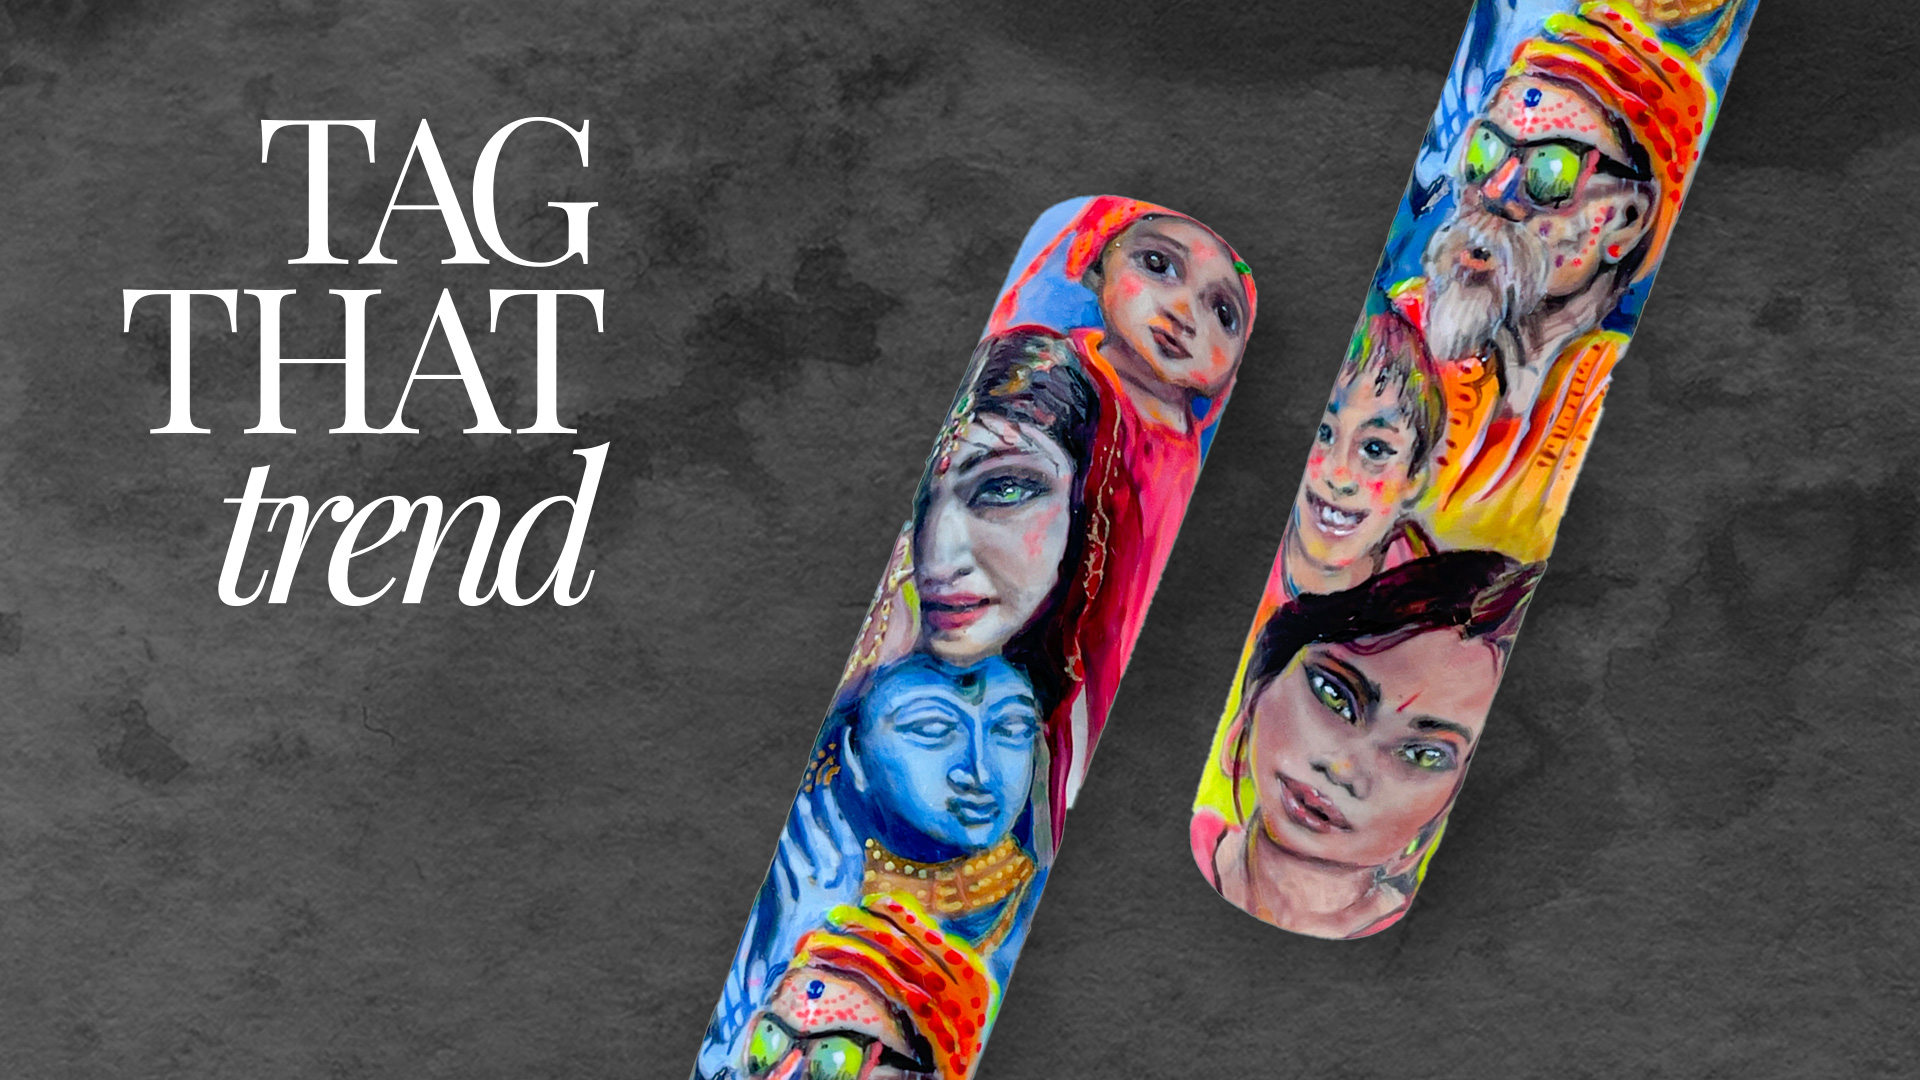
Character Portraiture
Character Portraiture
![]()
Jacqueline McClement
Award-winning Jacqueline McClement, certified nail technician and owner of private nail studio, Lux Nail Art Studio Inc in Estevan, Saskatchewan in Canada is also a successful published children’s book illustrator. “I’ve created many different types of art throughout my life, from large outdoor wall murals and backdrops, to children’s books and wall paintings. However, I never found my true niche until I discovered nail art. This is where I really found my passion and I’ve never been so happy as when I’m creating mini masterpieces on nails.”
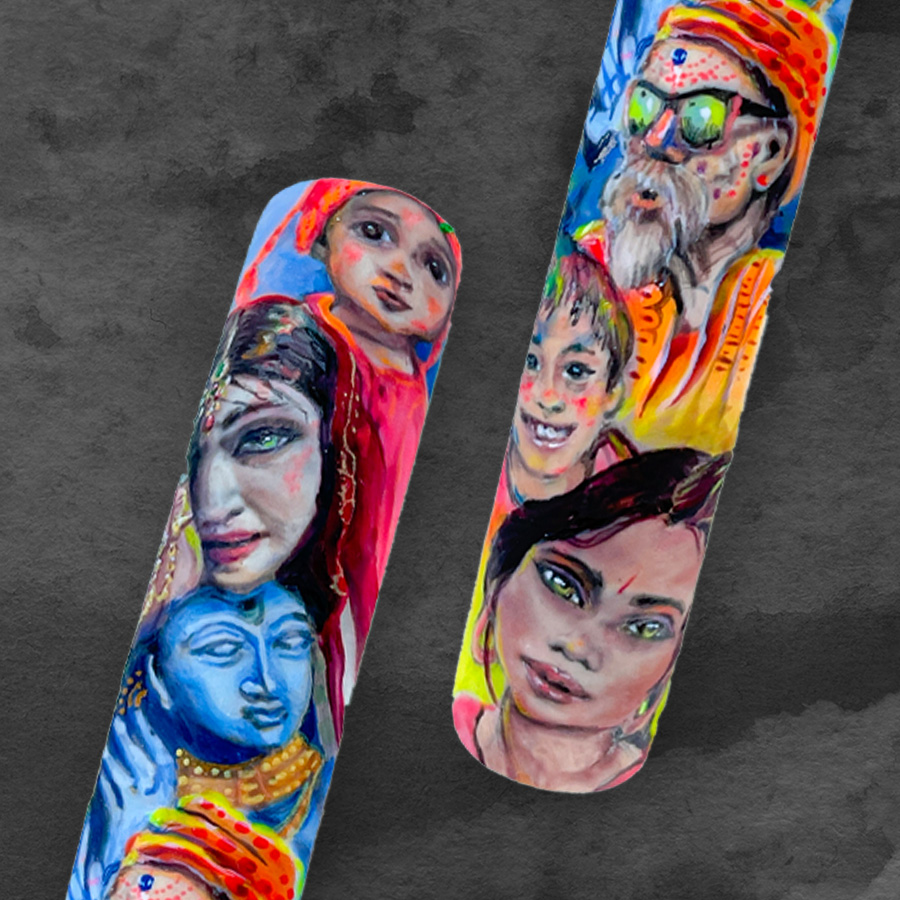
PRODUCTS USED
- Emi Nail gel paints
- Emi Nail Velvet Top Coatl
STEPS

Apply a coat of white gel polish & cure. Then buff the surface of the nail to create a matte surface. Use a pencil to lightly draw outlines of the faces. Use alcohol to erase any errors then top coat with a matte gel polish.
Add some flesh color thinly to the areas of skin & begin to add darker.
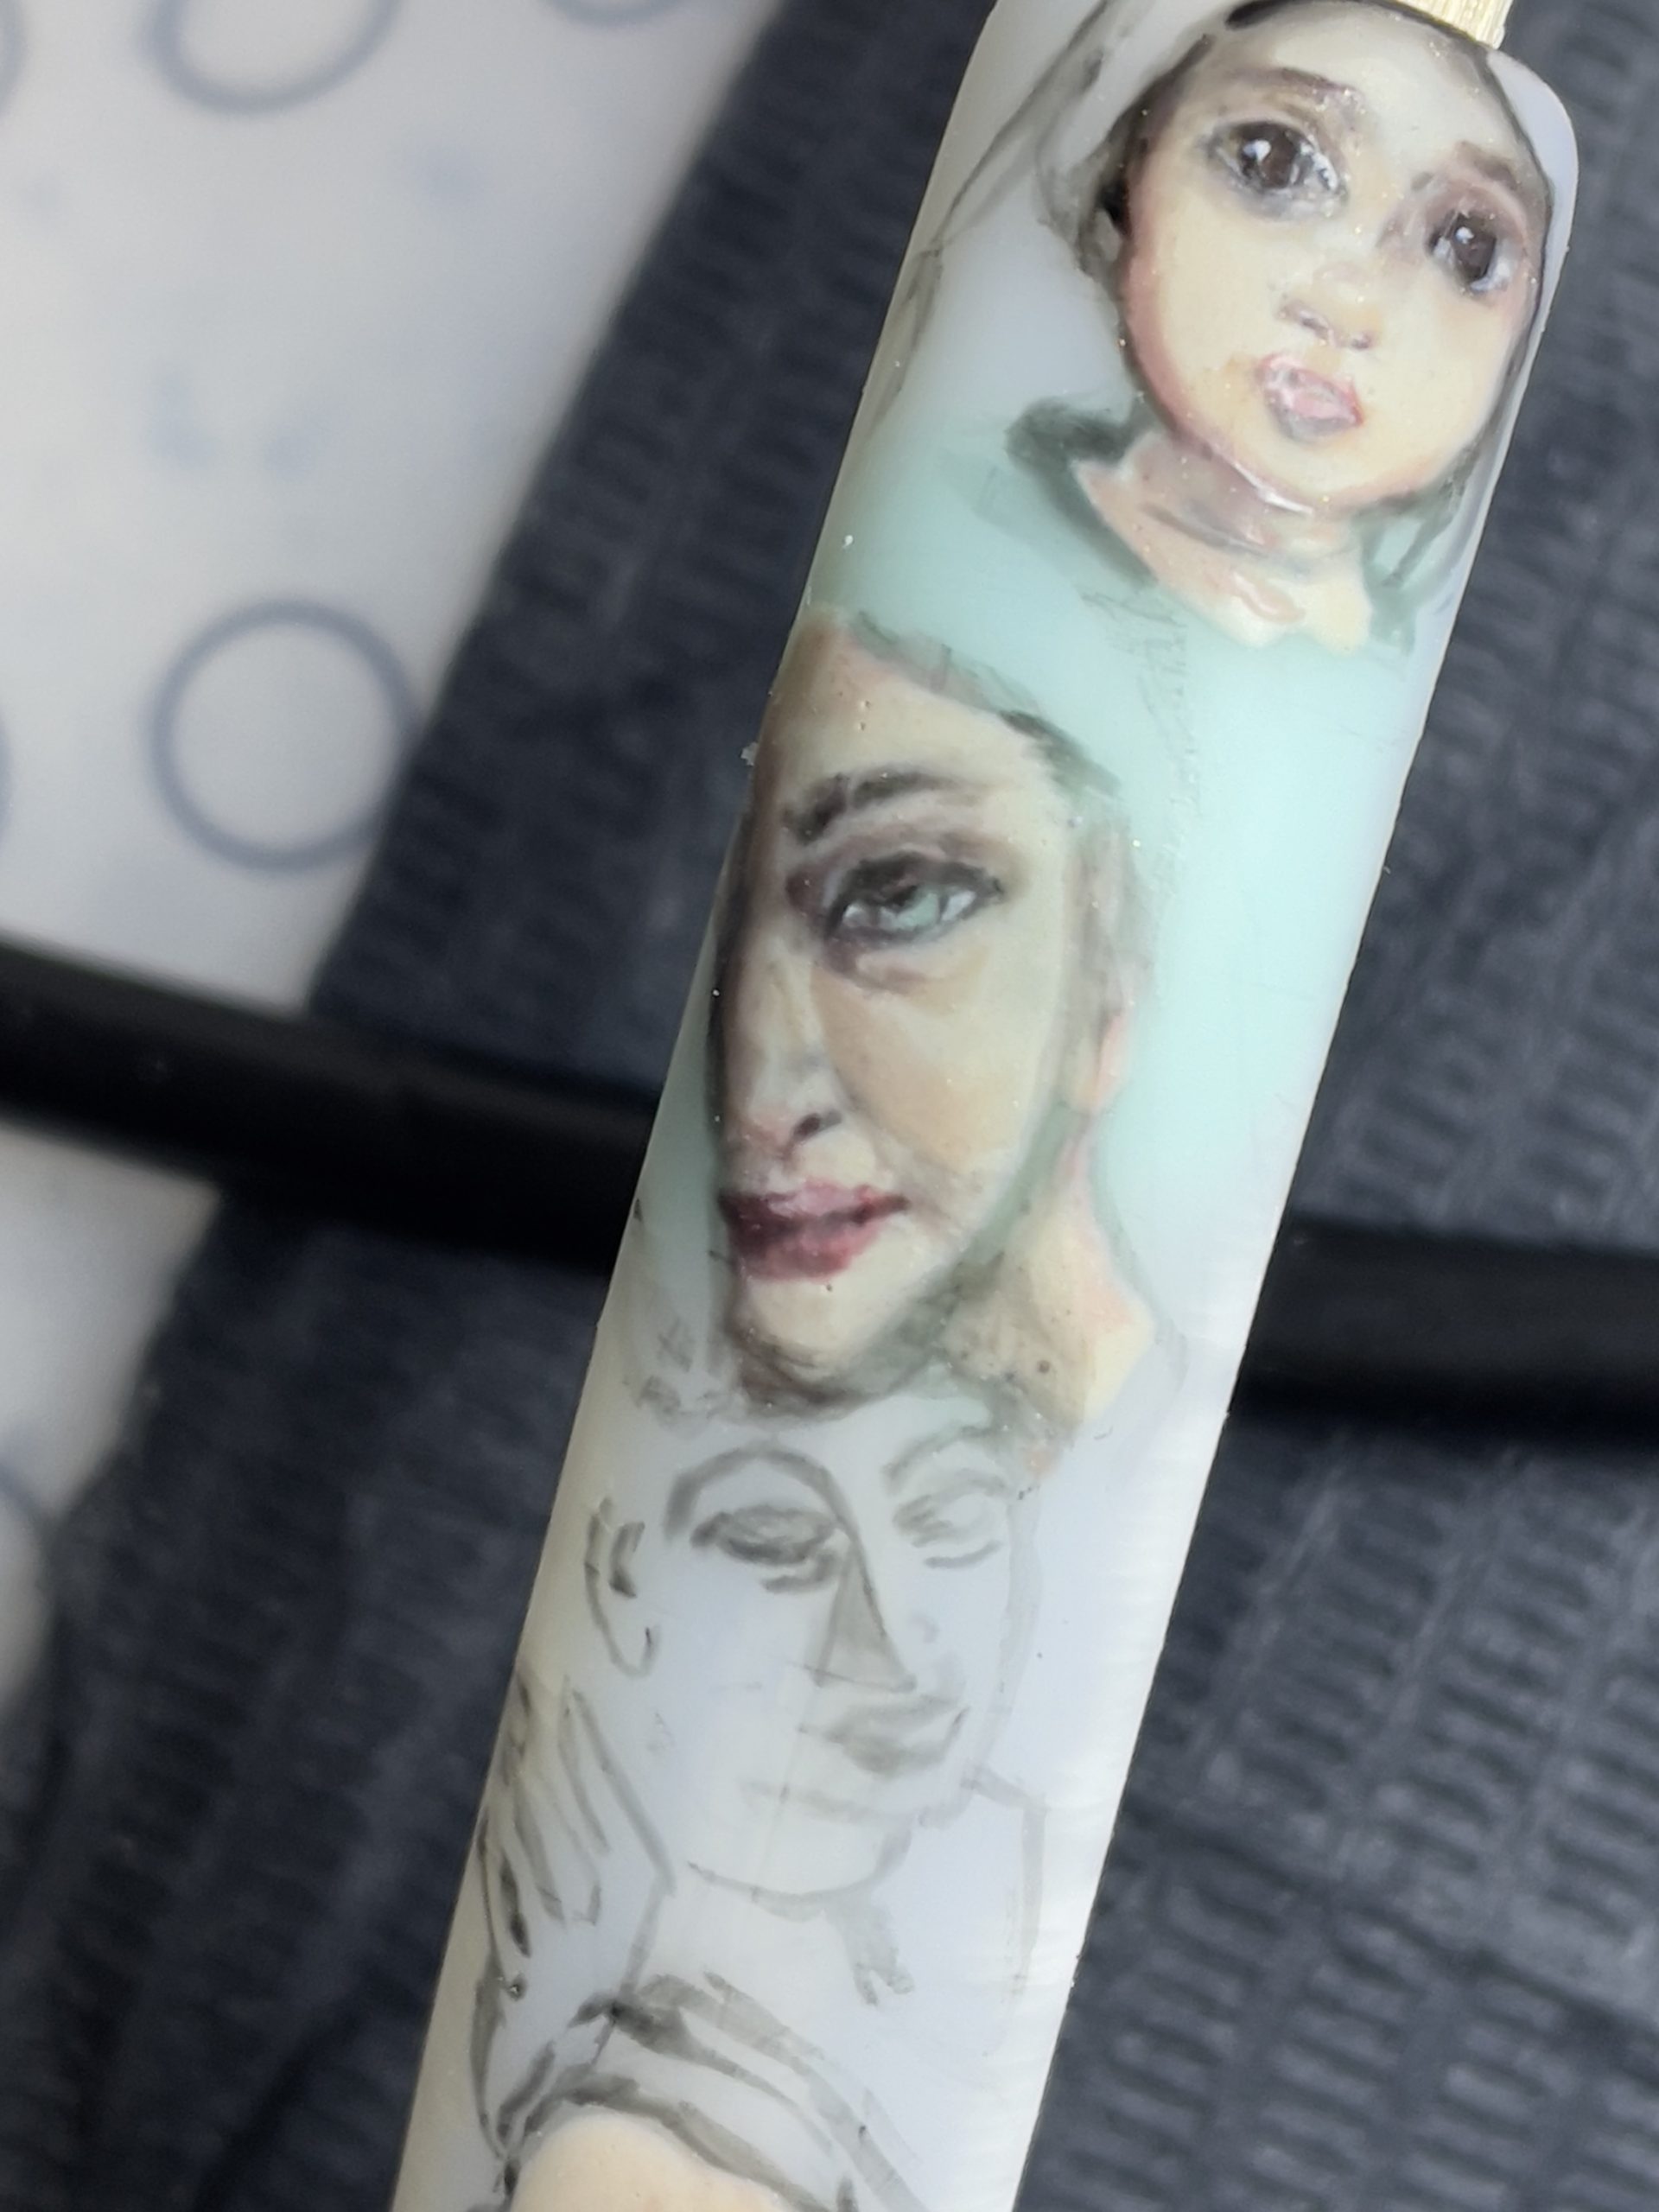
Continue to add details and softly blend in facial shadowing. Start with the eyes because you then begin to ‘feel’ the characters as they come to life. Begin to add a light background shade to the scene.
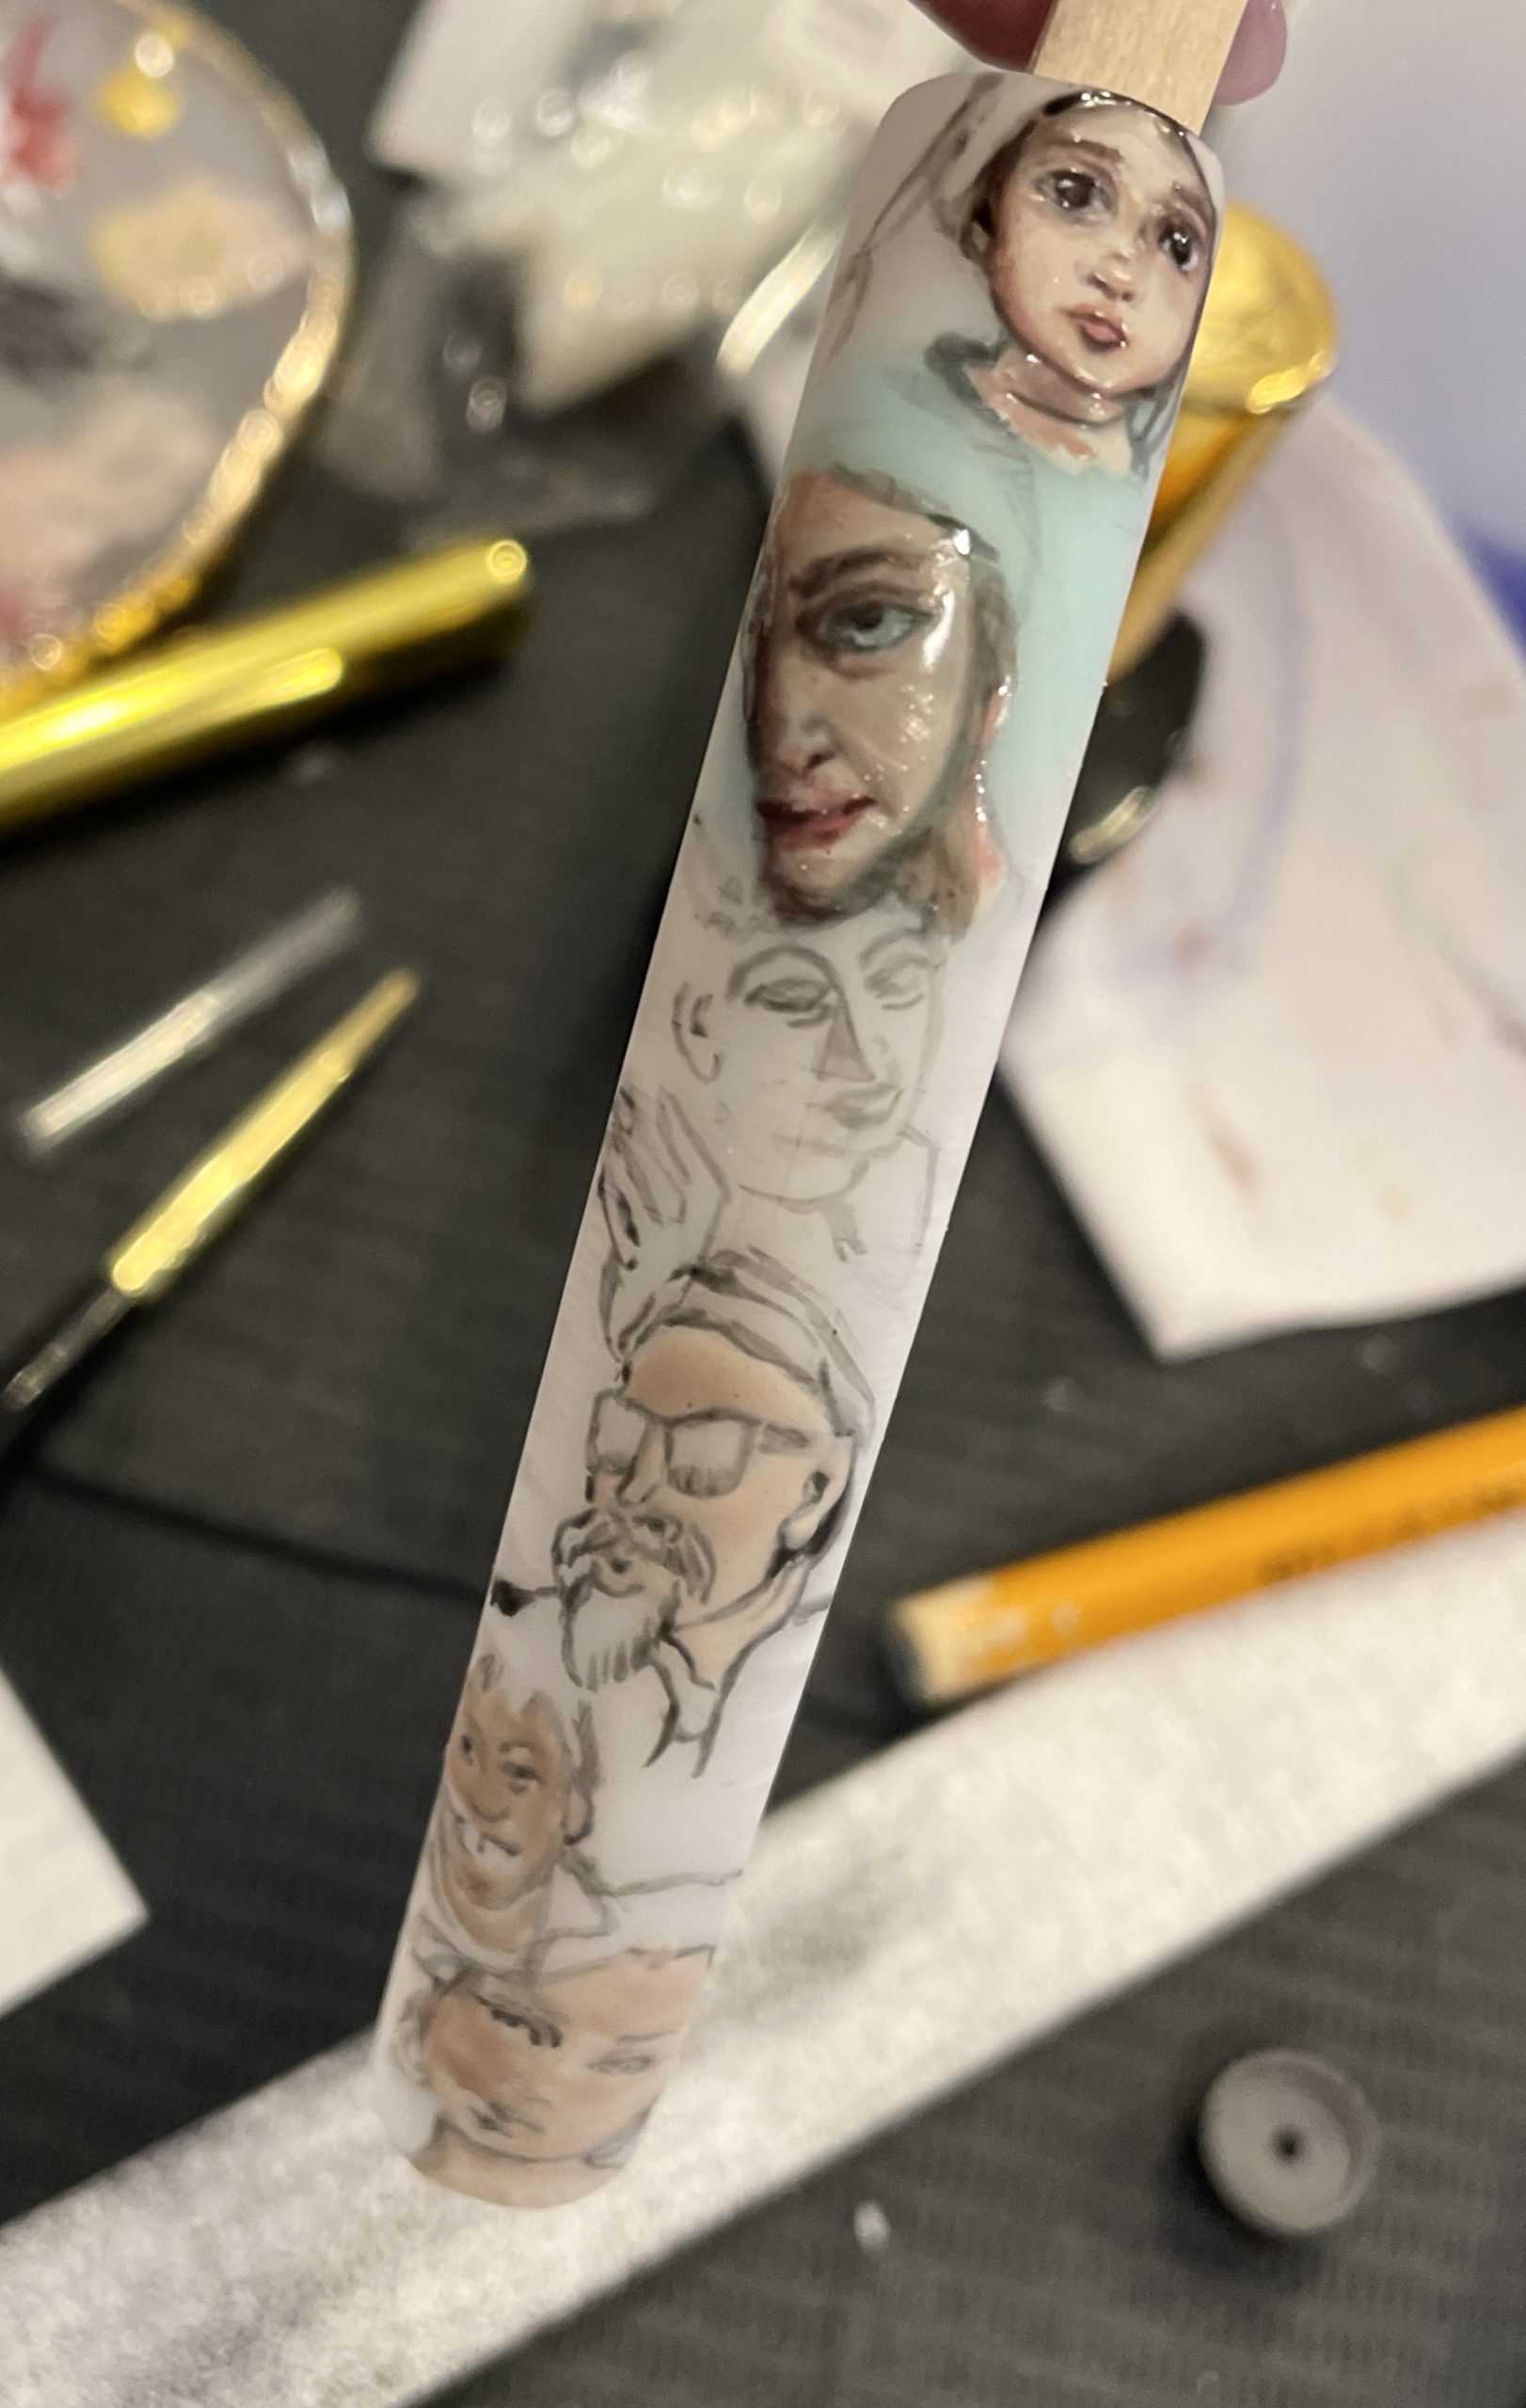
Start to lightly add in color, carefully & thinly at first. Take your time to build this intricate design.
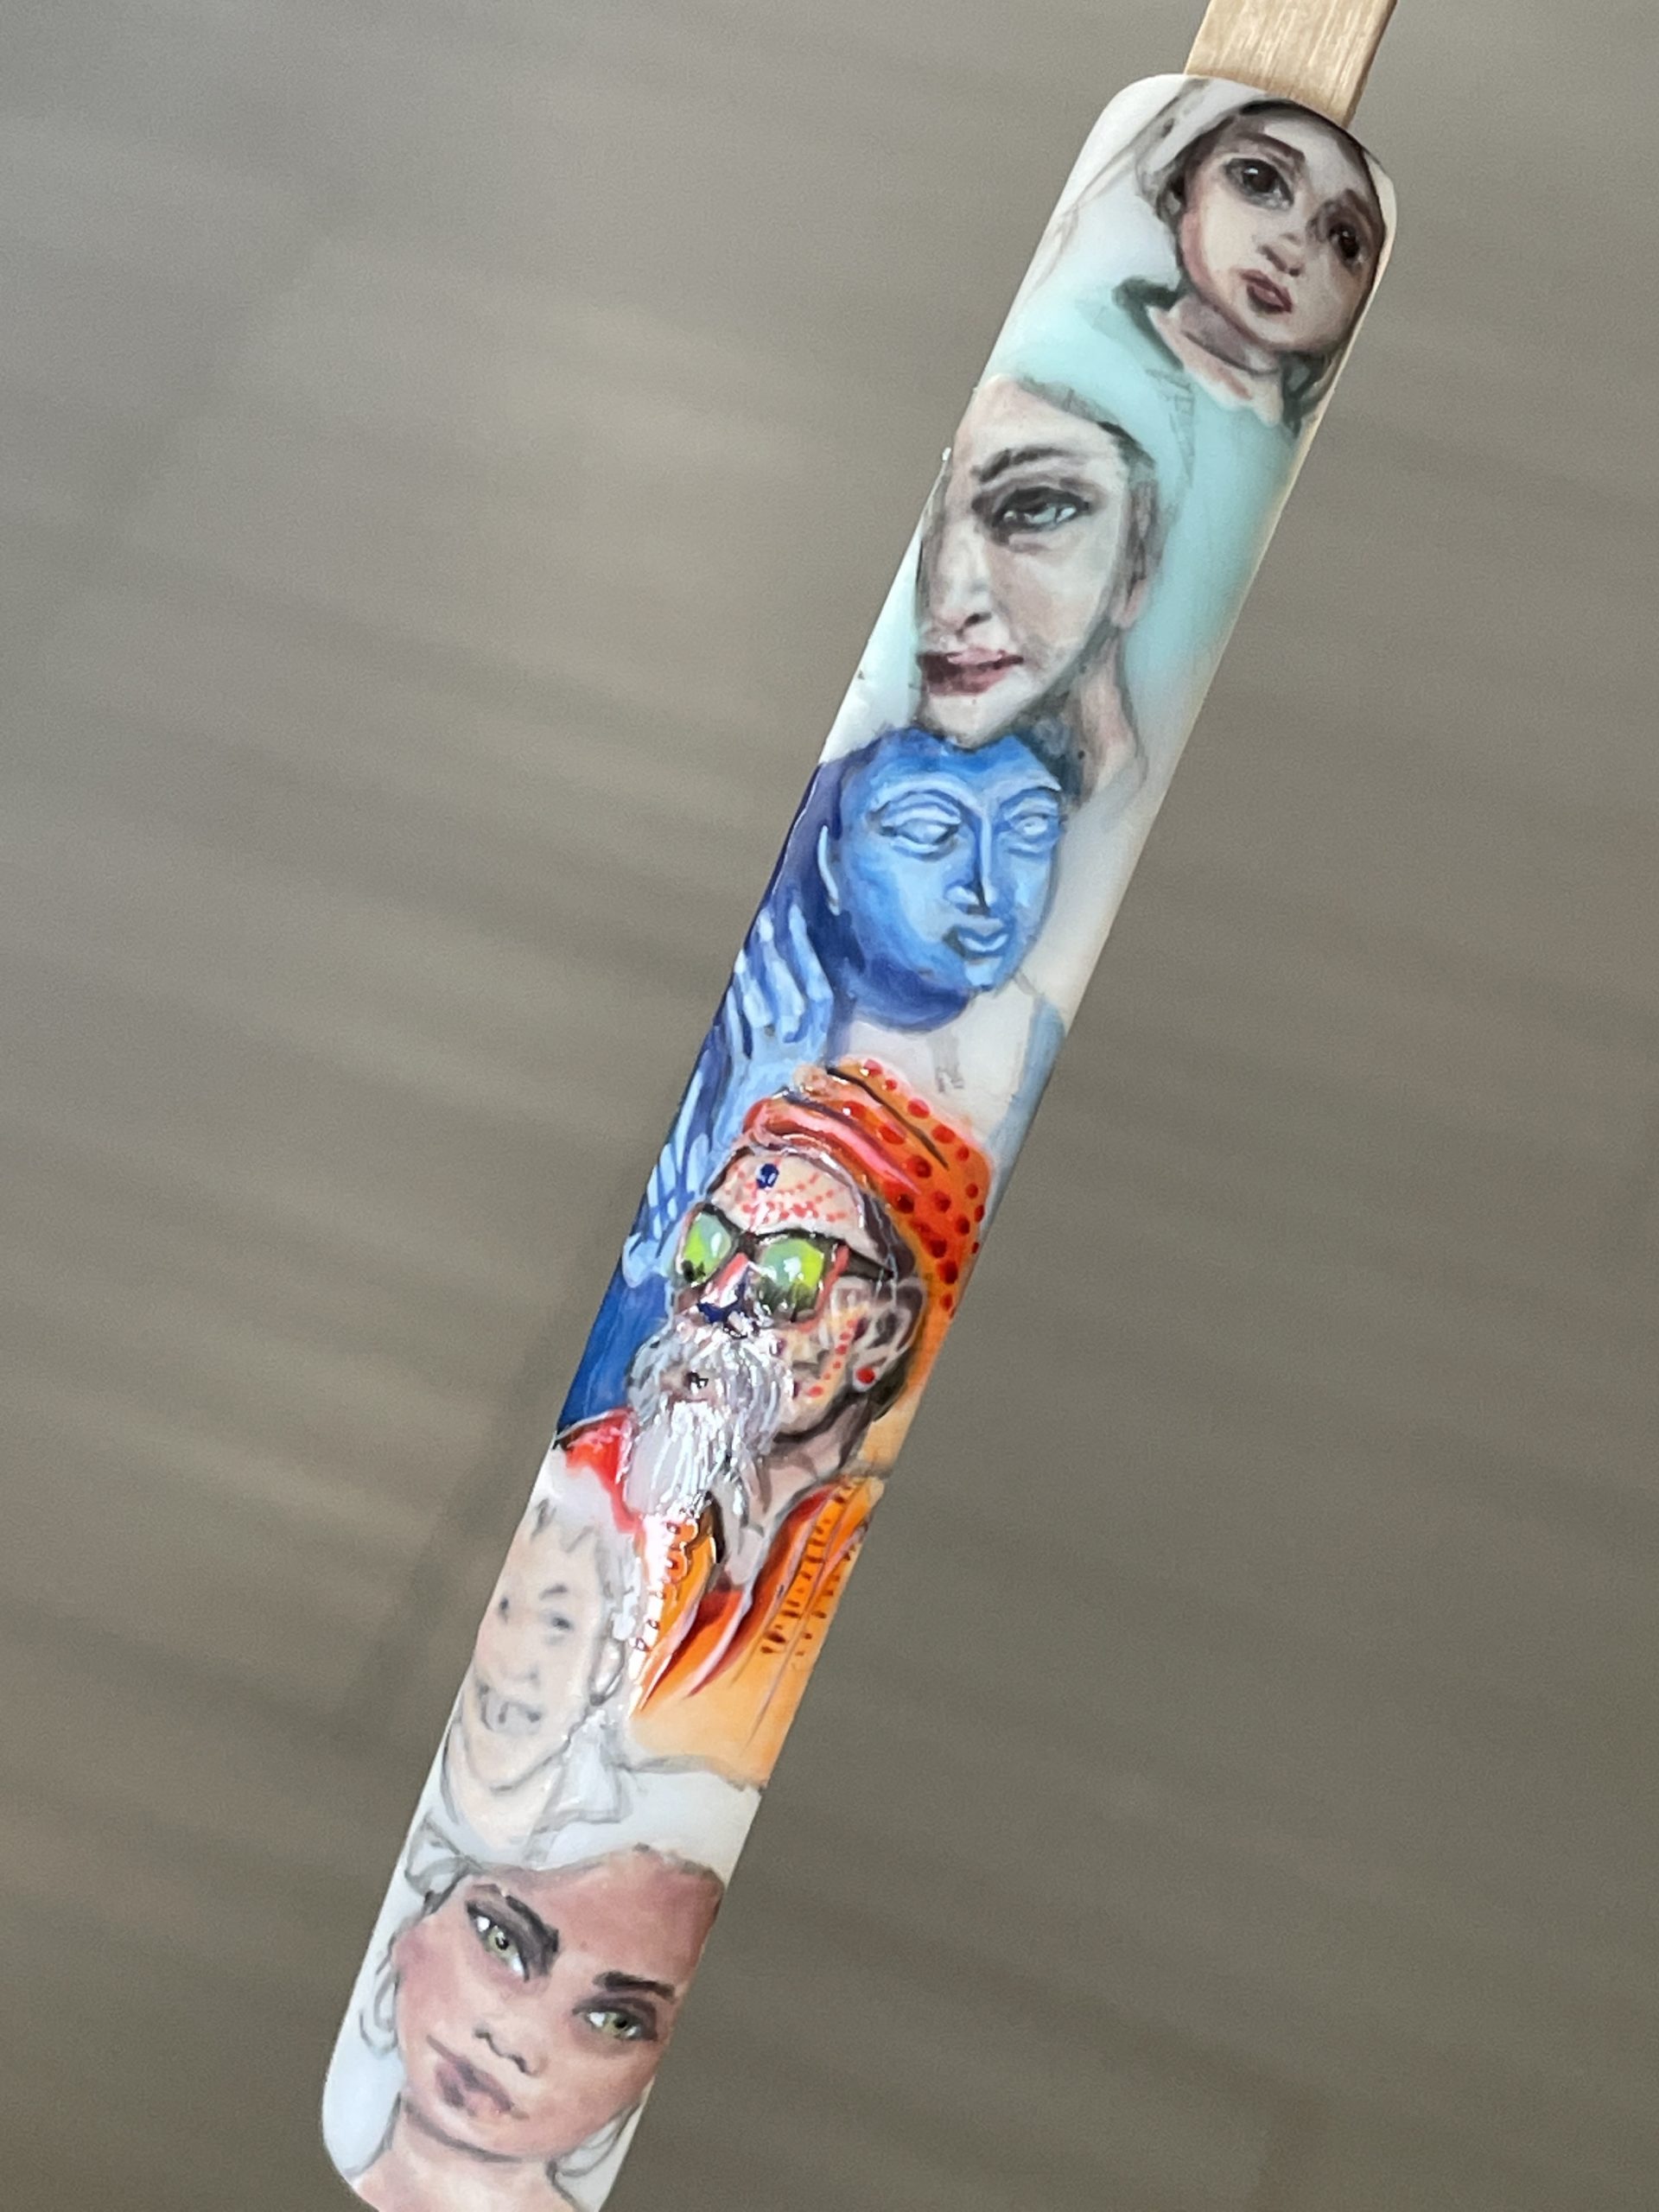
Now it’s time to start adding in bolder color across the design. Make sure to consider the color placement. Bold colors must flow around the image to keep consistency & balance across the whole image.
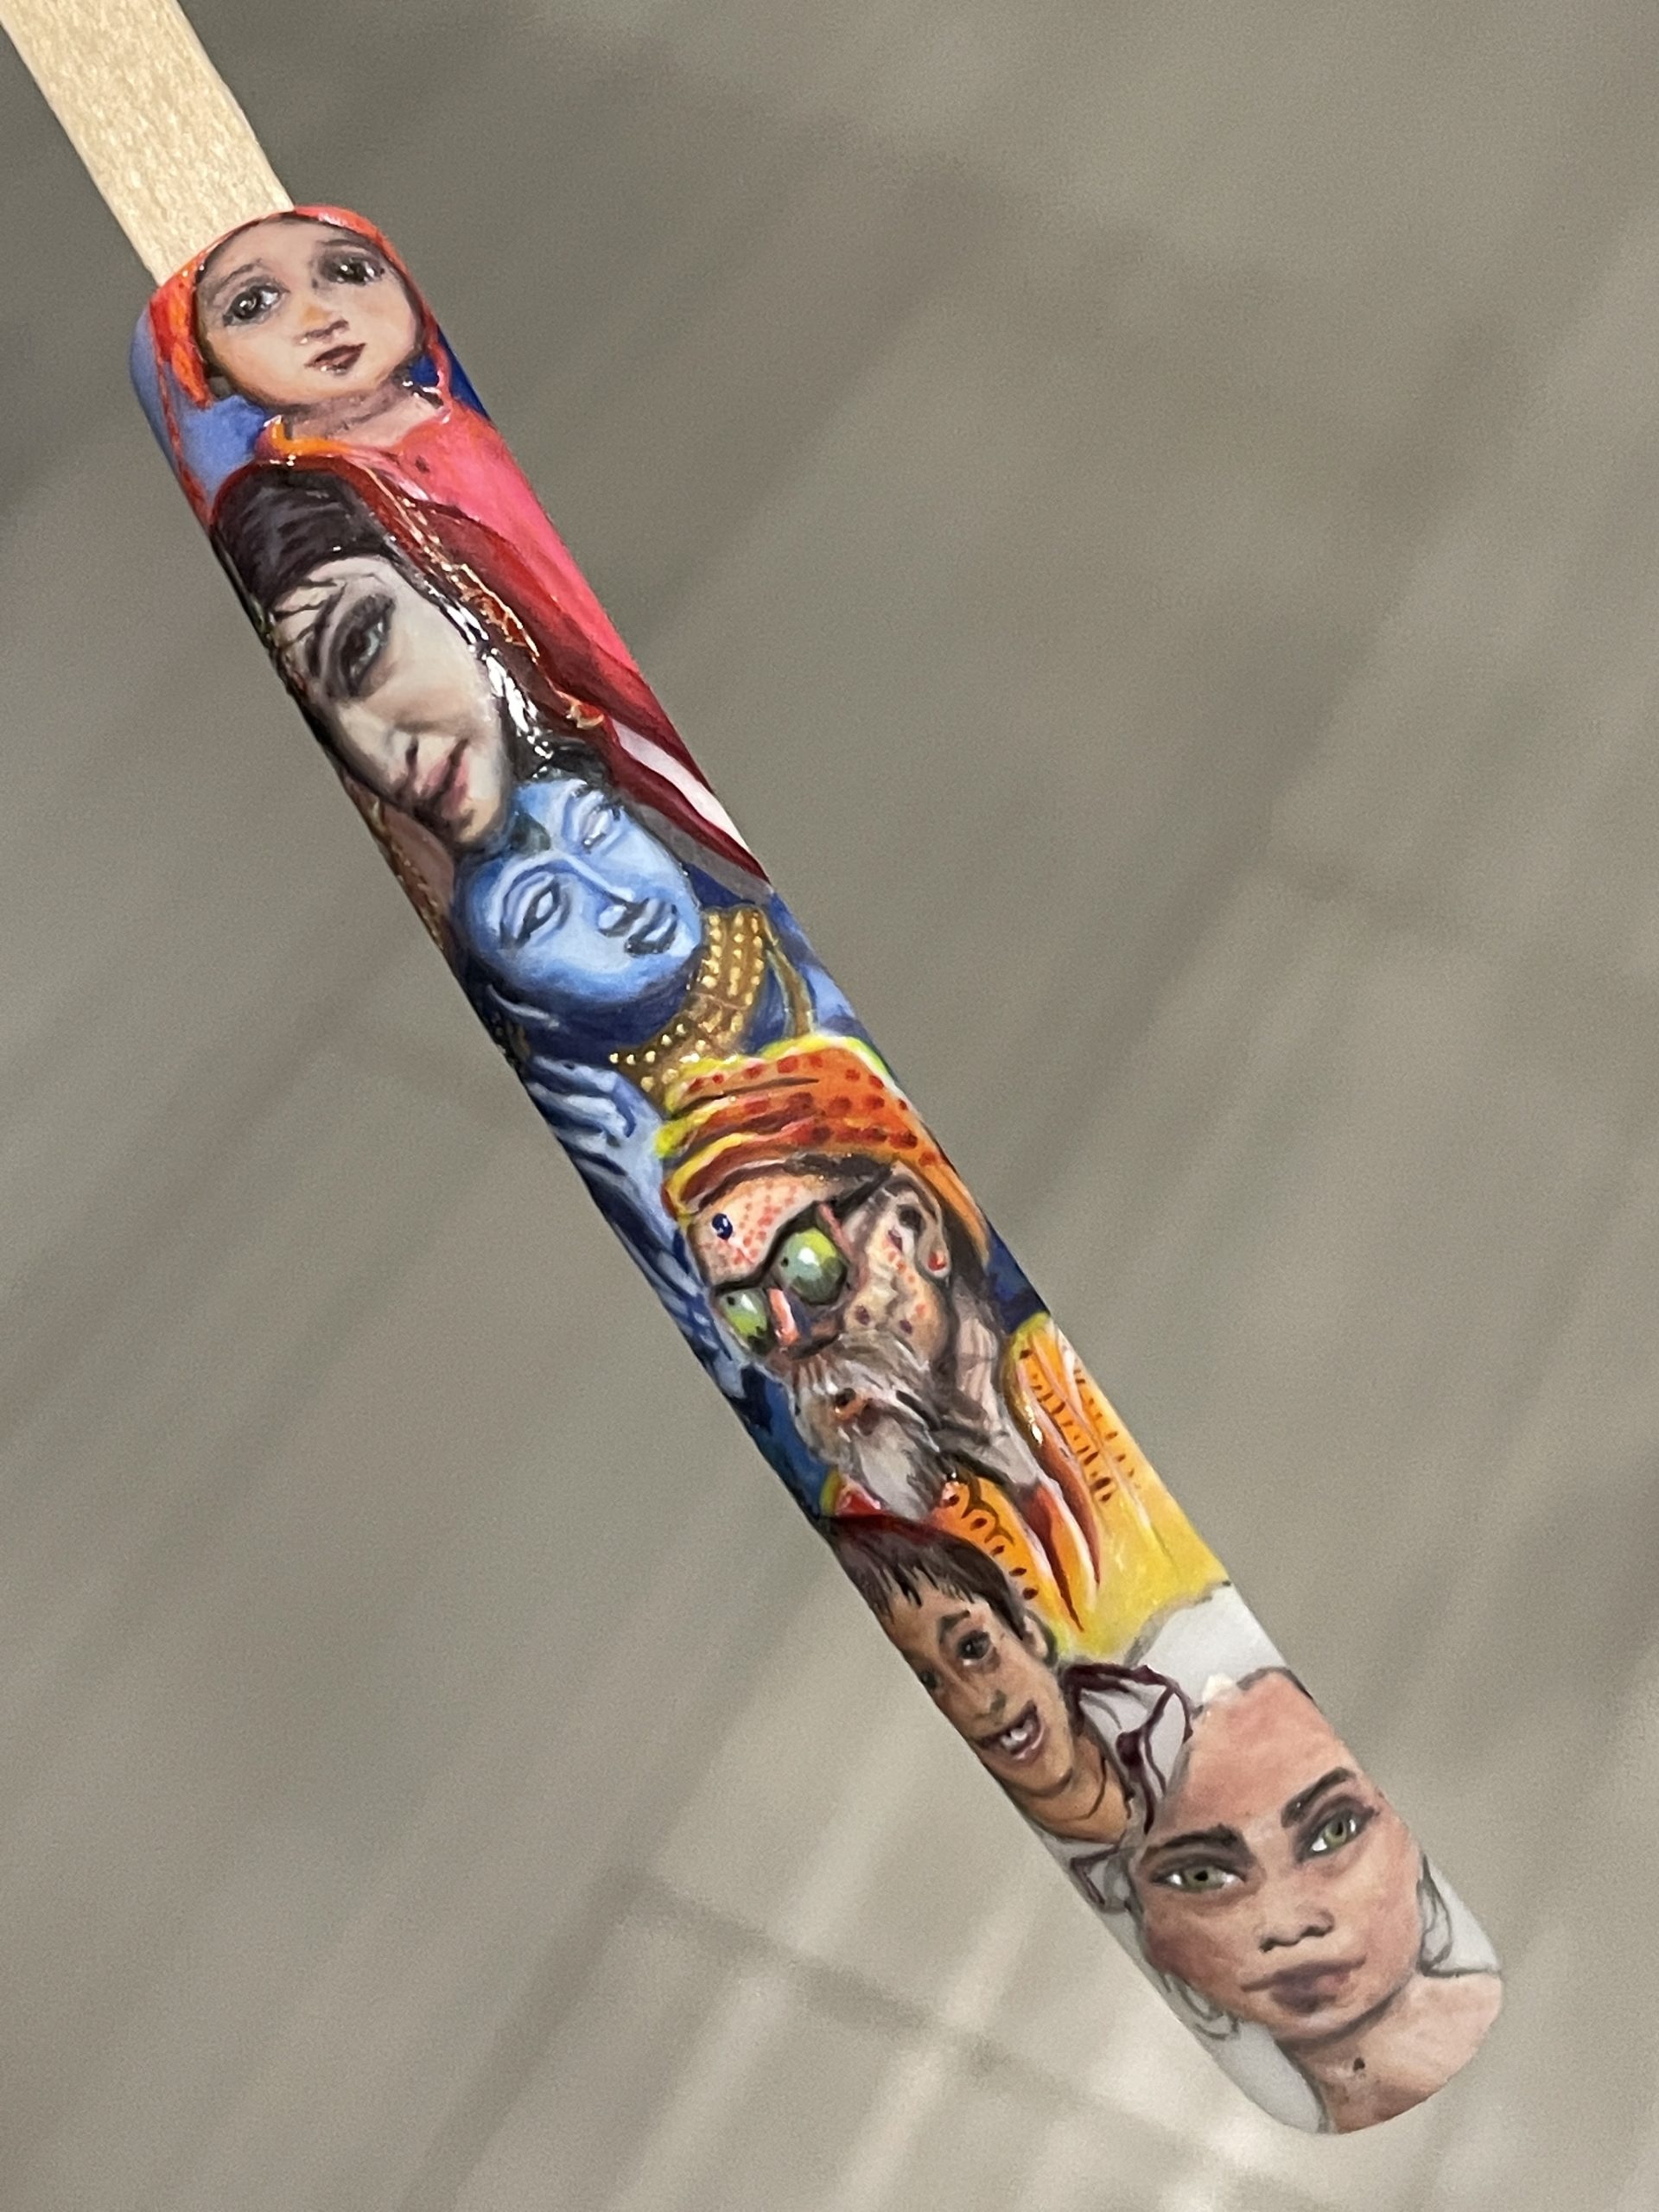
Now darken the colors, add shadowing & defining details.
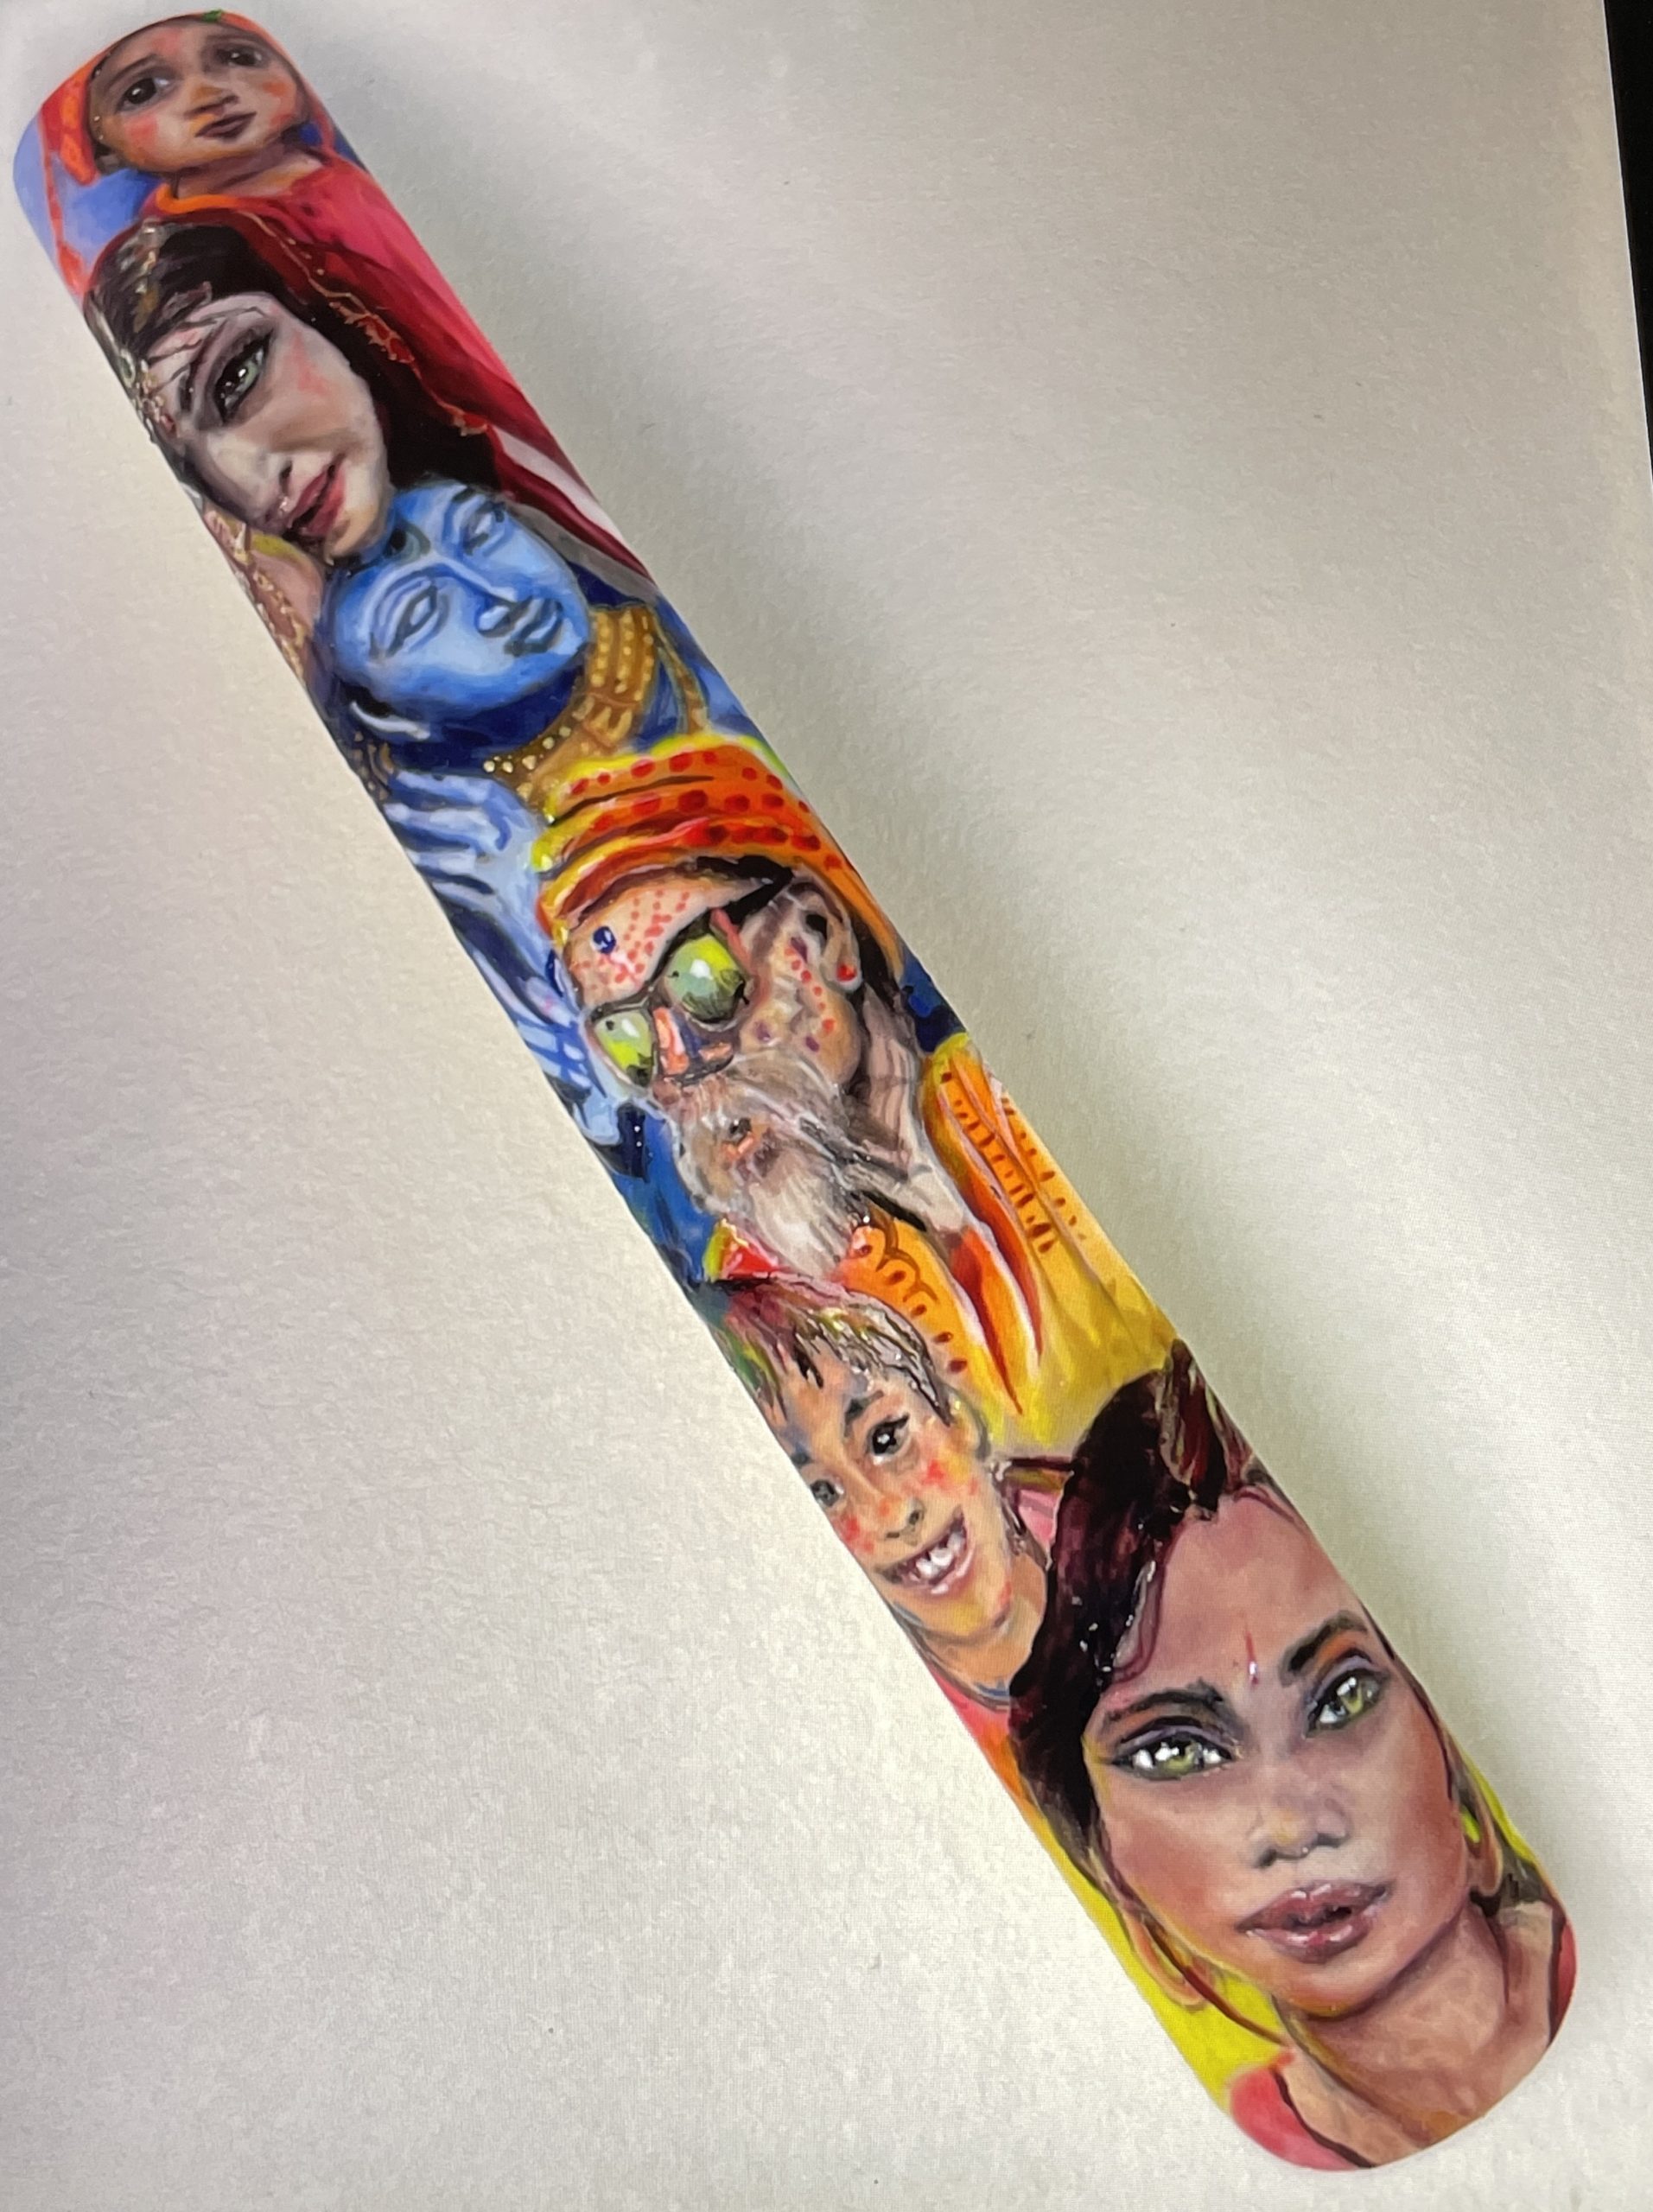
Decide on the finish you require such as whether to top coat or not. Take several photos at this stage to see how it looks without top coat. Depending on the type of gel paints used, you may not need to top coat at all.
MORE TAG THAT TREND
View all Tag That Trend
RELATED VIDEOS
MORE TO EXPLORE
Prep the natural nail using a 180-grit file, remove dust. Apply “Prep It!”, then two thin coats of Flex It! “Cover Peach”, curing each coat for 60-seconds.
Prep Apply a thin, even coat of HD Pro “Matt It!” Cure for 60-seconds.
Use the HD Pro Long liner brush and HD Pro Art Gel in “Graphite” to create a wavy line. Cure for 30-seconds, then rub line with a dusting brush.