UPGRADE TO PREMIUM TO WATCH THIS VIDEO
video and so much more educational content.
![]()
Nail hacks, hints and tips from top techs!
Nail hacks, hints and tips from top techs!
![]()
![]()
![]()
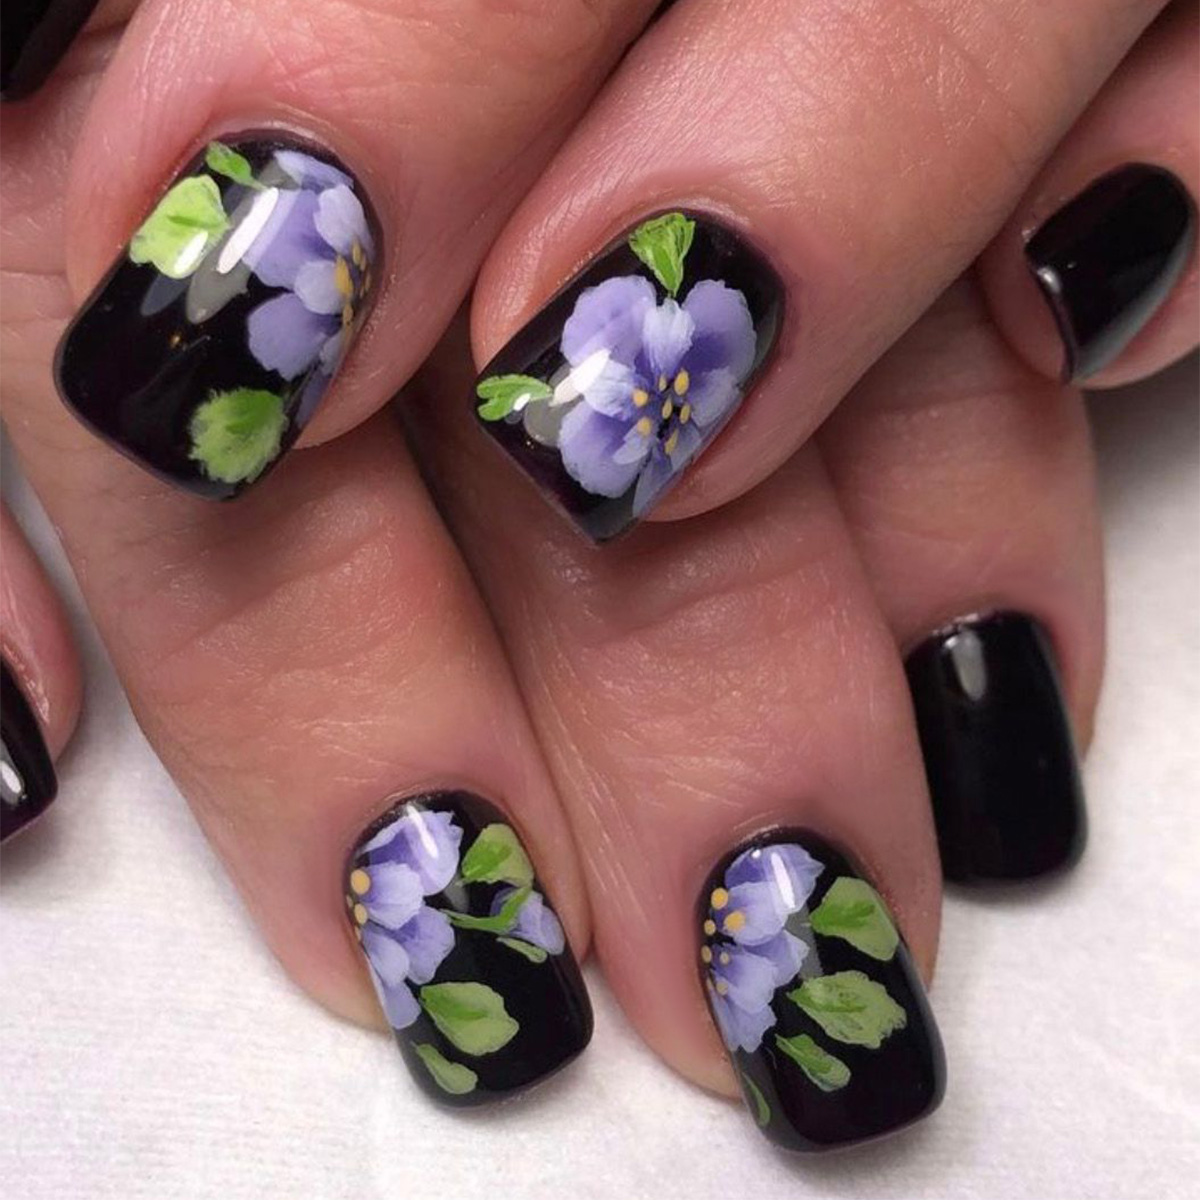
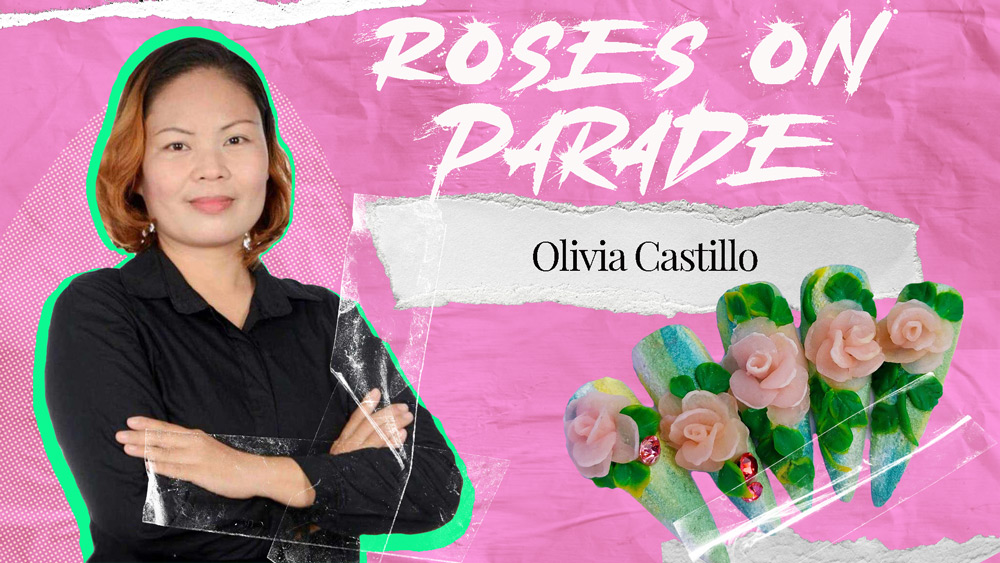
In 1995 American artist Donna S. Dewberry, patented a ‘One Stroke’ technique that she’d develop. This new idea allowed painters to blend, shade and highlight all in one stroke of a brush. The concept consists of loading a brush with two or three separate colors and achieving the shading and highlighting in just one simple stroke. By 2010 nail technicians around the globe began adopting this technique for their nail art. Archival records and articles Circa 1700’s show that the Schools of Art in the UK trained apprentices in the ‘onestroke’ style as it was a quick method of painting for commercial reasons – to speedily decorate furniture, pottery and trays for selling.
Hi, I'm Alisha Rimando and welcome to Peel Back the Polish. Today, I'm here with Damon Ho, he is a salon CEO. That's probably what you know him as on Instagram. He's got an amazing following, but he actually is a salon CEO. He has two salons currently and he just keeps growing and growing his business. He is an international nail artist, as well as a global judge. He has just an incredible story of his career and I just wanted to, you know, get him to share that with us. So thank you so much for coming and being here with us today. And I just kind of wanted to start with just telling us, you know, where you're from and where did you start out in life? So, hi Alisha and hi everyone. My name is Damon, I'm originally from Vietnam. I moved to the States in 2012. And yeah, I came to nails very random. I never had the thought that I would do nails one day, but it came to me, like nails chose me. So here it is. I'm leaving with it. So you think nails chose you? Well, were you... when you started out in Vietnam as a child, were you like, creative? Did you like to... were you like really an athlete or were you more like, you know drawing and painting? What was your childhood like? I was a little bit of everything. That's the thing about me. I like to draw, I usually draw a lot. I got suspended. I got kicked out of the class because I would draw and do it in class. So you were a bad boy? Yes, I was a bad boy, very. And also I played sports too. I played soccer, I played basketball, anything that the school had back then and I, you know, I would do that. So you spend your whole, kind of, childhood and all the way up into what age were you in Vietnam? I moved to the States when I was 25, so it's about 10 years now. Oh, so you've spent a lot of your life in Vietnam. Right. And did you start doing nails there or did it happen when you came to the States? No, you know in Vietnam, I think most countries in Asia, it is very strange for a man doing anything about beauty. I mean, that's the people. I think it's kind of strange everywhere until now. Oh really? Right. And it's kind of like you guys have the advantage because girls are like, Ouuu. You know. So yeah, I started... When I first came to the States, I didn't want to do nails or do anything about beauty. So I started to work at a factory just to get by and my main goal was to go to school to learn business or, you know, marketing because that's what I did before I moved to the States, in Vietnam. What made you move to the States? I just wanted to try something new. Yeah? I was stuck there. Yeah, the thing is, I am more like a street smart person, so I I never felt like I fit into any school. I went to IT school, I went to designer school, but then I dropped out. Even medical school, but I only lasted for like, two-three months and then I just... this is not for me. Well that's kind of all over the place. IT, medical, design... I know, I was all over the place. So you... and just so everybody knows, I've spent a little bit of time with this man and he is... his brain is that. You are all over the place. It's just like that. It's like extremely creative, extremely business smart, you know, you have all of these skills so I can imagine that you were a little confused on which path you wanted to take. So you came here and you're like, "I want to go to school. I want to take these different paths." And then, how did nails kind of fall... I mean, did you just walk by a salon and go, "That sounds like a good idea." Oh, no. I spent three months in the nail salon without touching a bottle of nail polish. My aunt, she used to own a nail salon in Phoenix, Arizona. Okay. So I when I first got here, I came to the salon to help. Like clean up or, you know, greeting customers, doing a receptional book. You know, talk to people and just kind of learn about American life. So, and and one day, I found out that I'm going to have my first daughter and the job I was doing, it was really low pay. There was no way I could afford, you know, to have a daughter. Yes, so I had started to practice nails. In the end, you know, the reason I'm here today is probably thanks to my aunt. A very big thanks to my aunt because she's was the one who pushed me into this. Yes, I'm forever grateful for that. She taught me all the beginner stuff, you know, how to lay the acrylic, all the beginner stuff. And then I went to school, by the time I got enough hours in school, then I already knew what I was doing. You already knew what you were doing because you'd been around it. Yes, she's been around, taught me everything I needed to know to start it. So was awesome. So then you started in her salon, and... Yes, so I went to work at a factory from 6 AM to about 2-3PM. And then I went to the salon and stayed there until, you know, whenever it closed. Sometimes 9-10PM, even, because I was new so it took me three hours to get my first full set. You know, how it is. Remember those days. Yes, it still takes me three hours. Yeah, so it was crazy. But I got lucky that a lot of clients, a lot of, you know, nice people that allowed me to work on their hands and they knew, they knew that I was a newbie and I was practicing, but still somehow they let me do it. So that's another good thing about when I started. I loved that, the gratefulness, you know, because I think a lot of technicians get out there and they want to work, but I remember being really grateful for those first clients, too. Yes! ...That just let you make them bleed and tear them up or whatever and it is so hard, in the beginning, to grow that. So, how did you grow from those those humble beginnings of trying to get those sets down to three hours? Because I know you've told me before, you're like, Oh, I can get that done in an hour. And I'm like, "What?" So how did you get to that space? I think majority is practice. Just practice? Yes. That's one thing about me, when I put my head into something, I will make it work. Yes. No matter what. So, there's a story, one time a client texted me. I don't remember, it's it's been a long time, but that's when ombre first came out and I obviously didn't know how to do an ombre until the client texted me that night. Asked if we do ombre at our salon and I had no idea how to do it. I'm like, Oh, that looks pretty. So I ran to the salon at 10-10:30PM and practiced and I I kept doing it. Made it over and over again until I got the... I wouldn't say perfect, but... A really good gradient. Right, the good ombre. Okay, so I have a quick question, is this ombre with acrylic or is this ombre with gel polish or...? With acrylic. Yes, it was pink and white. That's when it first came out. Yes. I think it was six or seven years ago. And then I took a picture and I sent it back to her and said, "Yes, we do." We do now. Yeah, that's how eager I was. I mean, I am. When I want to do it, I would do anything to get the result I wanted. Yes, yes. Well and that proves... Even like today, where I'm sitting here across from you and you're like, "I've been doing nails for 10 years." And I remember at 10 years of me doing nails, I mean, I was just getting to where I wanted to be and you're sitting here with two salons. You're an international judge. You're a global educator. I mean, obviously whatever you want to do, you just do it. I put my mind to it, I get it done. Yes. So you move from that... what made you make that transition and say, "Okay, it's time now to have my own salon." Did you just take over your aunt's salon or did you just go out on your own or...? Yes, I took over the salon. I never intentionally wanted, you know, to own a salon because I know it's a headache. There's a lot of work, dealing with customers, employees, and your supplies, all the bills and paperwork. That's a lot. It's not as simple as you see when you get into business. You know, it's crazy. Listen to him, it's not as easy as you think. And I mean, a lot of people see as a nail salon owner, oh you just com in the salon whenever you want, wandering around, doing nothing, and you get pay. You get everybody's money. No, it's not. It's not. It's not like that. There's a lot of things you don't see and a lot of things that they don't tell you because... It's working after the salons closed and working before the salon opens. Oh, yeah. I remember those days. Cleaning the toilet all by yourself at 10PM. No, that's kind of a lot. So you went into that space and you took over your aunt's salon. Oh yeah, yeah. And then you started that, but I know that you're expanding now and you've got another salon and you're making it even bigger. So obviously you created a very successful salon with your aunt's space, how did you grow that? Because I think you had told me before, when you started, it was like three technicians... Right, yes. There was me, my aunt, an another, uncle. The reason that I started working at the salon was because it was my mother and my aunt's investment. I would just run the show because I never wanted to own one. But after a while, you know, personal reason, my aunt couldn't keep going and she couldn't run the salon either. So at that point, I had no choice, one, to let it go or I had to run it. So I chose to run it because, you know, our first baby, my first baby. So I wouldn't give it to anyone. Even today, I wouldn't give that. I can sell out 10 more salons, but not the first one, not the the very first one. And right now, we are in the process of working on opening up to 10 salons. And we are bringing in MedSpa into the salon. So I have a very strong team to help me do it. Like, the fact that I'm here with you, I don't have to worry about anything because I have a really good team behind that is working on every step of the way. Let's say, if you are new, you are a new person going to this business, our team will help you to have a strong foundation that will make you more confident and make it easier for you to run the salon when you are working with us. How does somebody do this? I don't even understand it. We're going to have to talk off camera and then we may have to create another show so we can learn about how to, you know, get to this place where you can have a business and leave and it just happens all by itself, because you got that going on. No, yeah. I have an accounting team. I have medical team. I have a doctor and nurses work for me. I have an IT team, a very strong IT team. Yeah, so I have everybody in place. We just have to fluck it in. That's so great. So now that you're doing this, you're opening up to MedSpa and everything, you've got 10 salons that you're working to open and you're doing all this global stuff, do you sleep? Do you see your family? Do you... Go back about that, I haven't slept a lot the last three nights. I was up until 4 or 5AM, yes. I couldn't sleep because like I said, when I love something, I put my heart into something, I will do anything to make it happen. So all I think, right now, is focus on the business, to the salon. And my goal is to help people like me, like immigration. I went to the States, you know, empty-handed with nothing and now I create and own a business and I want to help everyone to get to that point. Maybe not to where I am, but at least to get you started somewhere. That's wonderful. So you're also an international educator and how did that part of your life happen? Oh, that's very interesting. When I opened my second salon, you know, I have a third one now, but when I opened a second one in Scott Air, Arizona my partner somehow connected with Valentino, and we got to invite David and Kevin to Arizona and that was an amazing experience. That man just gave me great vibes. He's the most down to earth person that I ever met. You know, imagine the CEO of a big brand in the United States or even now in the world and that, you know, they can talk to you like you're a friend or brother and that was just awesome. And that's when everything started. David, actually rooting for me so that I can be here today. I mean, he inspired me. I look up to him as a mentor and everything he told me, everything he said to me, I listened. I take it in and, you know, I try to achieve it as much as possible. So yeah, Valentino was where everything started. So he kind of came in as just an observer in your salon and he just found a diamond in the rough and said, "I want you to be part of my business." Right, yes. So I started as an ambassador and then over a year or two and then I became an educator after the training with the company. So he, obviously, is a pretty smart guy himself, to find this diamond and said I'm taking him to be on my team. And, you know, David is very inspiring, talking to him. Yes. And a great brand and so you're traveling around doing classes and stuff for Valentino as well. Yes, correct. So if you were to talk to... you know, I mean you said you feel like immigrants and people that are coming to the United States from another country, they're trying to figure out how they're going to start a business or what they're going to do, they feel maybe that they don't have any direction and maybe even if they want to get in the nail industry, what is your advice to someone who's trying to figure out how to, not only break into a business, but also survive in a new world. It was very difficult for me at first. It was shocking. The, you know, the language barrier, culture shock, and, you know, I didn't have any experience in nails, so it was a lot to take in. But my first advice would be, learn English. I mean, any country you live in you have to learn that culture. You have to learn their language. If you can't open your mouth, there's nothing you can do in this world, no matter where you go. So my first thing was English. I couldn't afford school back then because I barely got here, but YouTube, you know. Go to university. YouTube, you can learn anything. To type in, 'English for beginners'. I think my children are at the University of YouTube, right now. Like, you can learn anything. I was listening... say if I woke up at 9:10AM, in the morning, I'm going to turn my laptop on. I'm going to have it running, having the show, have people talking, and I would just listen to it. Listen, listen, listen. When I was driving, I would have the radio on. That's the best way you can learn and even though you don't understand anything, just keep listening. Just keep listening to it, you will absorb it one day. And that's probably why I can understand more than I can speak. You know, if you saw me 10 years ago, if you asked me a question, I would just like shake my head and bye. "I'm okay. I'm not talking..." But, you know, learning English would be the first advice and if you get into nails, don't give up. That would be my second advice, when you want to get into this business or any business. If you're new, you show up, you do your work, you learn as much as possible. Even to this today, I'm still learning. I am still learning. If I see another educator has something that I want to learn, even though it's nothing bout nails, I would go there. I will, yeah. And you knew it. I went to you, I went to sit with you for two days. We learned everything from you. So that's, you know, learning and keep practicing. Yeah, I mean we're never too old to learn. There's so much... There's always room for improvement. There's so much to learn and there's so much to figure out especially when you're trying to break into an industry, break into a country. Yes. I mean, it's crazy what you have accomplished and what you've done. And I'm sure that a lot of people are going to appreciate that about you, is that, you know, it's hard. Yes, it is hard. You have accomplished so much. It's not much to me, to be honest. There's so much more I want to do, but mainly, success to me, is what I can do to people. What I do to change other people's lives. Not about, you know, how much money I make because I never work for money. I never follow the money. Well, they say if you do what you love, the money just comes. Exactly, but now I see it now. There was a time that I did nails on my own hand at my house or at the salon late, you know, after we closed the salon and I was just doing it for nothing, just to practice, to learn a new technique, and just because I love it. I enjoyed doing it. I didn't do it because I wanted to win a competition or anything, no, I just wanted to do it. That was it. Yeah. Passion. Yes, it is. That's wonderful. Well, thank you so much for sharing this story with us. We are so happy to hear your story. Your so inspirational, just so you know, so inspirational and you're so genuine in everything that you do and all of, you know, when we first started talking, you told me what you wanted to do and what you wanted to learn. I was like, "Oh my gosh, the heart that you have!" So thank you so much for sharing your story with us and sharing your life with the nail industry and the nail technicians out there that are really looking for someone to follow, someone to mentor them. I know that you're going to be there for them. So don't forget, @salon.ceo, you know, he is really such a genuine person that will be there for you and wants you to succeed. So don't be scared to reach out, DM him. I mean, I may look scary on Instagram, but I don't know, it just... that's just who I am, I guess. You're not scary. You're a little intimidating. Your artwork is a little intimidating. So if you want to know how to do this, do you want to figure out what's going on in his brain or even watch... you even teach classes? Yes, I do. We're going to get him back on another show to do a master class or just show us some extreme art, got to do something, but for now, we're going to let him get back to his ten salons he's trying to build and however many fifty employees you have to manage. And we're going to thank you so much for being here with us. I so appreciate you taking the time because I know you're a busy guy. So thank you so much Damon for being here.
![]()
![]()
![]()
![]()
This series will help you elevate your nail game for effective and efficient salon services, from ensuring a proper foundation to increasing your speed, revenue and value when creating salon shapes and designs that are sure to impress your clients and give you a stress-free creative environment.
![]()
![]()
Do you have questions for the artist? GlossaryLive will present a LIVE interview with this artist. Email your questions to be featured during the Q&A session.
![]()
![]()
This series will help you elevate your nail game for effective and efficient salon services, from ensuring a proper foundation to increasing your speed, revenue and value when creating salon shapes and designs that are sure to impress your clients and give you a stress-free creative environment.
In this 2nd episode we will cover a popularombré technique, also known as French fade orbaby boomer. This is a design where awhite tip suddenly blends into the back of the nail.When using liquid & powder the technique canbe quite straightforward.However, this look can be quite difficult to recreate using gel.So I will show you 2 ways in whichyou can tackle this look like a pro, so thatyou don't stress next time your clients request it.For this technique it's important that we work with a product that'shighly pigmented.On this palette I have a gel paint that's quite opaque onthe right and a gel polish that's also very pigmentedon the left.Either product will be very useful when creating an ombrédesign on a nail using a sponging technique.The key is to work with a highly pigmented and opaqueproduct. Next you will need a porous make-upsponge.In addition, it's best to start off with a sculpted nailthat has been sculpted using a sheer pinkor sheer cover color. Once you have sculpted thenail and you have finish filed and buffed ensurethat you thoroughly cleanse the area. Here youcan appreciate the sheerness of the color as you can still see thelunula. Next grab a smallportion of the color and place it right onto the sponge.You don't want to flood the sponge with tonnes ofproduct. So small portions are best.Next, we will focus on dabbing the product onthe tip first.Make sure that you firmly pack that product onthe tip.The color should look quite concentrated on this area.Using a sponge will definitely add texture to thenail. However, we will be able to blend that intothe back of the nail by gently dabbing thesponge again over the surface. Grab aclean part of the sponge and gently start dabbing theproduct towards the center of the nail.The more you dab, the more the product will blend, thelighter the touch, the easier you'll seeit spread.Whenever you're using this technique, make sure that youare dabbing as much as possible.A few little dabs will not be enough tohelp you blend the product. Work the sponge andthe product from side to side focusing onthe tip and on the middle section. Avoid draggingthe product too far towards the cuticle area.Once you're happy with the blending, make surethat you clean up any excess that may have gone ontothe skin prior to curing.If you see lots of texture, it's important that you go backand dab a bit more until you see it nicely blended.Once you're happy, go ahead and cure this layer. Thetrick to make the sponge texture disappear, is toapply a layer of gel polish base over thesurface. Gel polish base has a higherviscosity than just top coat. So thiswill help you blend onto the existing layer andremove any extra texture.Make sure that you float the gel polish baseto avoid dragging any pigment.Here you can see how most of the texture has disappearedany remaining will be filled oncewe apply the top coat.I love the results of a sponged ombré. It's veryeasy to achieve and requires minimal investment in product.For this next technique, it's best to start with a layer of cured gelpolish.And again, choosing a sheer base to start with,with the sculpting and the gel polish, likea sheer pink or a sheer nude, will help the process offading the tip into the back of the nail. In addition thedispersion layer in the gel polish will help the airbrush productsadhere better. Now for the airbrush, Iam using an airbrush that has the ability ofworking with gel polish airbrushes. Theproduct gets placed in the cup and will comeout through the nozzle at the front.After use, and depending on the product that you'reworking with, you may use acetone, alcohol or acleanser to remove any excess product from themachine.Tilting the lever at the top will allow theproduct to come out. Tilting the lever too fastcould cause the product to come out spotty, so pulling itslowly is best for a smooth application. Gelpolish airbrush products are quite pigmented, soless is more. A few drops will do.Once you have your product in the cup, make sure to cover itto avoid spills.Just as easy as that, you're ready to start working. Justlike when we sponged our ombré, we will start applyingthe product starting from the tip and working our waytowards the back of the nail. Place your airbrush furtheraway from the nail. If you apply it too closeto the nail, the product will be spotty. The furtheryou are away from the nail, the product will look smoother.Adjust the airbrush distance as needed. The closeryou are, the more pigmented it will show, thefurther away you are, the more the product willspread.Your goal is to keep the most pigmentation on the end ofthe extension and then smoothly transition towardsthe back. As you get closer to the back ofthe nail, start pulling away from the nail.Then come back to the tip as needed to increase thepigmentation.And remember to pull the lever slowly to avoid blotchy spots.You can always come back and add more if you need to. So makesure you check the nail prior to curing.Make sure to clean up any excess thatmay have gone on the skin prior to curing. Once thisproduct goes into the lamp it will set, so you don't wantto leave any spots on the skin. Carefully removeany excess using a wipe and cleanser and pullthe skin away from the nail. Be careful not to touchthe nail. Otherwise, you will end up removing product fromthe nail as well.Getting your clients to wear gloves is a good way toprevent applying product all over their skin.Then go ahead and cure for the full recommended time. Aftercuring, you may repeat the process to increasethe opacity, especially on longer nails.Remember to focus on applying the product smoothly andpacking it at the tip and then gradually bringit back towards the back of the nail. Clean upany excess and cure.Using airbrush products will virtually leaveno texture on the nail. So after youfinished with the ombré, you can go ahead and apply yourtop coat as normal.Here you have a comparison of both techniques side by side.Both techniques will give you a beautiful, flawlessfade. So it's up to you to decide whichway you want to tackle ombré next time. Did youknow it would be that easy to tackle ombré? Well nowyou do and I cannot wait for you to give it a try.
![]()
![]()
Do you have questions for the artist? GlossaryLive will present a LIVE interview with this artist. Email your questions to be featured during the Q&A session.

Alisha is recognized as one of the nail industry’s leading experts in training & education. In her 28 years experience, her work has been described as ‘ground-breaking’ through her career as a platform artist & motivational speaker for thousands of promotional & educational events. She’s also competed in hundreds of nail competitions around the globe, notably winning the World Nail Championship in 2005 in Pink & White Sculptured Nails. She’s also the featured artist in many training videos, including acting host of the current Milady Standard Nail Technology DVD series.
![]()
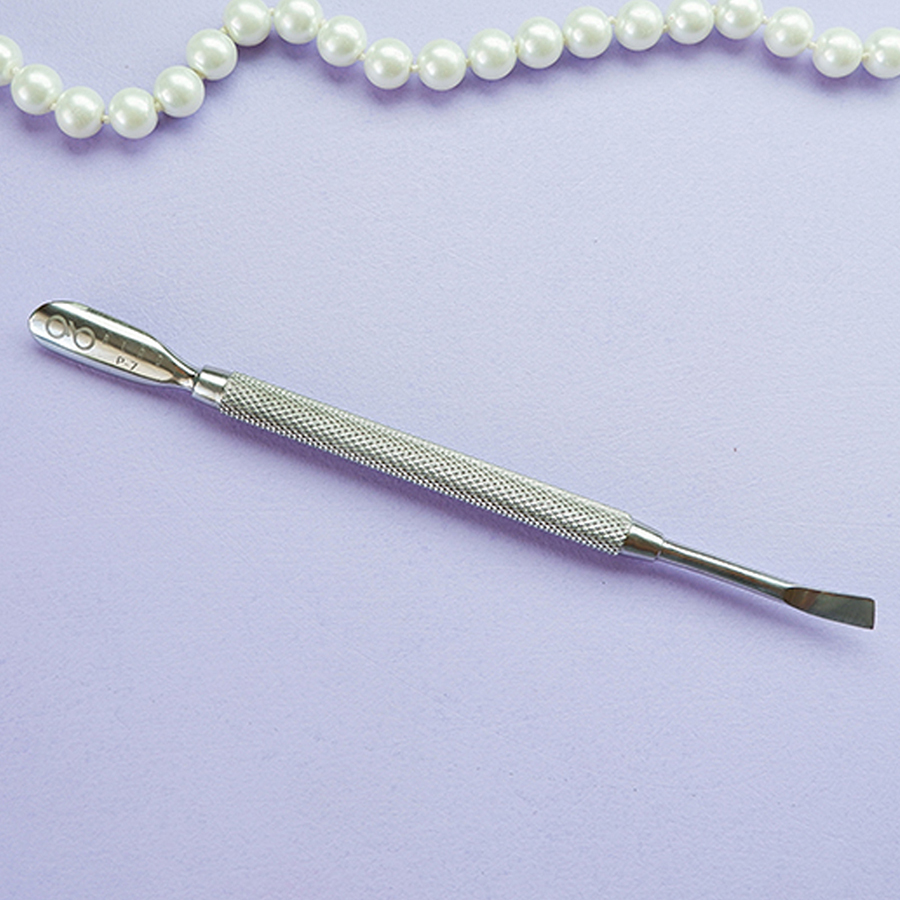
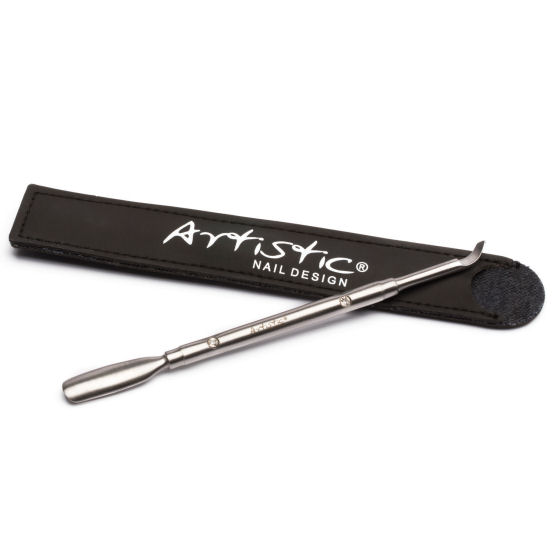
What it is: An implement with a spoon-shaped end, used to gently push back the eponychium to expose the excess cuticle attached to the nail plate.
How to use it: Used at the start of each service to gently push back the surrounding skin to expose the nail plate. Some pushers have a scraping end, shaped like half a nail nipper, that can gently scrape away the dead skin to clean the nail plate.
How to disinfect it: Scrub with soap and water, and dry. Next, submerge in hospital grade disinfectant for the recommended amount of time, then remove, rinse, dry and store.
How to store it: After disinfection and sanitization, store covered, in a clean dry area.
Cuticle Pusher
An Implement with a spoon-shaped end used to gently push back the Acuna Cube to expose the excess cuticle attached to the nail plate.
Used at the start of each service to gently push back the surrounding skin to expose the nail plate.
Pushers have a scraping end shaped like half of a nail Nipper that can gently scrape away the dead skin to clean the nail plate.
Scrub with soap and water then dry next submerge in hospital grade disinfectant after disinfection and sanitization store covered in a clean dry area.
![]()
![]()
This series will help you elevate your nail game for effective and efficient salon services, from ensuring a proper foundation to increasing your speed, revenue and value when creating salon shapes and designs that are sure to impress your clients and give you a stress-free creative environment.
Hello and welcome to my master quest.
I am Giselle Caballero award-winning male artist located in Canada in this masterclass divided into three episodes. We will cover proper form customization trending on bread techniques and nail design planning so that you can create Flawless salon services for yourself. And of course for your clients.
So come with me and let's get to work. In this first episode, we will cover proper form customization for the most popular salon shapes.
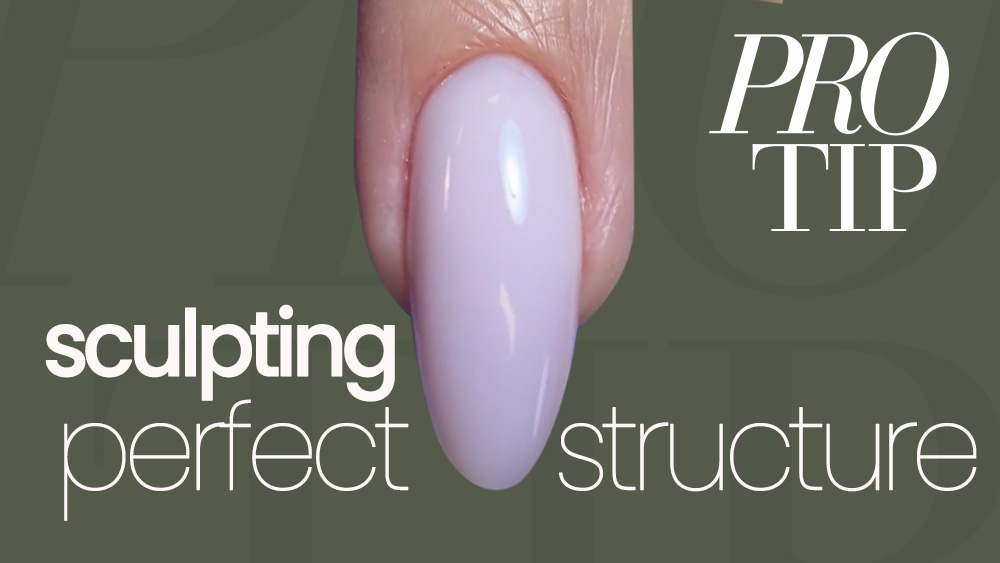
Proper form customization is crucial for any sculpted extension service. Every client and even each nail may have different needs therefore customizing each form to feed properly while guarantee that we have a solid foundation and this will ensure that they enhancements have the correct structure shape and weight.
Remember, it's not just about looks if you struggle with forms, or you are wanting to improve make sure to watch this episode take note and get practicing. Let's get started.
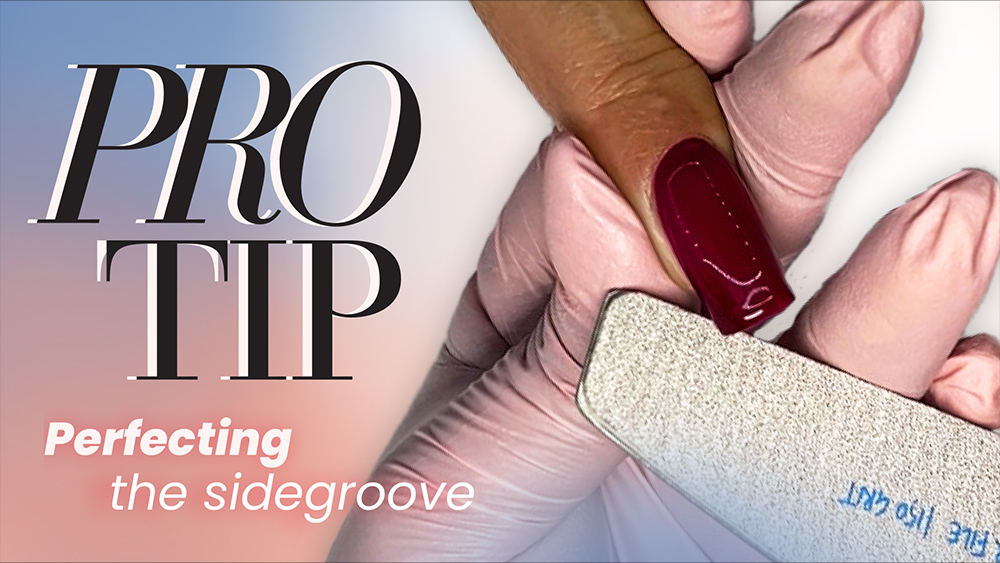
In order to properly customize our forms, we will need good quality scissors cuticle scissors work great for this technique using forms that have flaps at the front and back will allow us to properly adjust them to fit. Our clients needs after removing the paper back from the form. Make sure to place the small center part onto the form itself to give us extra support.
Molding the paper will give us extra flexibility when creating the Seeker on the extension.Detach the back of the form and proceed to connect the front flaps. Make sure you match them equally.
Next we need to figure out the positioning of our form. To help us do that. It's a good idea to place a little Mark on each side of the free Edge. Those marks will indicate the highest points of the smile line.
Meanwhile, the shape of the free Edge will need to match the shape of the curvature in the form. Our furniture always be placed under the free Edge.
However, when the shape of the form doesn't match the shape of our smile line we will use those markings to help guide us into cutting the form so that we can match the free Edge if we don't trim the form then we will have this gaps of both sides of our form.
And this will allow the product to seep into those gaps and create cracks on the structure of our extension. In addition. We need to ensure that the form is always as wide as the natural nail itself here. You can see how the form is wider than the width of the natural nail and that will cause the extension to come out wider as well to prevent this we must cut the form to match not only the shape of our free Edge, but also the width of our natural nail.
You can help yourself by marking the width of the natural nail on the form so that you can guide yourself from there. Then you're going to need to cut the shape of the form to match the shape of your free Edge and the width as we had previously marked the form.
Now the form should match the free Edge and fit easily under.
Now while we have a dress the gaps on the sides our forms still wider than the natural nail. So how do we fix that? Well, we'll need to cut diagonally on the sides to release the tension from the form.
As you can see on this forms, sometimes there is going to be guidelines already pre-cut. However, this will not always match the needs and shape of our natural nail. So make sure that you measure the width of the nail and then cut accordingly once you've customized the form you can place back under the free Edge and remove the flaps out of the way.
Now that we have removed the tension from the sides. I am able to pinch this form to match the width of the natural nail. The next step now is to align the form to match the direction of my nail a good way to align the extension is to consider the tip of the extension up to the knuckle. You will need to change your clients finger so that you get this View.
And align your form based on a vertical line running from top to bottom after pinching and aligning the form make sure that you thoroughly press on the flaps underneath to secure in place.
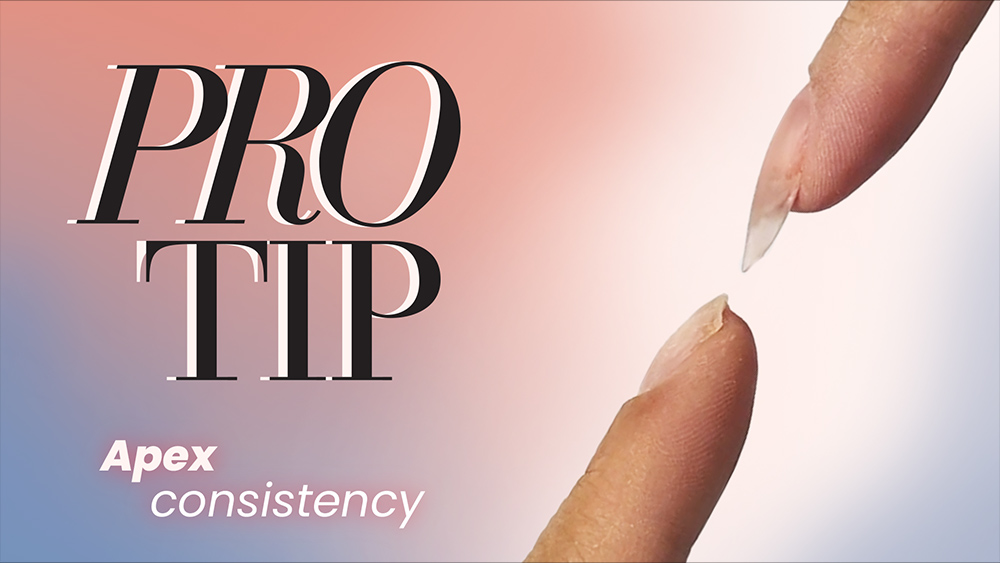
Next we will align the form so that we can create the extension and gain height for our Apex.
The tip of the extension should match the height of the Apex.
Our last checkpoint will be ensuring that there is no gaps under the free Edge.Once our form is fully secured. We should be able to tap on it and not have it moved.
And now you're ready to start sculpting. I like using polygel to create the extension as it gives me a little bit more of work time without having to worry about the gel clothing.
When creating the extension ensure that it aligns with the side of the nail.
This will prevent the nail from looking hooked.
Another tip is to pinch the extension halfway through the cure to enhance the Seeker gently remove the form to prevent the extension from cracking.
And voila you should have a nice Seeker.
Now you may continue sculpting this nail. I like to start by placing the product as close as you can to the cuticle and then work your way down.
Gently guide the gel and avoid overworking it using a self-leveling gel will make the sculpting process much easier.
Finish filing and remember to check your nail from all angles.
Next I will show you how the same process will apply when creatinga round nail start by trimming your form and match it to the free Edge. Then remember that we need to pinch the form to match the width of the natural nail. So if you need to cut the sides to allow room to release the tension.
After pinching the form to match the width now it's time to focus on aligning the extension remember that you want to consider the tip of the extension to the last knuckle then till the form to create height for our Apex.
And ensure that there is no gaps under the free Edge. Once the form is ready. We can start sculpting the extension.
The main difference when creating a round nail is how we will angle the product towards the center.
And this will create the curvature for all round shapes. We're almost there.
Make sure to pinch that extension halfway through the cure to help enhance the Seeker.
Then gently release that form to prevent cracking the extension and continue with
sculpting as you would normally do.
Ensure that you place the product as close as you can to the cuticle without touching the skin and then help yourself by guiding the product very gently avoid overworking gel.
Ensure that you have a proper Apex and that the tip of the extension isn't thick after finish filing. You may continue with sealing the nail coloring or designing.
How great was that? Remember that mastering a technique will take discipline and practice so keep at it and you'll see results in no time.
![]()
![]()
Do you have questions for the artist? GlossaryLive will present a LIVE interview with this artist. Email your questions to be featured during the Q&A session.


